Information on adding Z-Wave devices to your network
Overview
Use the process below to add a Z-Wave device to your HS4 system using Z-Wave Plus.
Steps
-
Navigate to Plugins > Z-Wave Plus > Add Device.
-
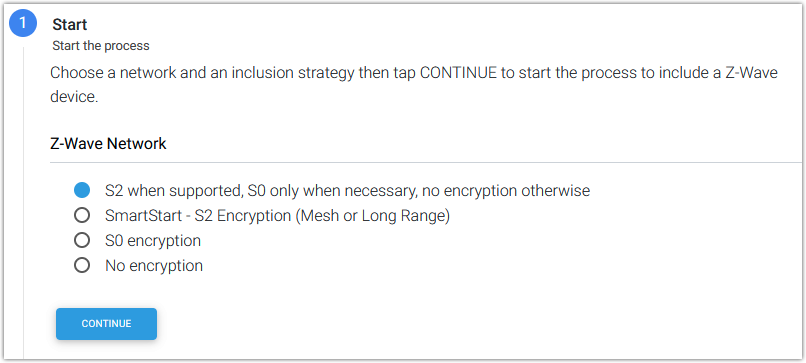
In the Start step, enter the following and click CONTINUE.
-
Select the Z-Wave Network you wish to add a device to. (Most systems have one network).
-
Choose inclusion method that’s best for your device and situation. Options include:
-
S2 when supported, S0 only when necessary, no encryption otherwise - Recommended.
-
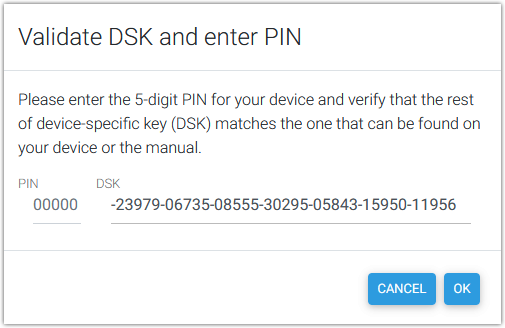
For S2 inclusion, you’ll be prompted to enter the 5-digit DSK PIN code for the device.
-
-
SmartStart - S2 Encryption (Mesh or Long Range) - Use if supported by your hub or software.
-
For SmartStart inclusion, you’ll be prompted to enter the full 40 digit DSK code (with dashes).
-
-
S0 encryption – Use for older S0 encryption devices if S2 inclusion fails.
-
No encryption – Use for older devices or if inclusion fails with encryption.
-
-
-
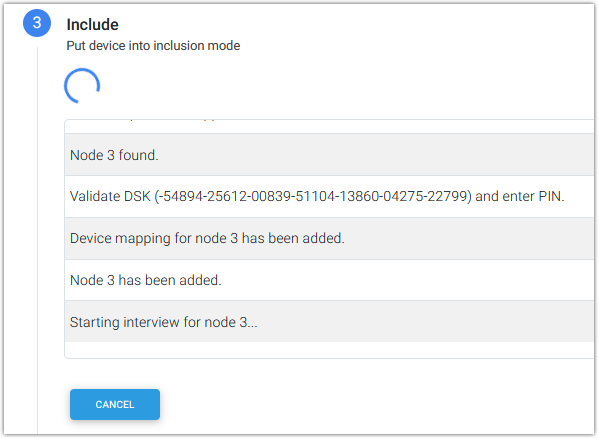
Put the device into inclusion mode and observe the inclusion status in the Include step. If device supports S2 encryption, the following pop-up will appear. Enter the 5-digit PIN code for the device where the 00000 are displayed and click OK.
-
The Include step will display the inclusion status in real time.
-
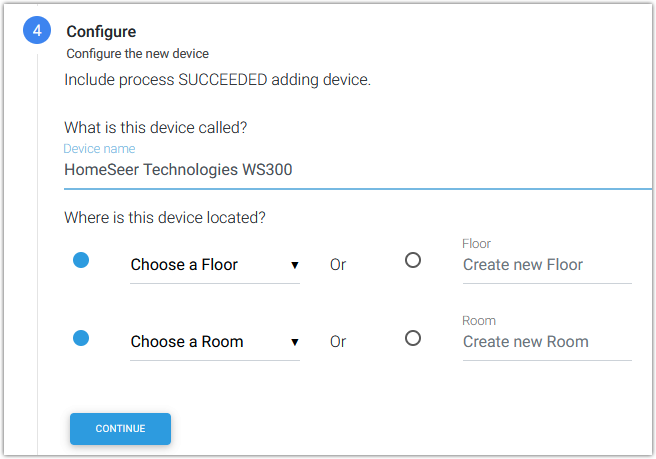
After inclusion, you can change the Device name and assign it to a Floor and Room in the Configure step.
-
The Verify step allows you to review your configurations. Click CONTINUE and then FINISH to complete the inclusion process.
Troubleshooting
Removing a device and re-adding it is a common troubleshooting step. The removal process resets the device and can be done even if the device was never added to a network.
The device fails the inclusion process
Occasionally, Z-Wave devices may fail to add correctly, resulting in an error.
-
Perform a Z-Wave device removal and then attempt the inclusion again.
-
Restart the Network
The device is not being seen after starting the inclusion process
If the device was part of another network, it will contain addressing data related to that network and will need to be cleared.
-
Perform a Z-Wave device removal and then attempt the inclusion again.
Z-Wave Inclusion distances can fluctuate greatly depending on the environment and the structure of the Z-Wave network.
-
Perform a Z-Wave device removal and then attempt the inclusion again.
-
Bring the Z-Wave device and the interface as close as possible and attempt the inclusion again. If successful, the devices can be moved farther apart. Note that more Z-Wave devices on the network will help with communication over greater distances.
The device was added, but is not showing up correctly in the device list
-
Refresh the device list
-
Rescan the device
-
Perform a Z-Wave device removal and then attempt the inclusion again.
If you continue to experience issues, contact HomeSeer support.
Notes
Z-Wave Encryption
-
S2 encryption is supported by Z-Wave Plus devices. When adding a device using this method, you will be asked to enter the device's DSK code. This code will always be printed on the device next to a small QR code. If this code is not present, then the device does not support S2. If you skip the DSK prompt, the plugin will add the device using S0 automatically.
-
S0 encryption is an older but still secure encryption method that all but the oldest Z-Wave devices support.
-
No Encryption adds the device without any security. Very old devices do not support encryption and need to be added using this method. Some newer devices may time out before they can be securely added if the secure pairing process takes too long. In such cases, unencrypted inclusion can be used to complete the pairing. However, this should only be done if the device fails to include with encryption.
-
Learn more about Z-Wave security here