Installation and setup guide for the DS100 G8 Z-Wave Door / Window Sensor
Overview
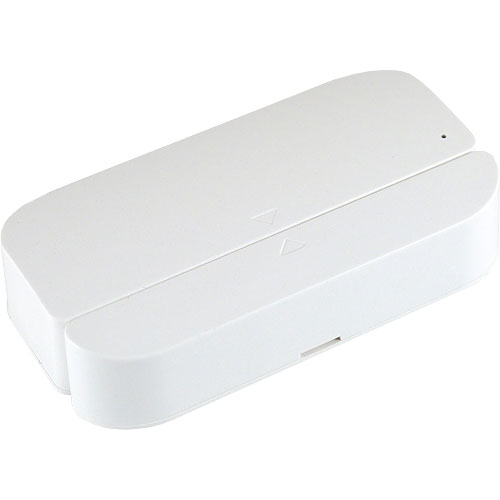
DS100 G8 is a battery operated sensor that is designed to issue Z-Wave commands when doors or windows are opened or closed. DS100 G8 may be associated directly with other Z-Wave devices or it may be used with a wide variety of Z-Wave hubs and controllers to trigger events, scenes and other automations.
Compatibility
DS100 G8 works with a wide variety of Z-Wave certified systems.
HomeSeer users: The Z-Wave Plus plugin is required for full support of this product. The legacy v4 plugin cannot be used to adjust Z-Wave parameter settings.
Operation
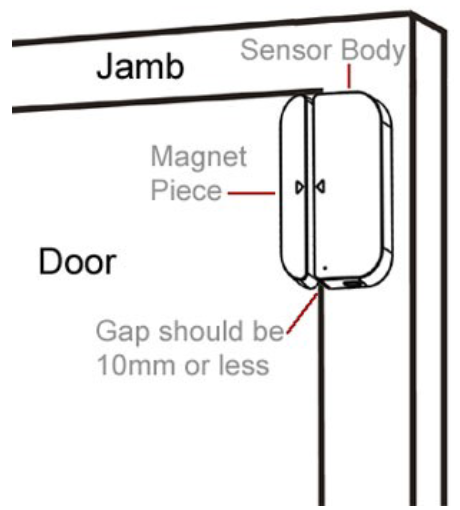
DS100 G8 is comprised of a sensor body and a magnet piece. The sensor body is (typically) installed on a door or window jamb. The magnet piece is (typically) installed on the door or window. When the door or window are closed, the magnet trips a switch inside the sensor body and a Z-Wave command is issued. When the door or window are opened, the switch is tripped again and another Z-Wave command is issued.
Physical Installation
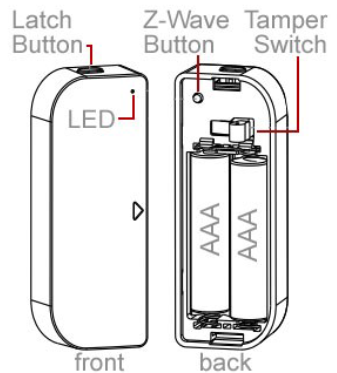
The sensor body and magnet piece must be mounted to the door or window (vertically or horizontally) using the provided screws or double-stick tape (your choice). Leave a gap (no wider than 10mm) to allow the door or window to open and close easily without obstruction. If using screws, you’ll have to the mount the backing plates of the sensor body and magnet pieces first. To do this, press the latch button on the sensor body and gently pry off the backing plate (plate can be difficult to remove). Then, use a small slotted screwdriver to remove the backing plate from the magnet piece.
|
Door Installation |
Sensor Body |
|---|---|
|
|
Z-Wave Network Installation
Door/Window Sensor can be included and operated in any Z-Wave network with other Z-Wave certified devices from other manufacturers and/or other applications. All non-battery operated nodes within the network will act as repeaters regardless of vendor to increase reliability of the network.
-
Inclusion (Use this procedure to add the DS100 G8 to your Z-Wave network).
-
Ensure AAA batteries are installed. Remove any plastic from battery compartment (if necessary)
-
Put your home automation controller into ‘inclusion’ mode. Consult your system’s manual for details.
-
Quickly press and release the Z-Wave network button once inside the sensor body. Wait for the process to finish
-
If successful, the sensor body LED will blink briefly and then stay on for 3 seconds. If unsuccessful, the LED with blink briefly and then turn off. Should this happen, repeat the inclusion process.
-
-
Exclusion (Use this procedure to remove the DS100 G8 from your Z-Wave network).
-
Put your home automation controller into ‘exclusion’ mode. Consult your system’s manual for details.
-
Triple-click the Z-Wave button inside the sensor body. If successful, the LED will turn off within 1 second. If unsuccessful, the LED with blink for 5 seconds. Should this happen, repeat the exclusion process.
-
-
Reset (Use this procedure to reset the DS100 G8 to factory default settings when the network primary controller is missing or otherwise inoperable).
-
Press and hold the Z-Wave button inside the sensor body for 20 seconds, the LED will stay on until release the button.
-
Z-Wave Association Information
DS100 G8 supports Group 1 and Group 2 associations. Group 1 reports the sensor’s condition, battery level and tamper state. Group 2 sends the BASIC SET command.
Battery Information
DS100 G8 is designed to report its battery condition once every 24 hours. A battery level report can also be manually invoked by pressing the Z-Wave button.
S2 Security
DS100 G8 supports Z-Wave S2 security.
Z-Wave Parameters
Use the parameters below to adjust HS-DS100 configuration settings
|
Parameter |
Description |
Bytes |
Value |
Default |
|---|---|---|---|---|
|
14 |
BASIC SET |
1 |
0-Disable (Default)
|
0 |
|
15 |
Value of BASIC SET |
1 |
0-Sends 0xFF for open and 0x00 for closed
|
0 |
|
32 |
Defines value of LOW BATTERY |
1 |
10-50 (10%-50% |
20 |
Specifications
|
Operating Temp Range |
0ºC to 40ºC |
|---|---|
|
Z-Wave Frequency | Range |
908 MHz (US) | Up To 300 Ft line of sight (Stands Z-Wave) | Up to 1 Mile line of sight (Long Range)
|
|
Z-Wave Certification |
Z-Wave Plus |
|
Power Supply |
Requires (2) AAA 1.5V Batteries |
|
Dimensions |
Sensor Body: 3 x 1.1 x .75 inches
|
Limited Warranty
HomeSeer Technologies, LLC will repair or replace, at its option, any part of the device, which proves to be defective in workmanship or material under normal use, in the USA except in the states of Alaska or Hawaii, for a period of one year from the date the device is purchased. During the warranty period, HomeSeer Technologies, LLC will repair and provide all parts necessary to correct such defects, free of charge, provided the device has been operated in accordance with the manufacturer's guidelines. The Customer will return the device to HomeSeer Technologies, LLC for testing and repair or replacement. Should you need service, during warranty period or beyond, contact HomeSeer to obtain return authorization before shipping your device to HomeSeer Technologies, LLC.