Installation and setup guide for the DS150ZB Zigbee 3.0 Door / Window Sensor
Overview
DS150ZB is a battery operated sensor that is designed to issue Zigbee commands when doors or windows are opened or closed. DS150ZB may be used with a wide variety of Zigbee 3.0 compatible hubs and controllers to trigger events, scenes and other automations.
Compatibility
DS150ZB works with HomeSeer, Home Assistant, OpenHAB and Zigbee2MQTT powered hubs.
Operation
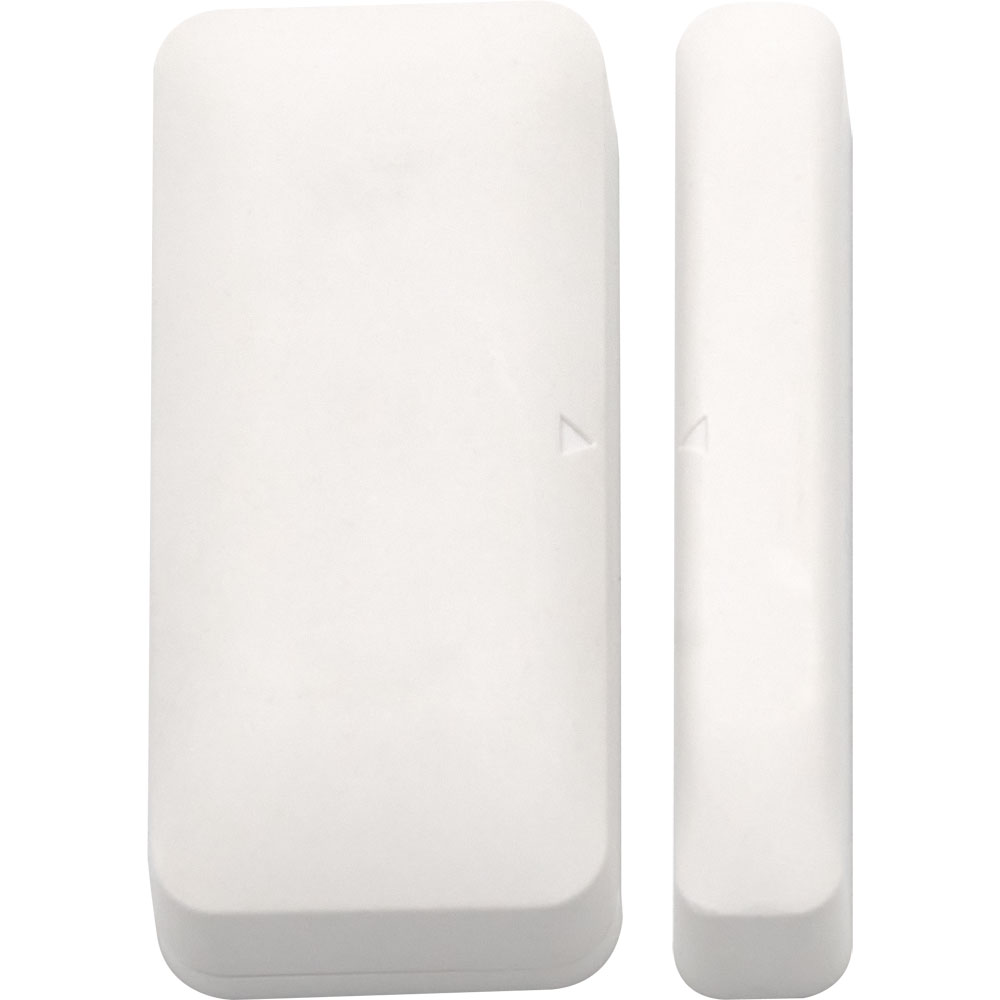
DS150ZB is comprised of a sensor body and a magnet piece. One piece is installed on the door/window and the other is installed on the door/window jamb. When the door or window are opened or closed, the magnet trips a switch inside the sensor body and a Zigbee command is issued.
In the Box

DS150ZB is comprised of the following parts:
-
Sensor body
-
Sensor body mounting plate
-
Magnet piece
-
(2) CR1632 batteries
-
Double sided mounting tape for sensor body and magnet piece
As shipped, the batteries will be installed in the sensor body and the sensor body mounting plate will be attached.
Zigbee Network Pairing
Use this procedure to add the DS150ZB to your Zigbee network.
-
The sensor is shipped with the batteries pre-installed. To activate the batteries, gently pull and remove the 2 paper tabs protruding from the back of the sensor body. You may do this with or without removing the mounting plate. To remove the mounting plate, grip the sensor body with one hand and use a finger on the other hand to slide it off to the side.

View of batteries with mounting plate removed -
Put your smart home hub into Zigbee pairing mode. If necessary, consult your system’s manual for details regarding this step.
-
Squeeze the sensor body. The (hidden) blue activity LED will glow through the plastic. Continue to squeeze the sensor until the LED begins to blink. Relax your grip and wait for the pairing process to complete. This can take a bit of time. If pairing is not successful, reposition the sensor closer to the hub and repeat the process.
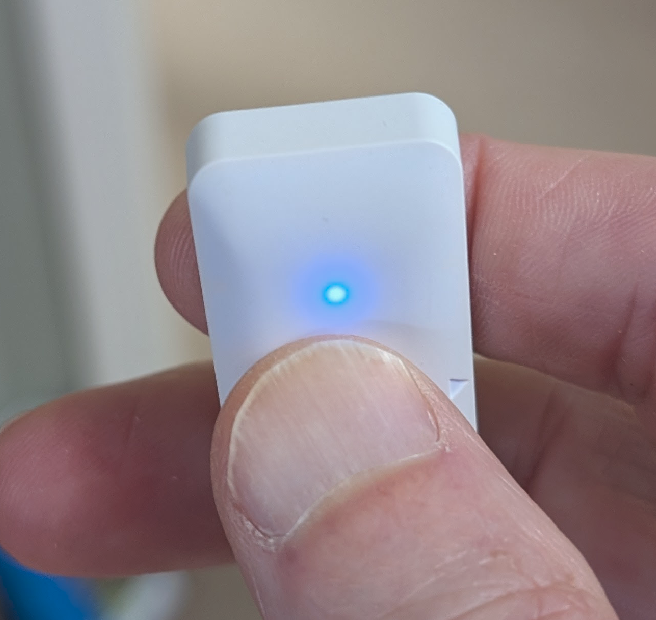
Blue activity LED
Physical Installation
The sensor body and magnet piece must be mounted to the door or window (vertically or horizontally) using the provided double-stick tape.
Before proceeding, please read the following important considerations carefully as the double-stick tape can only be used once!
Important Considerations
-
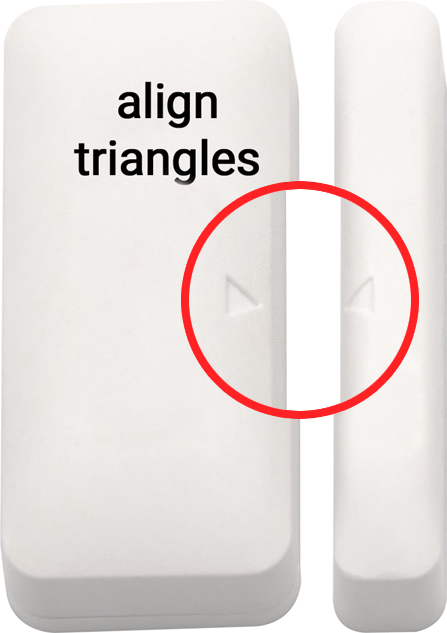
For proper operation, the sensor body and magnet piece must be aligned with their embossed triangles facing each other and you should leave a gap between them (no wider than 15 mm) to allow the door or window to open and close easily without obstruction.
-
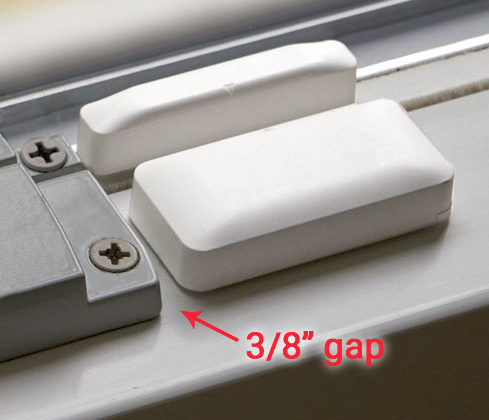
Be sure to leave at least 3/8” gap between any obstacle above (or next to) the sensor so it can be slid off the mounting plate for battery replacements.
-
If installed vertically, the recommended orientation is that the sensor body backing plate be mounted with the slide stops at the bottom (as shown below). This will hold the sensor firmly in place and prevent any sliding or shifting when vibrations occur.
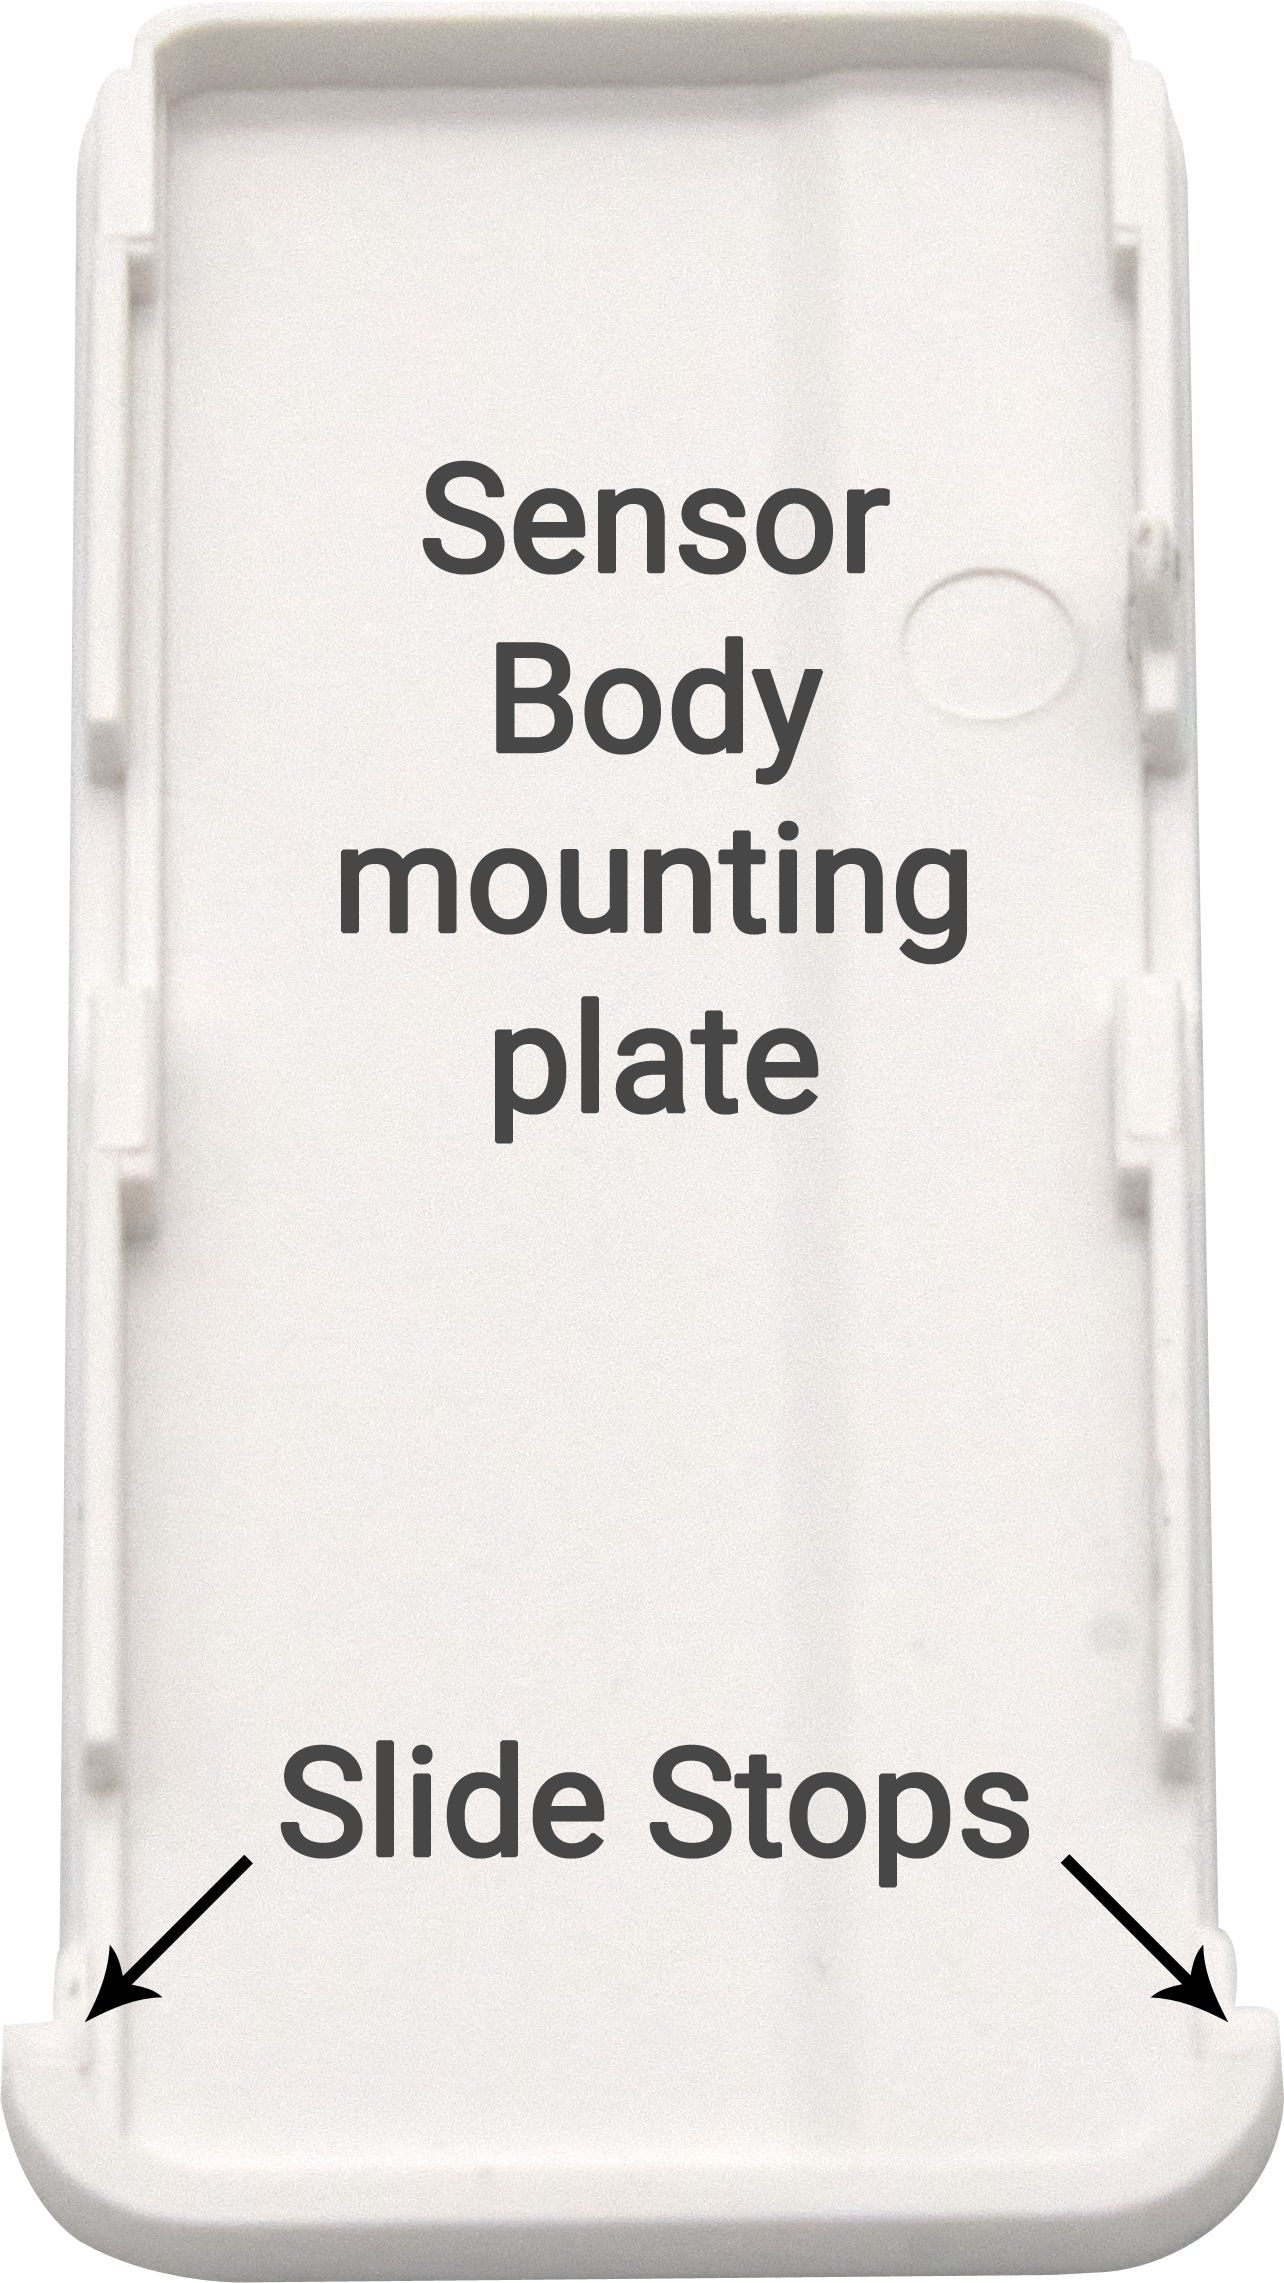
Slide stops at the bottom -
For best adhesion, sensor and magnet pieces should be installed on a non-porous flat, clean and dry surface. Avoid rough, porous or textured surfaces if possible.
Follow these steps:
-
Attach the sensor body to the sensor mounting plate.
-
Peel the adhesive cover from one side of the sensor body double-stick tape and apply it to the bottom of the sensor mounting plate.
-
Peel the adhesive cover from the other side of the sensor body tape.
-
Carefully position the sensor body on the door or window, then press it into place with just enough pressure to cause the adhesive to stick.
-
Slide the sensor body off the mounting plate and press down on the mounting plate for at least 30 seconds to firmly stick the adhesive in place.
-
Re-attach the sensor body to the mounting plate.
-
Peel the adhesive cover from one side of the magnet piece tape and apply it to the bottom of the magnet piece.
-
Peel the adhesive cover from the other side of the magnet piece tape.
-
Carefully position the magnet piece on the door or window, then press down on the magnet piece for at least 30 seconds to firmly stick the adhesive in place.
-
Open and close the door or window a few times and make sure the blue activity LED blinks with each open or close operation.
Replacing Batteries
To replace the batteries, remove the sensor body from the mounting plate and gently pry the batteries up and remove them. Slide the fresh batteries under the metal clips and away from the inside walls.
Specifications
|
Transmission Protocol |
Zigbee 3.0, IEEE802.15.4 |
|---|---|
|
Work Frequency |
2.405~2.480 GHz |
|
Wireless distance |
Max 90 meters (Empty area) |
|
Power support |
2x CR1632 Battery |
|
Button |
For pairing (hidden design) |
|
LED |
For pairing/sending (hidden design) |
|
Max detecting distance (gap) |
15 mm |
|
Waterproof rating |
IP20 |
|
Operating Temperature |
-10℃~+50℃ |
|
Operating Humidity |
Maximum 95% RH |
|
Dimension (LxWxH) |
44 x 21 x 9.3mm (sensor body)
|
|
Weight |
14g (include battery and magnet) |
|
Installation |
Mounted with double-sided adhesive |
FAQ
I use mostly Z-Wave devices. Will this work with my Z-Wave hub? If not, what do I need?
Z-Wave and Zigbee are both wireless technologies but they are not interchangeable with each other. You’ll need a Zigbee compliant smart home hub to work with these sensors.
I’m installing the sensor vertically but can’t install the sensor body on the left (with the slide stops at the bottom). What will happen?
Installation with the slide stops on the bottom is highly recommended but not required. In most cases, this should be fine. However, vibrations could dislodge the sensor body enough to cause it to slide down or off the mounting plate. If this happens, you may need to apply a piece of tape or a drop of hot glue to the side of the sensor body to secure it to the door or jamb. Use something that can easily be removed for battery replacements.
My doors have a rough wooden finish. Will these work with those?
Non-porous, finished surfaces work best with the provided double-stick tape. For rough surfaces, we recommend using hot glue instead. You should test this on an inconspicuous area first to make sure this sticks well and doesn’t harm the finish.
Will this function as a repeater for my Zigbee network?
Since it is a battery operated device, it cannot function as a repeater. However, it can communicate with any non-battery operated devices within range.
Limited Warranty
HomeSeer Technologies, LLC will repair or replace, at its option, any part of the device, which proves to be defective in workmanship or material under normal use, in the USA except in the states of Alaska or Hawaii, for a period of one year from the date the device is purchased. During the warranty period, HomeSeer Technologies, LLC will repair and provide all parts necessary to correct such defects, free of charge, provided the device has been operated in accordance with the manufacturer's guidelines. The Customer will return the device to HomeSeer Technologies, LLC for testing and repair or replacement. Should you need service, during warranty period or beyond, contact HomeSeer to obtain return authorization before shipping your device to HomeSeer Technologies, LLC.