Instructions on upgrading a HomeTroller SEL hub from HS3 to HS4
Overview
This guide will assist in upgrading your SEL from HS3 to HS4. If you've been automating your home with HS3 on Windows and have purchased an upgrade to HS4, thank you for your patronage! The instructions below will walk you through installing HS4 on your SEL. If you run into any questions or issues, please reach out to us here.
NOTE: If you are upgrading from HS3, make sure you have your HS3 license ID and password, you will need this when registering HS4. If you don't have them you can request them from here.
Preparation
To prepare for the upgrade procedure, first make sure your SEL is updated to version 3.0.0.551. You can do this in Tools→Setup→General.

Export your events from the Labs tab in Setup. Normally, events import fine into HS4 but if you get errors you can manually import this file from the Labs tab in HS4.
Maintenance Page
When you visit find.homeseer.com while local to your system, you will see the system's name as well as a Maintenance link.
Note: Find.homeseer.com may be cached and still pointing you to /php/Main.html. Try changing Main.html to Main.php
Note: Find.homeseer.com will not detect HomeSeer software if using a VPN.
Version 1.2 of the maintenance page (911) has some new features such as the ability to update your SEL to HS4. The two step process will create a backup of your existing HS3 setup and install HS4.
On the Main page, there are three new bits of information to help you during the upgrade or if you’re working with support.
Linux Version: shows the version of your OS.
Mono Version: Common versions: 3.2.8, 4.5.1, 5.20. (HS4 does not work properly on version 3, it is recommend that you do Update System if on version 3).
HS Version: shows HS4 once you complete step 3.

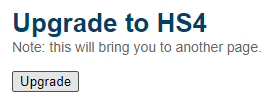
Once you have your SEL nearby, navigate to find.homeseer.com and select Maintenance next to your system. You will see the new Maintenance page with an updated look, feel, and options. Select Upgrade in the Upgrade to HS4 section of the Main page.
Step 1: Backup HS3
Select Backup under Step 1 to backup your HS3 folder. It is not recommended to skip this step.
This step will create a backup of your current HS3 system and allow you to download the backup once finished. You can expect output on the page once the backup is complete. If no output is visible, the backup did not work and should be run again. Once the backup is complete you will have the ability to download your backup for safe keeping. This backup is what is used if you choose to revert back to HS3 via Restore HS3 Backup. This backup cannot be used to restore within HS3 or HS4 interface.
Step 2: Install HS4
Select Install under Step 2 to perform the last step of the upgrade. Upon clicking Install, the page will start to run the upgrade but will not change until it completes. Do not click Install more than once.
This step will upgrade your system to HS4. Your devices, events, plugins, and settings will carry over to HS4. The process should not take more than 5 minutes and your system will reboot once completed.
You can expect output on the page once the upgrade is complete. If no output is visible, the install did not work and should be run again. If the install fails, save the output and contact HomeSeer support. See Update System section if you are having issues with running HS4.

Note: If you are having trouble viewing devices in HomeSeer Mobile, make sure the user you are logging in with, typically MyHS, is added as a User in HS4.
Note: You may not see all your HS3 devices and events. To get them back enter Setup, General tab, then click on EDIT CONFIG, then SWITCH. You will see a list of configurations. Look for your HS3 configuration which will be a name with a .hsd extension. Select this and it will be updated to the new HS4 format.
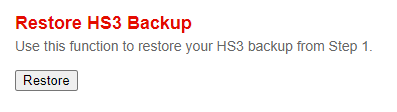
Reverting to HS3
To restore your previous HS3 system, click restore within the Restore HS3 Backup section.
Update System
If you are having issues with registration, run System Updates.
Select Update to update your system and install necessary packages for HS4. HS4 does not work properly on version 3, it is recommend that you do Update System if on version 3.
This process will prepare and update very old systems that cannot complete Step 2. Your system will have it’s packages updated but not the entire OS distribution. The primary package being upgraded is mono.
You can download the output once the page is finished. This output is saved to a file locally. It is recommend to save the output if you do not get confirmation that the update worked. This process very well may take a while. Older systems will have a lot more to upgrade and can take up to 45 minutes.

Having issues with the Maintenance (911) page showing up? Try these instructions:
You will need SSH access to your controller. You can accomplish this by using Putty. Follow these instructions:
Login via homeseer
Enter
cd /var/www/php sudo nano UpdateRecovery.sh
NOTE: nano is a text file editor, use your keyboard arrow keys to navigate the text file.
You will see reference to a Recovery.tar
Change sudo wget www.homeseer.com/linux/recovery/Recovery.tar to sudo wget https://homeseer.com/hometroller/sel/RecoverySEL.tar
Change sudo tar -xvf Recovery.tar to sudo tar -xvf RecoverySEL.tar
Change sudo rm -f Recovery.tar to sudo tar -f RecoverySEL.tar
Type CTRL + O to save the file and CTRL + C to close it.
Run the script with
sudo sh UpdateRecovery.sh
You will now have the updated Maintenance page. If you navigate to that, you will see the Upgrade HS4 section. Proceed through Step 1 and Step 2 now.