HS4 Dashboards
Description and usage for the HS4 Dashboards feature. This documentation is for the version 1 features that have been added to HS4 version 4.2.22.0
Overview
Dashboards are a powerful feature that allow you to organize your devices and cameras into groupings of your choice. Your devices appear on “cards” as shown in the “Batteries” dashboard example here.
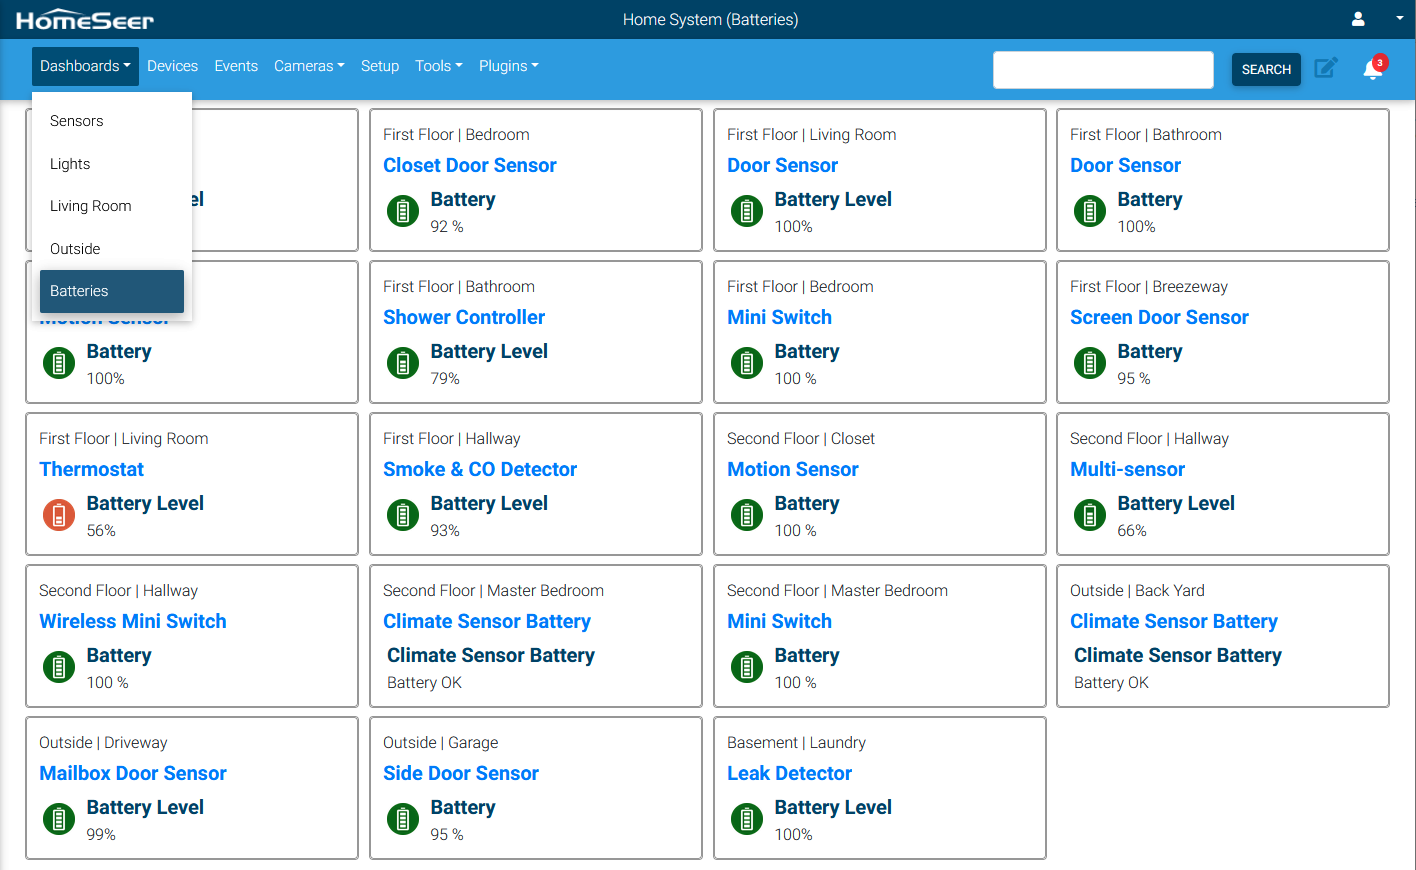
The order of these cards can be changed and the cards can be modified to include or exclude any of its elements. For example, a card that displays a motion sensor could just show the name of the sensor and the motion status.

Adding Devices or Cameras to a Dashboard
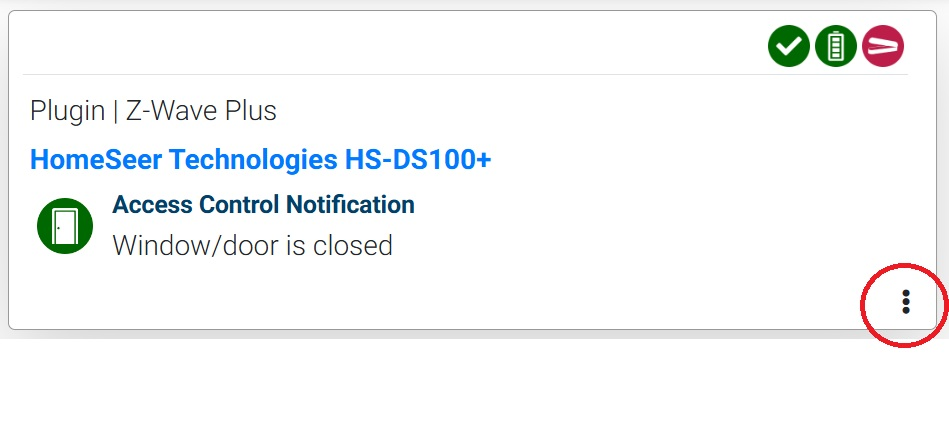
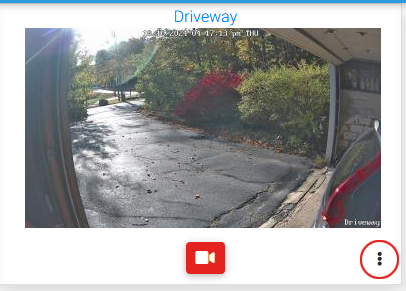
To add a device or camera view to a new or existing dashboard, navigate to the Devices page or Cameras page, then click the 3-dot button at the right (as shown below).
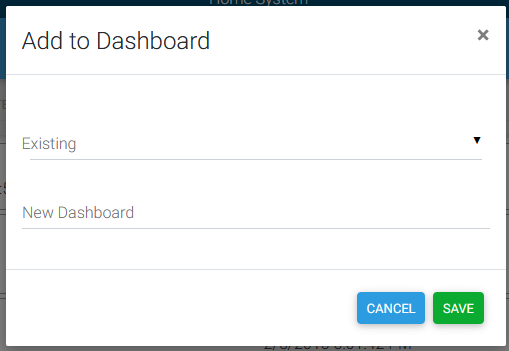
From the Add to Dashboard pop-up, select an existing dashboard (if available) from the Existing menu or enter a New Dashboard name and click SAVE.
Viewing Dashboards
By default, no dashboards exist in the system and the dashboards menu will not be visible. Once a dashboard is created, it will appear in the list on the navigation bar. If only a single dashboard exists, only the name of that dashboard will be shown. The list will appear if more than one dashboard has been created.

Dashboard Selection
Editing a Dashboard
After selecting a dashboard from the navigation bar, a new page is displayed showing all the devices/cameras you have added. Dashboards may be edited to change the card layout, card order, and overall settings for the dashboard. To enter edit mode, click on the edit icon at the top of the page.

Entering Dashboard Edit Mode
Dashboard Settings
Once in edit mode, the overall settings for the dashboard may be changed by clicking on the 3-dot button at the top of the page.

Opening the Dashboard Settings
After selecting the dashboard settings icon, the following dialog appears:
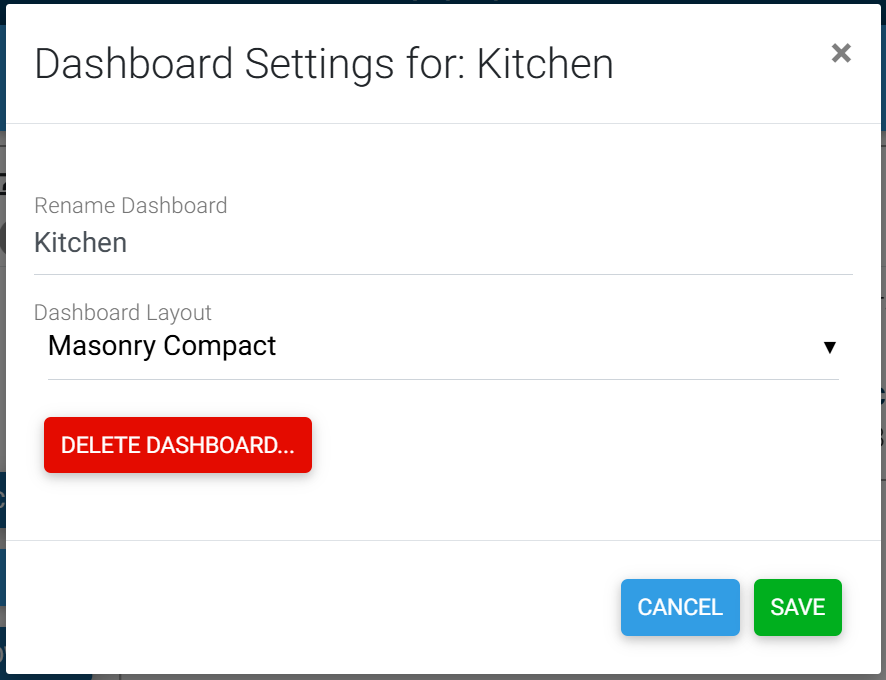
Dashboard Settings Dialog
The following settings are available:
Rename Dashboard
Allows you to rename the dashboard to a different name
Dashboard Layout
Allows you select one of 3 different layouts
Masonry Compact
Displays the cards as compacted as possible but they may not be in orderMasonry Ordered
Displays the cards as compacted as possible but keeps the cards in orderRow/Colum
Displays the cards in a row/column format so rows are even. This layout may present more white space if the cards are of different sizes.
Delete Dashboard Button
This button will delete the dashboard including all cards on the dashboard. Note that this does not have any effect on the actual device.
Dashboard Cards
Once in edit mode, the cards on the dashboard will display some editing icons.
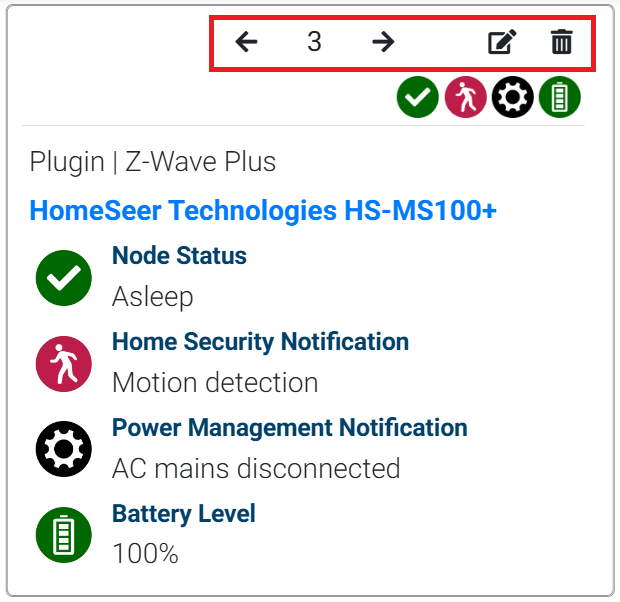
Card Editing Options
The following editing options are available:
Arrows
Allows the card to be moved up or down on the page. The order can be seen by the number next to the arrows.Trash Can Icon
Will delete the card from the dashboard. This will not affect the actual device.Edit Icon
Displays a dialog as shown that allows for editing the card view. If a toggle is disabled, the item is hidden. In the following dialog, all items are set to display.
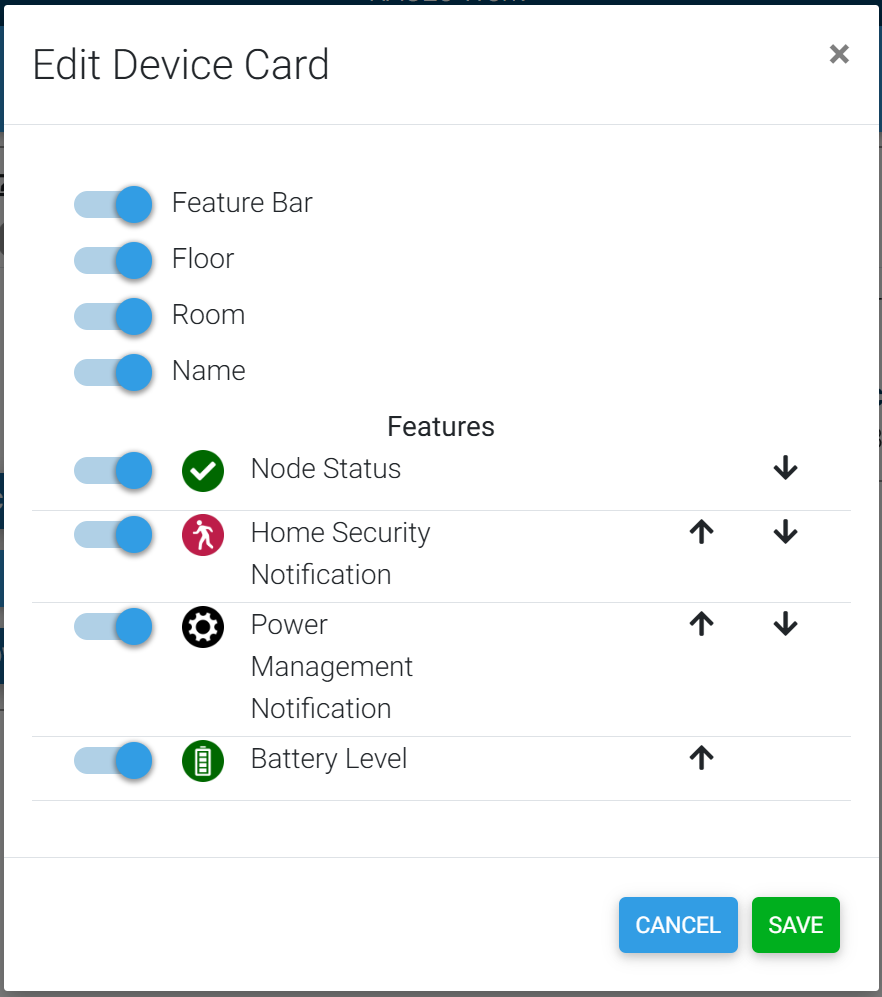
Editing a Device Card
To exit dashboard editing, click on the save icon at the top of the page.

Exit Dashboard Edit Mode
Using Bulk Edit to add devices to a dashboard
The HS4 Bulk Edit feature may be used to add multiple devices to a dashboard at once. Enter bulk edit mode, select the devices you wish to add to a dashboard, then select the “Add to Dashboard” bulk edit operation. A dialog will appear where you can select which dashboard to add the devices to. You can also set some default view options such as hiding the feature bar or the location.
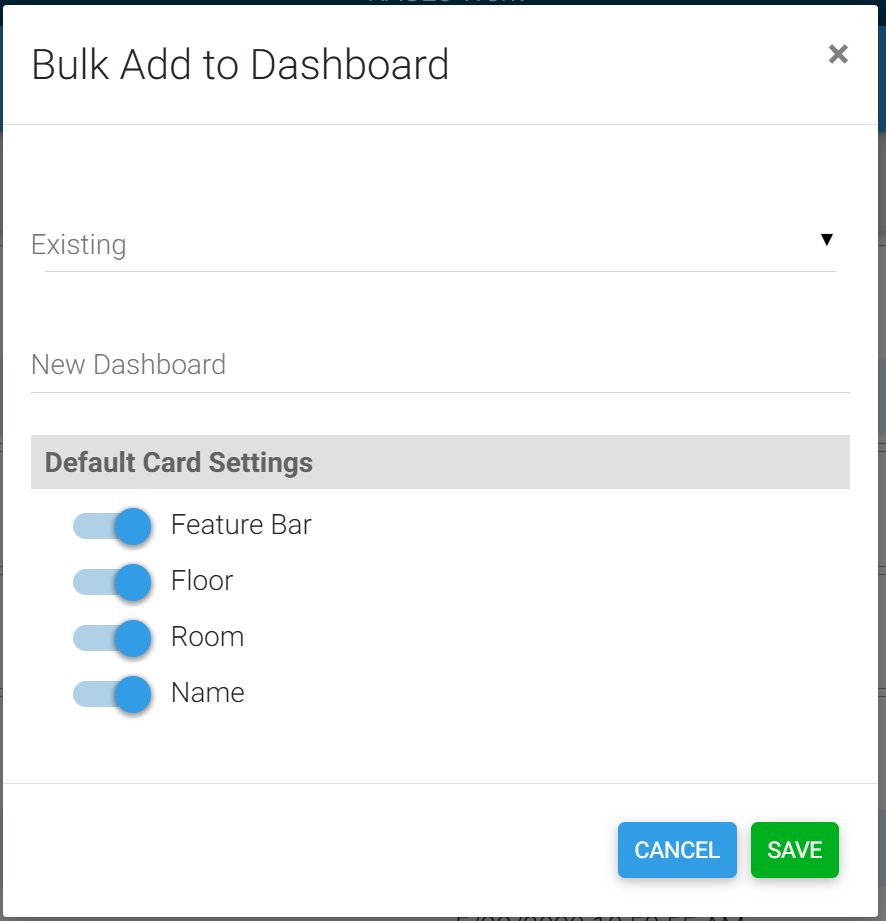
Bulk Edit Add to Dashboard
