HS4 Dashboards V2
Description and usage for the HS4 Dashboards feature. This documentation is for the version 2 features that have been added to HS4 version 4.2.22.86 or later.
See the V1 documentation for basic dashboard use. This page documents the new features added in V2
Overview
In V2 dashboards have been expanded to include custom cards and new layouts. A custom card is a card that performs a specific function, such as, display just the status of a device feature, or displaying the weather forecast. Cards are HTML files and can be modified by the user, and shared with others. V2 also includes more layout options to allow for more customizable displays.
Layouts
V1 supported 2 layout options, masonry and row/column. V2 adds 2 new layouts. Here is a comparison of the different layouts.
Layout | Available in V1 | Packing | Resizable Cards | Fixed Positioning |
|---|---|---|---|---|
Masonry | Yes | Yes | No | No |
Row-Col | Yes | No | No | No |
Masonry Resizable | No | Yes | Yes | No |
Fixed Resizable | No | No | Yes | Yes |
If the layout supports resizable cards, the cards will include drag handle on the right side and the bottom of the card. These handles may be used to resize the card. Resizing is done on a grid to make it easier to line up cards. Hovering the mouse over a card will highlight the card and the user may click to drag the card. Note that the card may move as the view attempts to keep the cards packed together. This may cause cards to not stay where you want them. This can be avoided by making your cards the same size or close to the same size. Positioning will then be easier.
If the layout supports fixed positioning, cards may be dragged to any location on your screen and will stay at this location. Note that if the web page is resized, cards may disappear off the view. This is because there is no moving of cards as the screen size is changed. This view is designed to be used on fixed sized screens such as a tablet.
Customizing the Dashboard View
After putting the dashboard in edit view (edit icon on navigation bar), an options drop list is now available.
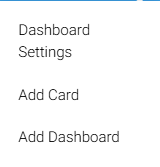
The dashboard settings option opens a dialog where the format of the dashboard can be changed.
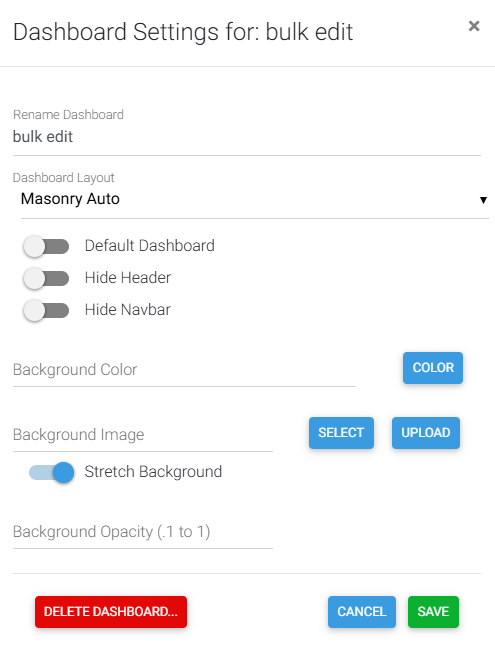
The following options are available:
Rename Dashboard: Allows renaming of the currently displayed dashboard.
Dashboard Layout: Allows selecting 1 of 4 different layouts. The layout determines how cards are presented.
Default Dashboard: If enabled, this dashboard is displayed as the default page when connecting to the HS4 system.
Hide Header: Hides to the top header of the page
Hide Navbar: Hides the navbar. When the navbar is hidden, a small icon appears in the upper right of the page. This icon can be used to display the navbar when needed. The “Hide Header” and “Hide Navbar” can be used together to support a kiosk like display where the user cannot navigate off the dashboard. Great for tablets.
Background Color: Sets the background color of page.
Background Image: Sets the background image of the page. An image may be uploaded.
Stretch Background: Stretches the background to fill the page. Note that it keeps the aspect ratio of the image so it may not completely fill the page, if the page aspect ratio does not match the image.
Background Opacity: Sets the opacity of a background image. Allows for a lighter image. This setting will not affect the background color.
Delete Dashboard: Deletes the existing dashboard and all the cards on the dashboard. Will prompt for verification.
Creating Dashboards
There are a couple of different ways to create a dashboard. If you are creating a card that will control a device, you can find the card in the devices list or grid view and click on the 3 dots on the device card. This will display a dialog where you can create a new dashboard or add the device to an existing dashboard.
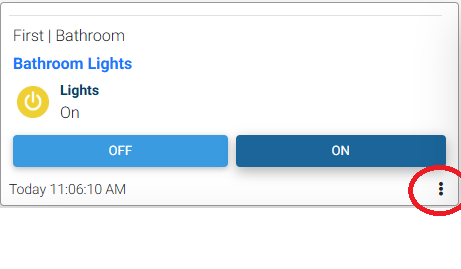
Adding a device to a dashboard
If you want to create a dashboard with custom cards, click on the Dashboards menu on the navigation bar, or the current dashboard name if you are already viewing a dashboard. Then select “Add Dashboard”. This will prompt you for the name of your new dashboard. Add a name and click “Save”. A new blank dashboard will be created.
Editing Dashboards
To edit a dashboard, first display the dashboard from the navigation bar or create a new dashboard. To edit a dashboard, it needs to put into edit mode. Click on the edit icon on the navigation bar.

The dashboard will now be in edit mode. To exit, click on the save icon.

While in edit mode, cards will not update if they are referencing a device, a camera, or any external data. In all layouts except Row/Col, cards may be clicked on and dragged to new locations. In resizable layouts, the cards may be resized by clicking and dragging on the card drag handles. To edit a card, move the mouse to the top of a card. A menu bar will appear.
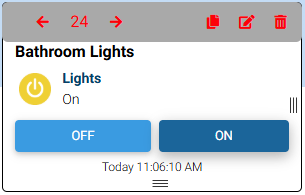
This menu bar has the following options:
The arrows allow for moving the card to a different location, same as dragging. The number is the order of the card on the page. The system attempts to layout cards in this order, but since the view is a packed layout, the order may not be exact. For the “Fixed Resizable” layout, the arrows and number are not used.
The copy icon allows for creating a copy of the card.
The edit icon will display a dialog where the card can be configured.
The trashcan icon will delete the card from the dashboard.
Custom Cards
Custom cards are special HTML files that describe the layout of a specific card. The card is an HTML file that is in a special format for displaying on the dashboard. There are custom cards that are included with the system, but new cards may be uploaded.
When editing a card, the edit dialog includes 2 tabs, Display and Format.
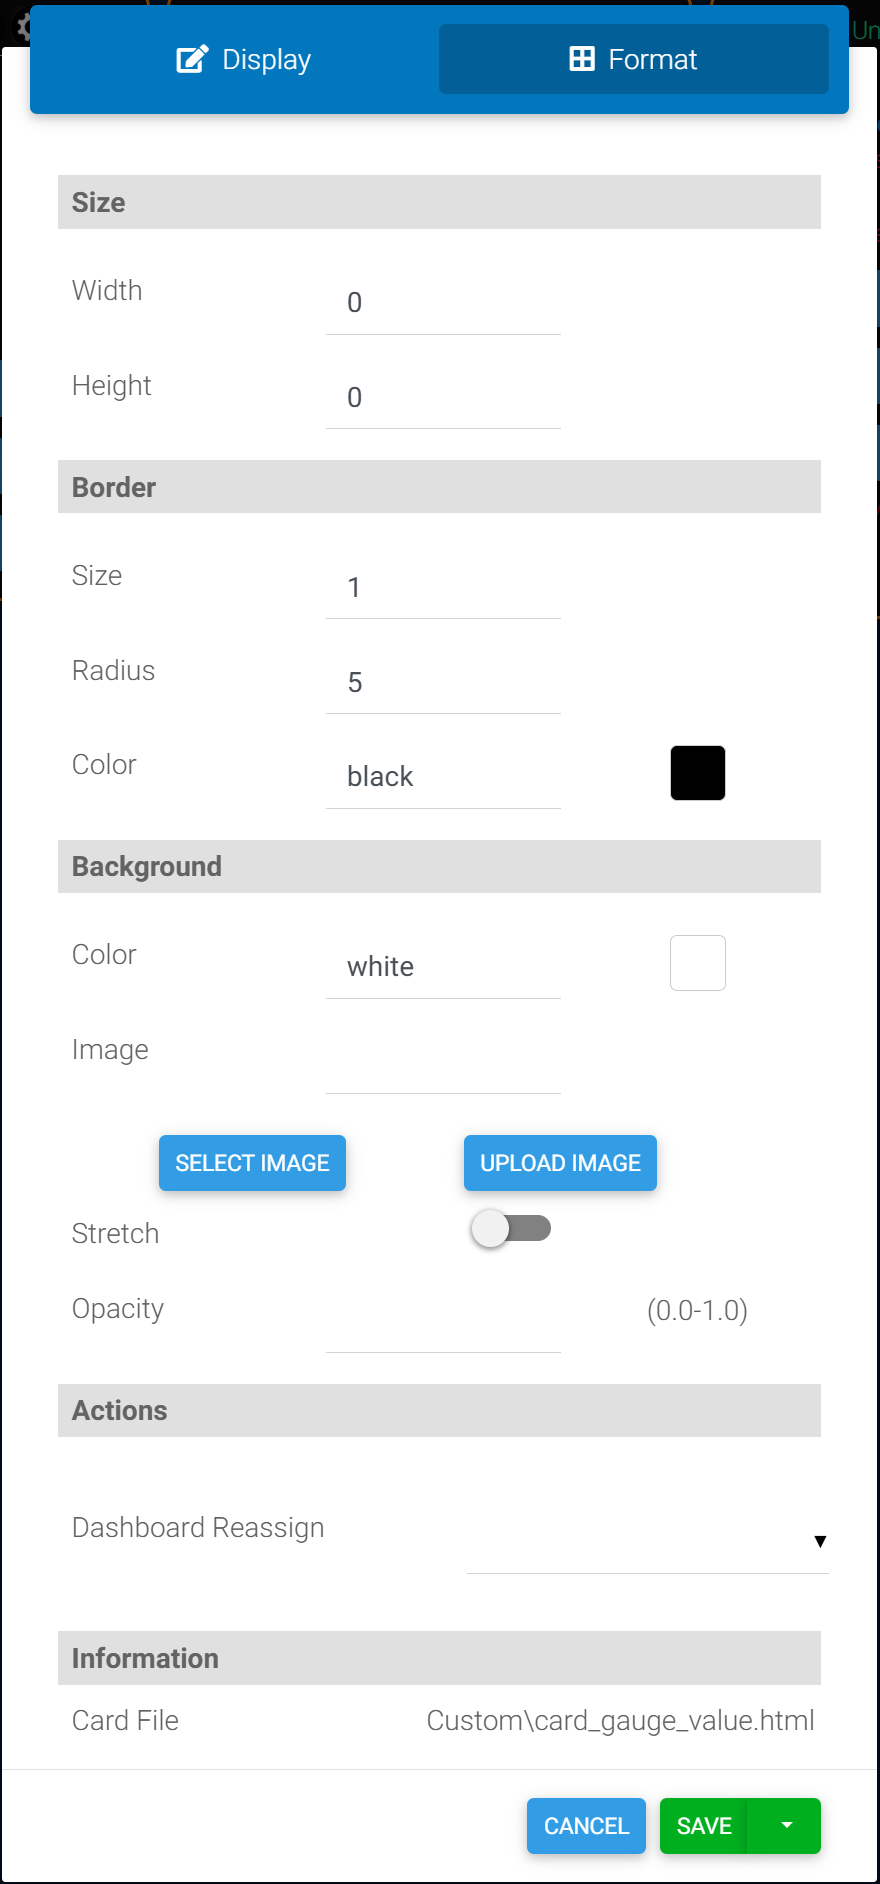
Edit Card Format Tab
The display tab holds settings specific to the card and will be different for each card. The Format tab holds settings for the format of the card. These settings are the same for all cards. It holds settings like the card background color or image, allows for moving the card to another dashboard, and displays the card file that is being used.
Note that the Save button has a drop list with some save options.

Card Settings Save Options
Clicking save simply saves the settings for the current card. Clicking the drop list allows you to save the changes but also copy them to other cards on the dashboard. You can copy just the format tab, or the display tab. For example, you change the background color of the card and want this new color on all your cards. Rather then editing each card, just select the option to copy all the format settings to all cards. Note that the copy only applies to the current dashboard. Other dashboards are not affected.
For setting the background color, enter “transparent” to allow the card to not have a background. This is useful if you have a background on the dashboard and wish to place cards at specific locations but don’t need the card borders. Such as a floorplan.
Adding Cards to a Dashboard
To add a card to a dashboard, the dashboard must be in edit mode. Click on the drop list on the navigation bar and select “Add Card”. A new dialog appears.
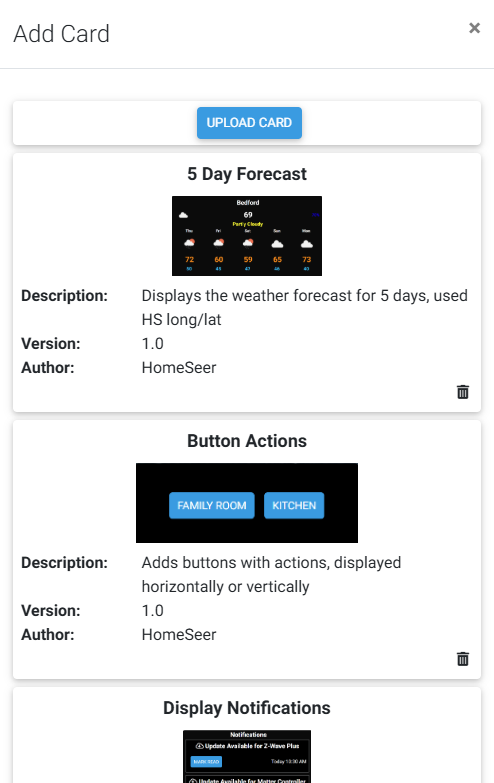
Add Card Dialog
From this dialog, click on a card to add it to the existing dashboard. Note that these are card templates, not the actual cards on your dashboard. By clicking on a card, a new card is created and then added to the dashboard. The new card is set with default settings and will need to be edited for your use.
Click on the trashcan to delete the card template. Note that you will no longer be able to create this type of card. This is most useful if you upload a third-party card and decide you no longer need it.
Click on the “Upload Card” button to upload a card. The card must be an HTML file and be in a specific format. An error will be displayed if the card is not formatted properly.
The following custom cards are included.
Multi Feature
Multiple features from different devices may be added. Options include displaying ON/OFF as a toggle or a button. Multiple ON/OFF features can be controlled using a single toggle.
Font colors and sizes may be adjusted.
5 Day Forecast
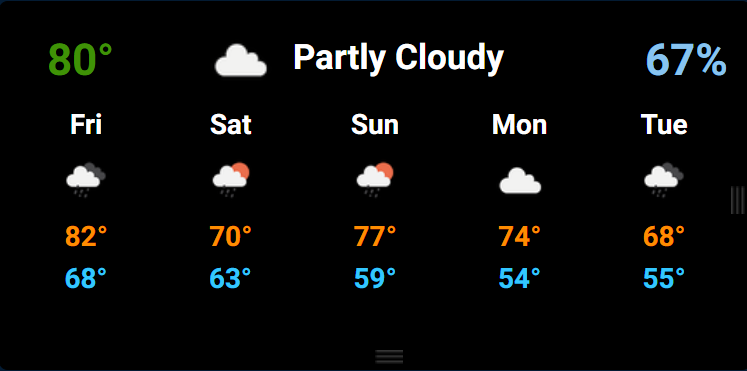
Displays a 5-day forecast
Uses the longitude and latitude as set in the HomeSeer settings, but can be changed
Multiple forecast cards can be displayed
Font sizes and colors, as well as icon sizes may be changed
Gauge
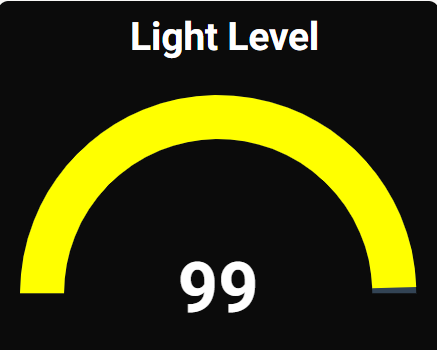
Displays a simple gauge that can track the value of a HomeSeer device
Min and Max values may be specified
The value bar is divided into 4 sections, each with its own color
The name value font size and color may be changed
Button Actions
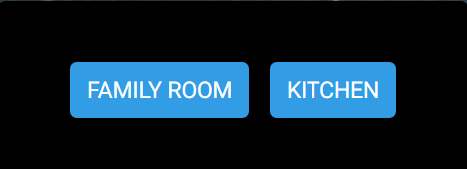
Displays multiple buttons
Buttons may be arranged horizontally or vertically
Actions may be assigned to the buttons such as:
Display another dashboard
Run the actions of a HomeSeer event
Great for creating a navigation menu
Single Device Status Icon
Displays the status icon for a HomeSeer device.
The name of the device may be displayed
Click the “Set Feature” button to select the feature you want the icon to track.
By clicking the icon, the device will be controlled. The 2 controls to toggle may be specified.
Status Text

Similar to the status icon, this one displays the status text of a HomeSeer device.
A title may be added
Click the “Set Feature” button to select the feature you want the icon to track.
Display Text

Displays text that you specify.
Good for labeling an area of the card or creating sections.
The label font size and color may be specified.
Display Notifications
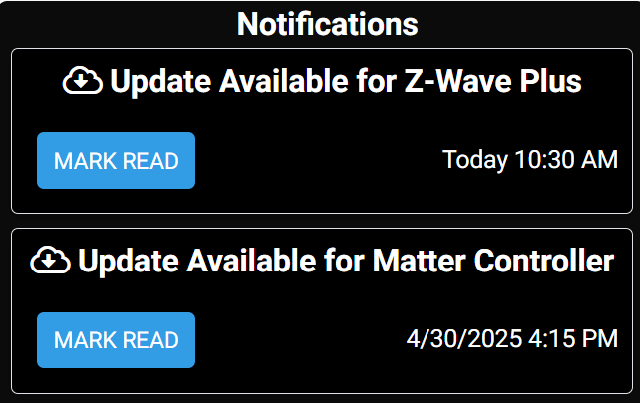
Displays the list of available notifications, similar to the notifications view in HomeSeer.
Font sizes and colors may be specified as well as which items are displayed.
