Information regarding HomeSeer integrations with Reolink Video Doorbell
Overview
Reolink's video doorbell supports RTSP and ONVIF events, making it ideal for integration with HomeSeer.
When integrated, HomeSeer supports locally managed live views and events (auitomations) may be triggered with the following ONVIF events reported by the camera:
-
Motion Detected (Motion)
-
People Detected (PeopleDetect)
-
Doorbell Presses (Visitor)
Requirements
You'll need the following to integrate the Reolink video doorbell with HomeSeer:
-
Reolink Video Doorbell (WiFi or PoE versions)
-
HomeSeer HS4 v4.2.18.8 or later
-
ONVIF Events software plugin (FREE) (required for creating automations based on motion and button press events)
Setup
The following steps are required to install and integrate the video doorbell with HomeSeer HS4-powered hubs or systems.
-
Install the video doorbell and connect it to your home network using WiFi or Ethernet. Refer to the instructions included with your camera for this procedure.
-
Enable RTSP and ONVIF for your camera. To do this, follow these steps:Open a web browser and enter the IP address of your camera in the address field.Log into the camera, click the settings gear and click Network settings.Scroll to the bottom of Network settings, click Advanced and then click on Port Settings.Scroll Port Settings and enable RTSP and ONVIF
-
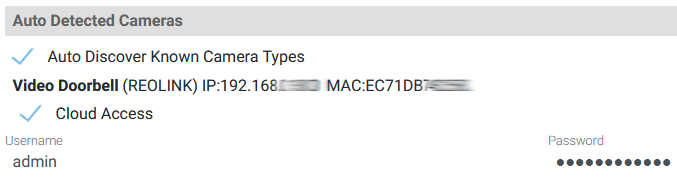
Access your HomeSeer HS4 web interface and navigate to Setup > Cameras. You should see your video doorbell in the Auto Detected Cameras section. Enter the Username (admin) and Password that you created when you added your camera to the Reolink app.
-
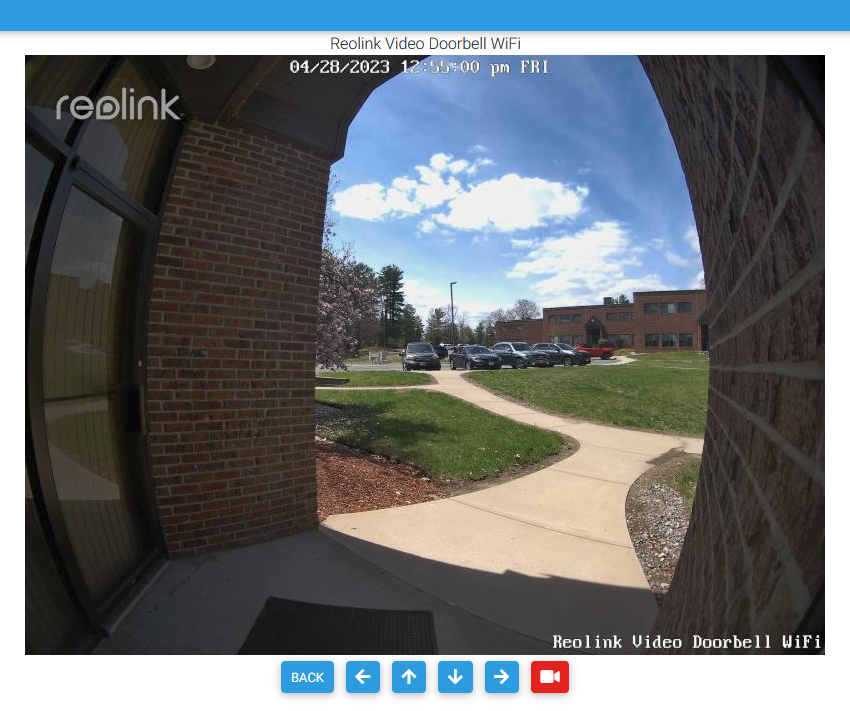
Check the live view of your camera on the HS4 cameras page to make sure your camera view is now visible.
-
Access your HomeSeer HS4 web interface and install the ONVIF Events plugin. This plugin will create a HomeSeer device to track ONVIF events as features. You'll be able to use the changing status of these features in your automations as event triggers and conditions. Please refer to Setting Up the ONVIF Events Plugin for information on adding the camera's ONVIF events to HS4. When complete, it should look like this (in list view):
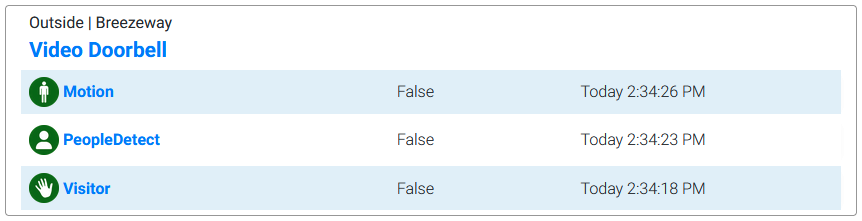
Note: Device features may not appear until motion is sensed or the doorbell button is pressed.
Creating HomeSeer Events
The video doorbell provides these 7 different ONVIF events which may be used as triggers and conditions when triggering HomeSeer events (automations).
|
ONVIF Event |
Description |
Values |
|---|---|---|
|
Motion |
This event turns TRUE when the camera detects any motion |
TRUE = Motion Detected
|
|
PeopleDetect |
This event turns TRUE when the camera detects people |
TRUE = People Detected
|
|
Visitor |
This event turns TRUE when the camera detects a button press of the doorbell |
TRUE = Doorbell Rung
|
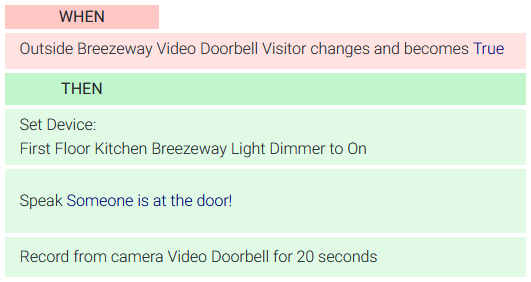
Example
In this example, HomeSeer will turn on a light, speak a message and make a 20 second recording when the doorbell is rung.