Setup guide for the Zigbee Plus software plugin
Overview
This plugin is designed to allow HomeSeer HS4 to monitor and control Zigbee devices using Zigbee2MQTT.
Compatible Systems
This plugin is designed for HomeSeer HS4-powered systems including the following:
-
HomeTroller Pi hub or HS4-Pi
-
HomeTroller Plus hub or HS4
-
HomeTroller PRO hub or HS4PRO
This plugin is not compatible with HomeTroller SEL hubs as their operating system is missing components that are required for Zigbee2MQTT.
Compatible Devices
-
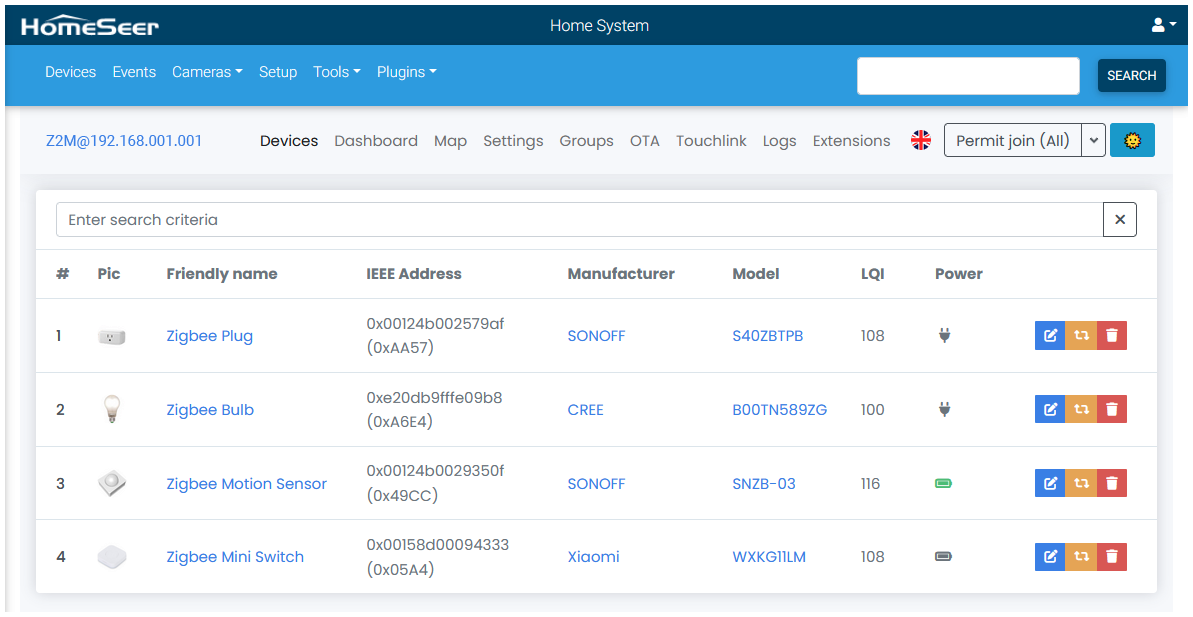
This plugin supports thousands of Zigbee devices. The complete list is available here: https://www.zigbee2mqtt.io/supported-devices/
Requirements
-
HomeSeer Hub or HS4 Software
-
HomeSeer SmartStick ZB, HomeSeer Z-NET PRO, or other Compatible Zigbee adapter
This plugin has been tested with the HomeSeer Z-Net Pro, HomeSeer SmartStick ZB, and the Sonoff ZBDongle.
The Zigbee SmartStick ZB and other adapters can also be connected to a HomeSeer Z-NET G3, 500, or G8 for network-based use. The Z-NET system must be running version 1.0.27 or later.
Setup
Follow the steps below to connect your Zigbee adapter (coordinator) to the Zigbee Plus plugin and create a Zigbee network. Repeat these steps for each adapter you wish to add to your HomeSeer system.
-
Ensure that you have a Zigbee USB adapter attached to your system, or a Z-NET connected to your local network.
-
In HS4, navigate to Plugins > Zigbee Plus > Manage Networks.
-
Click the ADD NEW NETWORK button, enter a name for that network, and click OK.
-
In the Zigbee Adapter Settings section, choose the Connection Type that suits your adapter.
-
Serial Port is for USB Dongle adapters
-
Then select the Serial Port number for your adapter
-
Then select the appropriate Adapter type for your adapter
-
-
Network (TCP, MDNS) is for network attached adapters
-
Then enter the URL for your network adapter | format: tcp://{IP Address}:{Port Number}
-
Then select the appropriate Adapter type for your adapter
-
-
Z-NET is for HomeSeer Z-NET or Z-NET PRO adapters
-
Then open the Z-NET menu and select your Z-NET adapter. The Network URL field should automatically populate
-
Then select the appropriate Adapter type for your adapter
-
-
-
Click SAVE to save your settings.
-
In the Zigbee2MQTT Status section, click START and wait for Zigbee2MQTT to initialize.
If you are using an older HomeTroller Pro and Zigbee2MQTT fails to start, refer to the Zigbee Plus warning fix do for instructions to resolve the issue.
Menu Options
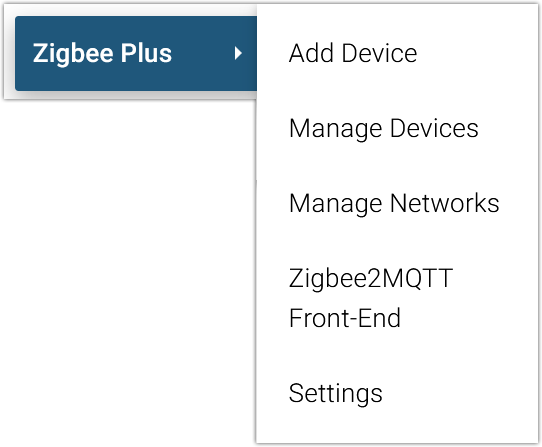
Add Device
-
Select this option to add Zigbee devices to your system.
Manage Devices
-
Select this option to remove devices from the adapter (coordinator) or to recreate HomeSeer devices that have been included into the adapter.
Manage Networks
-
Select this option to create Zigbee networks that will monitor and control your Zigbee devices.
Zigbee2MQTT Front-End
-
Select this option to launch the Zigbee2MQTT application within HomeSeer and to access the front end application.
By default, Zigbee2MQTT is designed to be accessed on the local network (LAN). Remote access to the Front End is possible with the use of port forwarding (port 8080) but not via MyHS.
Settings
-
Logging: Select this option to change the log information type
-
MQTT Broker: By default, the plugin installs and uses its own instance of MQTT. If you'd like to use an external instance, you can set the IP address and port for that here.
-
Zigbee2MQTT: By default, the plugin installs and uses its own instance of Zigbee2MQTT. If you'd like to use an external instance, you can set that here.
Screenshots
|
Device List View |
Device Grid View |
|---|---|
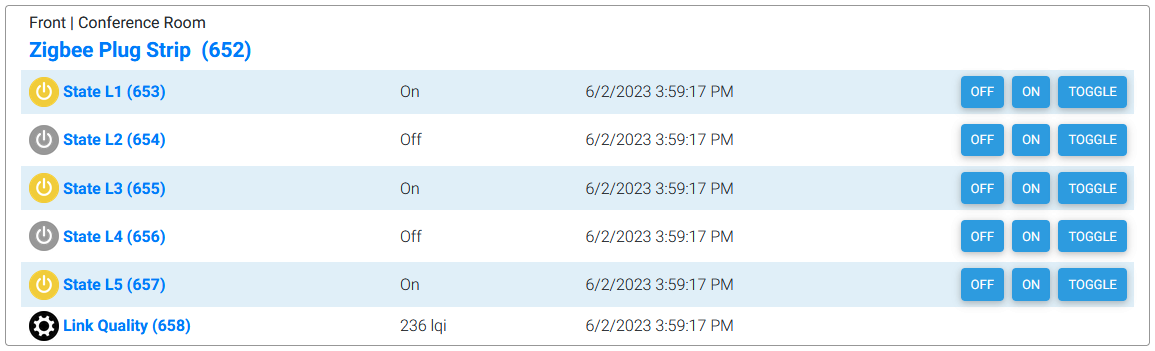
|

|