This document details the steps necessary to enable Amazon Alexa text to speech (TTS) announcements for HomeSeer devices using Node Red.
Step-by-step guide
-
Install Node Red and configure it to work with your HS4 system. Please refer to this document for details: Setting up Node-Red for use with HS4.
-
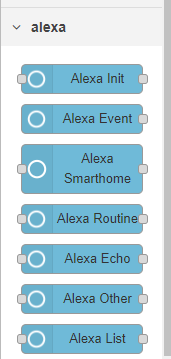
Launch Node Red, open the hamburger menu, select manage palette, click the Install tab and search for Alexa. From the module list, locate and install the node-red-contrib-alexa-remote2 module. This will install these nodes into Node Red:
-
Drag the Alexa Routine node into a Node Red flow and double-click on the node. Now click the pencil icon in the Account row to open the account settings. This module provides 3 methods to authenticate your Alexa account. The preferred method is Proxy authentication and that is detailed below.
Note: If you have difficulty getting the Proxy method to work or if the proxy method doesn't work reliably, try using Cookie authentication instead. -
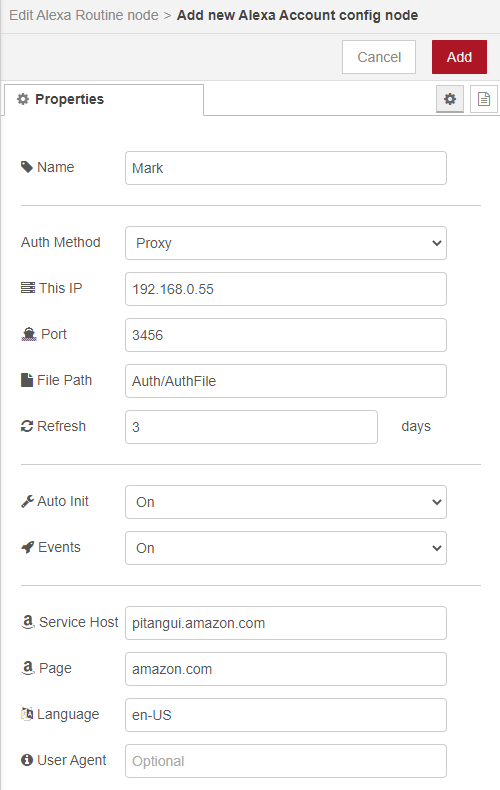
Name the account (any name you want) and change the Auth method to Proxy. Then, enter the IP address where Node Red is installed, a port number your choice (any number), the File Path where the authentication file will be saved. Then enter the appropriate Service host, Page and Language. It should now look something like this:
-
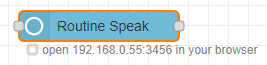
Click the Add button at the top to save your settings. This will close the account screen and display the Alexa Routine screen. Click the Done button (for now) to close this screen. Then click the Deploy button above the flow window. The Alexa Routine node should now display this:
-
Enter the this address into your browser. That will open your Alexa account login screen. Enter your Alexa credentials and submit them. If successful, your browser will now display this:

-
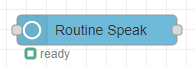
Open your Node Red tab and you should now see this:
-
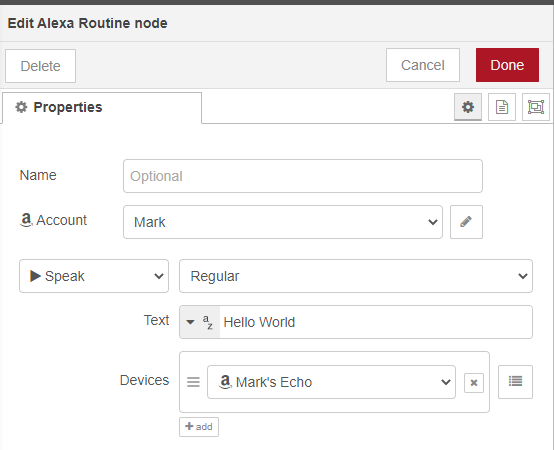
Double-click on this node, select your newly authenticated account and type "Hello World" into the text field. It should look something like this:
-
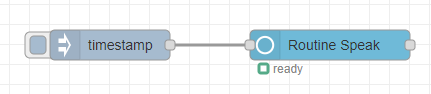
Click the Done button to close the screen. To test your system, drag an Inject node into your flow and then connect it to your Alexa Routine node. Then click the Deploy button again. You should now see this:
-
Now, just click the button on the left side of the Inject node. Your Alexa device should now speak "Hello World".
-
At this point, we can configure a sequence that will speak the status of a HomeSeer system device through any of your Alexa devices. Start from scratch and drag an HS Device node, a Change node and an Alexa Routine node to the flow. Connect the 3 nodes so your new sequence looks like this:

-
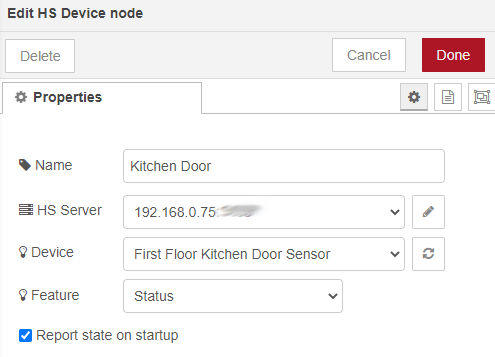
Double-click the HS Device node, select your HomeSeer server and choose any device that easy to test (like a door sensor). By default, the node Name will include the HomeSeer location attributes. Adjust the node Name to simplify the announcement (if desired). When done, it should looks something like this:
-
Double-click the Change node and configure it like this:

-
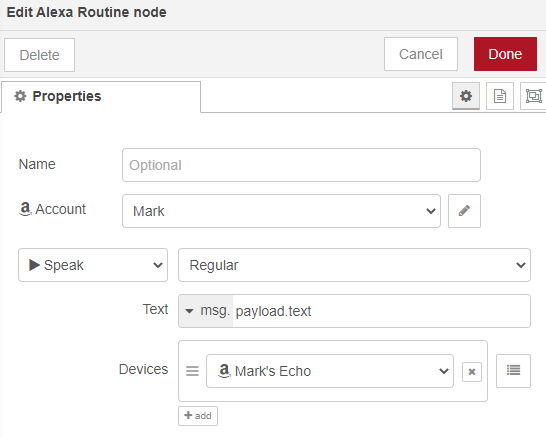
Double-click the Alexa Routine node and configure it like this:
-
When done, your sequence should look something like this:

-
Open and Close your Kitchen Door (or control your device) and you should now hear "The Kitchen Door is Closed" and "The Kitchen Door is Open" (or your own custom text)!
-
At this point, you can link additional HS Device nodes to your change node and your Alexa devices will speak whenever your devices change.
Filtering Announcements
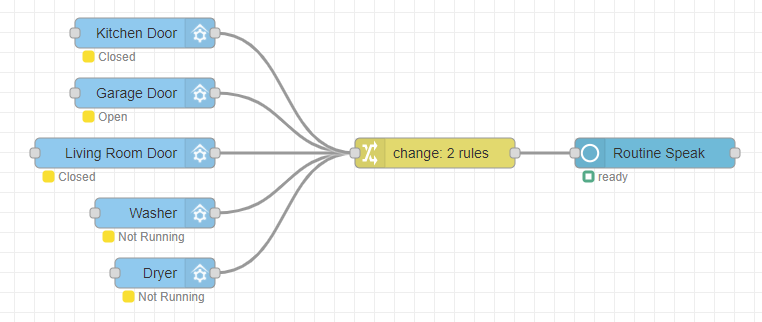
The steps above are designed to issue announcements for ALL status changes. However, you may wish to prevent some announcements from happening. For example, consider the Motion and No Motion status commands for a typical smart motion sensor. You may wish to know when Motion is sensed but may not wish to know when a motion sensor resets to No Motion. In order to accomplish this, you'll need to insert a Switch node into the sequence and configure it it to prevent the "No Motion" output from reaching the Alexa Routine node. Here's what that would look like:
-
Add a Switch node to any sequence just before the Change node.

-
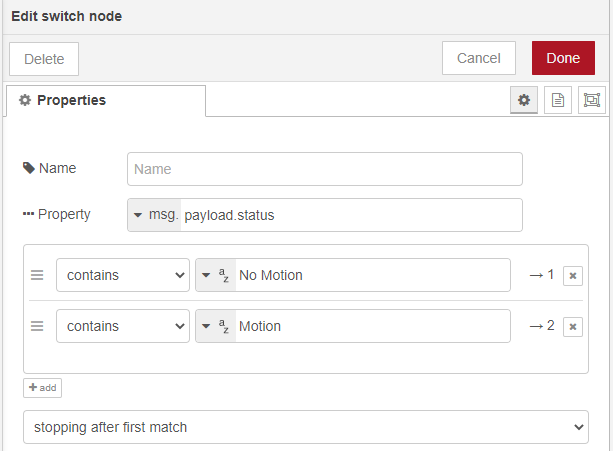
Double-click the Switch node and configure it by adding rules for both status values of the Motion Sensor device. This will create 2 connection points on the exit side of the Switch node, one for each rule. Be sure to position the No Motion rule at the top of the list. Change the drop menu under the rules from checking all rules to stopping after first match. Click Done, then click Deploy.
-
Now, connect the HS Device to the to Switch node and connect the Switch node to Change node, using the bottom connection point (this point is associated with Motion).

When the HS Device changes from Motion to No Motion, the Switch node will detect that with the first rule and will send that output that to the first connection point on the exit side, and it will stop and not execute the second rule. Since the first connection point is not connected to the Alexa Routine node, No Motion will not be spoken.
Filtering for Z-Wave Dimmer that supports the "Last" Command
Note that a Z-Wave Dimmer can be controlled to be turned on to the "Last" on setting. When this is the case, 2 messages are sent to Node-RED. the first reports the device's Status as "Last" and the second reports it as the resulting value, or dimmed percentage. To keep from announcing the first message, set the switch node as shown below. This ignores any message with the word last, regardless of any Upper/Lower Case letters in the message.
Related articles
Filter by label
There are no items with the selected labels at this time.