Documentation on using the HS4Touch Designer and client.
Overview
HS4Touch is an advanced custom user interface system for HomeSeer HS4-powered HomeTroller hubs or software. It is comprised of a Windows design tool (HS4Touch Designer) and run-time client apps for Windows, iOS and Android devices. Projects are created with the Designer and then deployed to the client(s) for use on phones, tablets and other devices.
Installation
Download and run the HS4Touch Designer installer on your Windows PC. HS4Touch clients may be downloaded and installed to your devices via Apple, Google Play, and Amazon app stores. The Windows client (HS4Touch.exe) may be be copied/pasted from your PC to your Windows devices.
Designer Environment
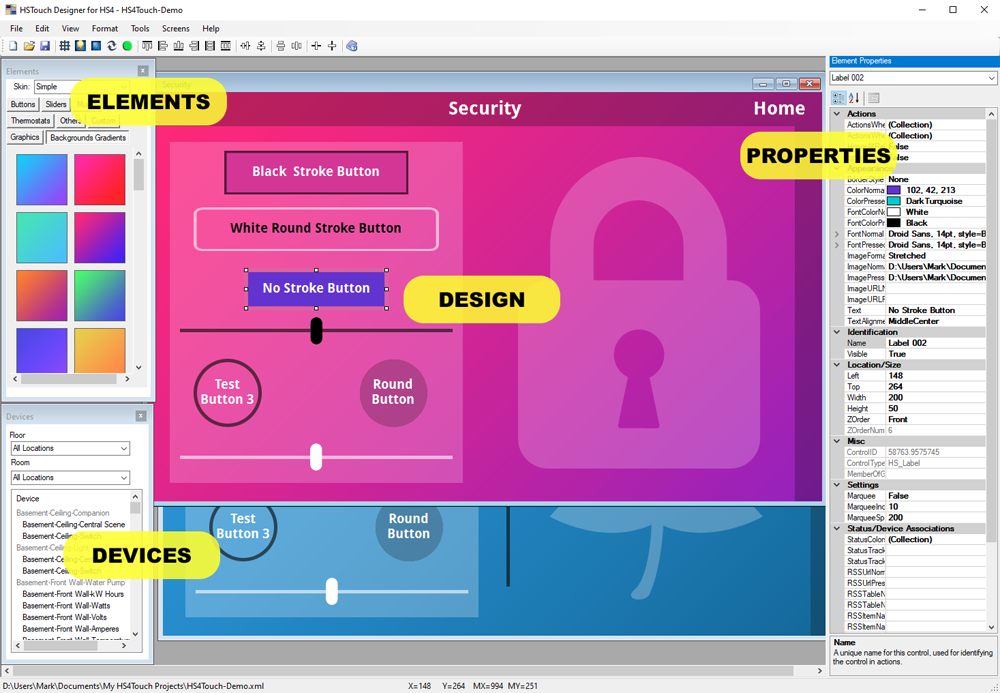
The HS4Touch Designer includes an integrated development environment (IDE) that consists of a elements palette, devices palette, design area and properties pane (as shown below). Elements and devices are added to screens (in the design area) with a drag and drop operation. Properties for any element or any device may be adjusted in the properties pane after clicking on that element or device.
Connection
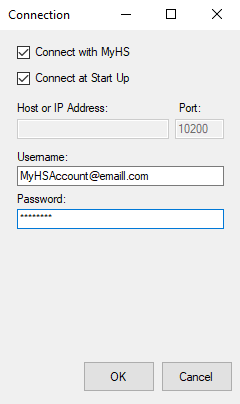
HS4Touch Designer and HS4Touch Clients must be configured to communicate with your HS4 hub or software before use.
-
HS4Touch Designer: Launch the program, then navigate to Tools / Connection Defaults. Check the boxes for Connect with MyHS and Connect at Start Up. Enter your MyHS credentials and click OK. The Designer will now connect to your HS4 system.
-
HS4Touch Client: Launch the HS4Touch app on your mobile device or touchscreen and access the settings page. Enter your MyHS credentials and save. The client will now connect to your HS4 system.
Creating Projects
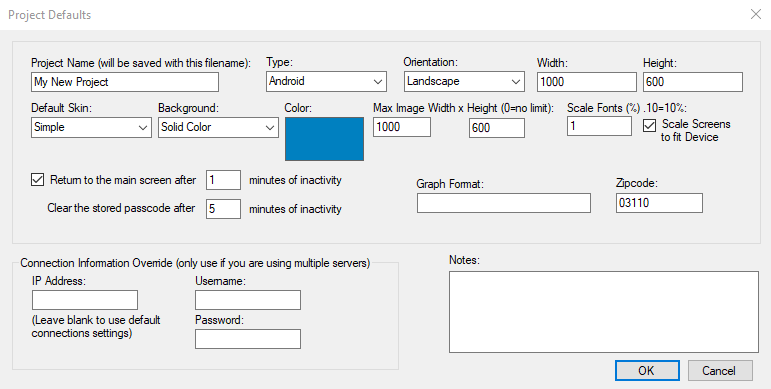
Open the File menu and select New Project. The Project Defaults screen will appear. Name your project, choose the appropriate Type (based on your device), Orientation and screen Width and Height. If you're not sure about your device specifications, check your user guide or manufacturer's online documentation. Additional settings are provided to determine the Default Skin, Background type, background Color and maximum image dimensions. Click OK when finished.
Adding Elements to a Screen
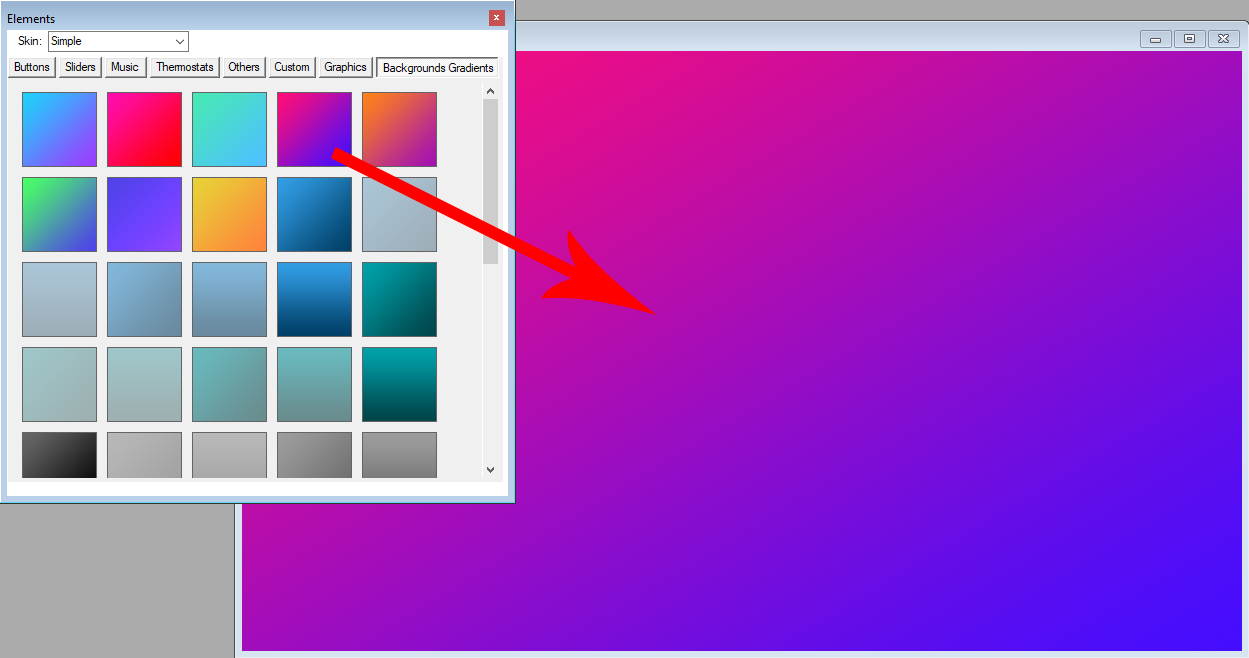
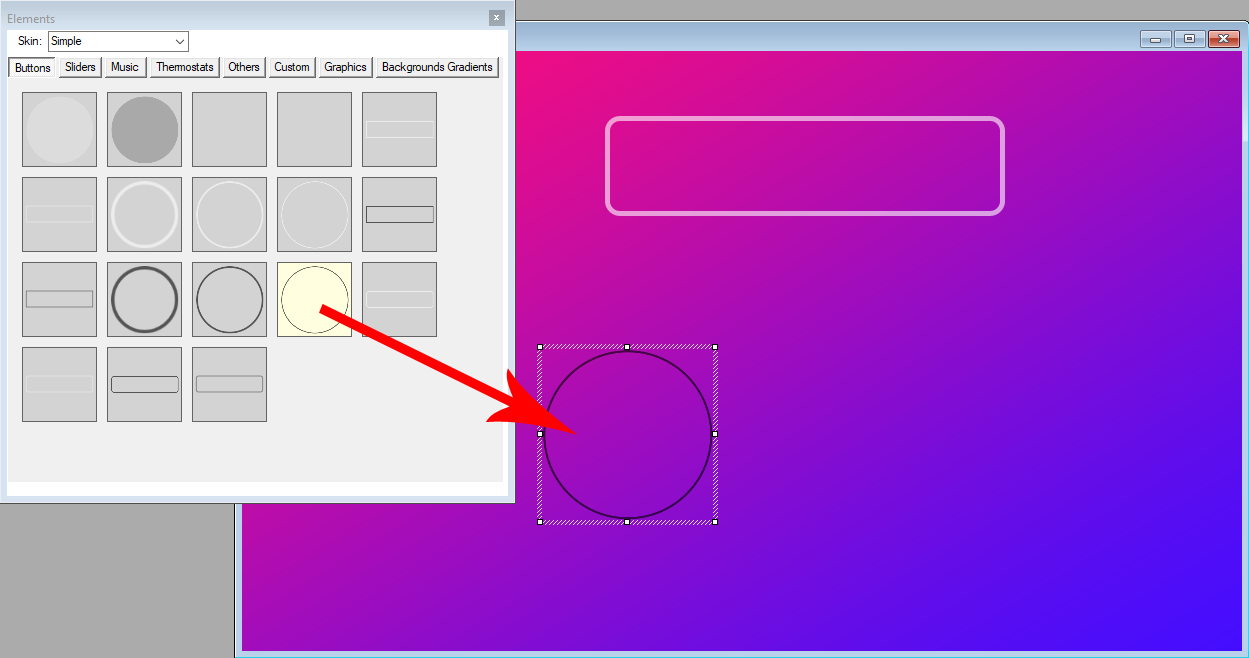
All projects are made up of Elements, including Buttons, Sliders, Graphics, Text and more. To add an element to your project, drag and drop that element from the Elements palette to the screen you're currently designing. In the example below, a multi-colored background graphic has been dragged to the screen and then two buttons have been added to that same screen.
|
Adding a Background to a Screen |
Adding a Button to a Screen |
|---|---|
|
|
Editing Properties
Screens, Devices and Elements are defined by their properties. To edit the properties of a screen, click its title bar. To edit the properties of an element, click it on the screen. In the example below, properties are displayed for a button.
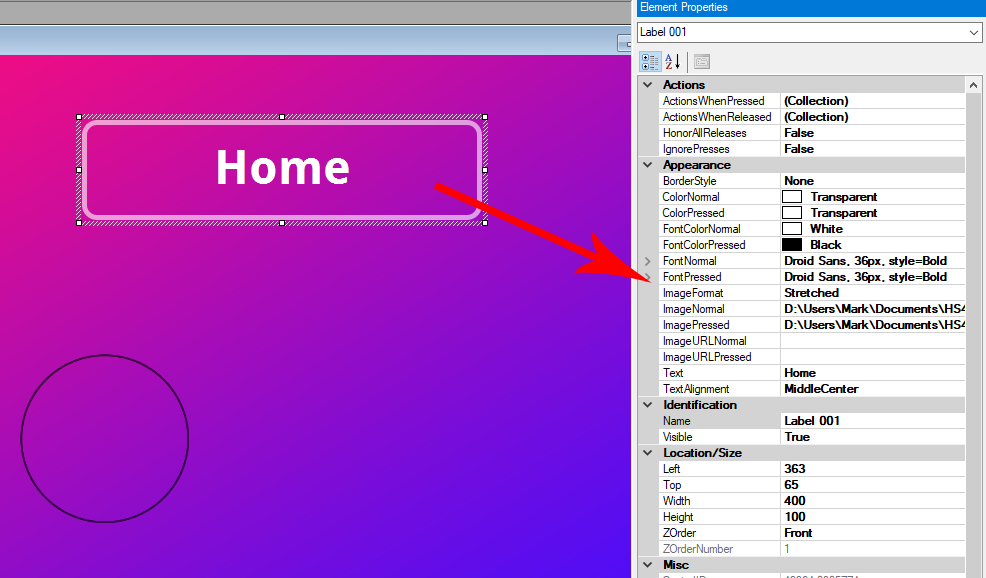
See HS4Touch Properties for a complete listing of all available properties.
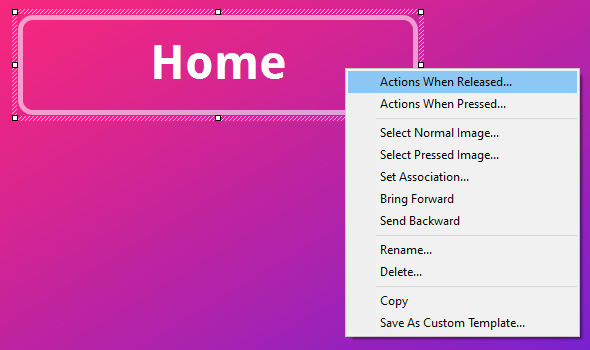
Editing Actions
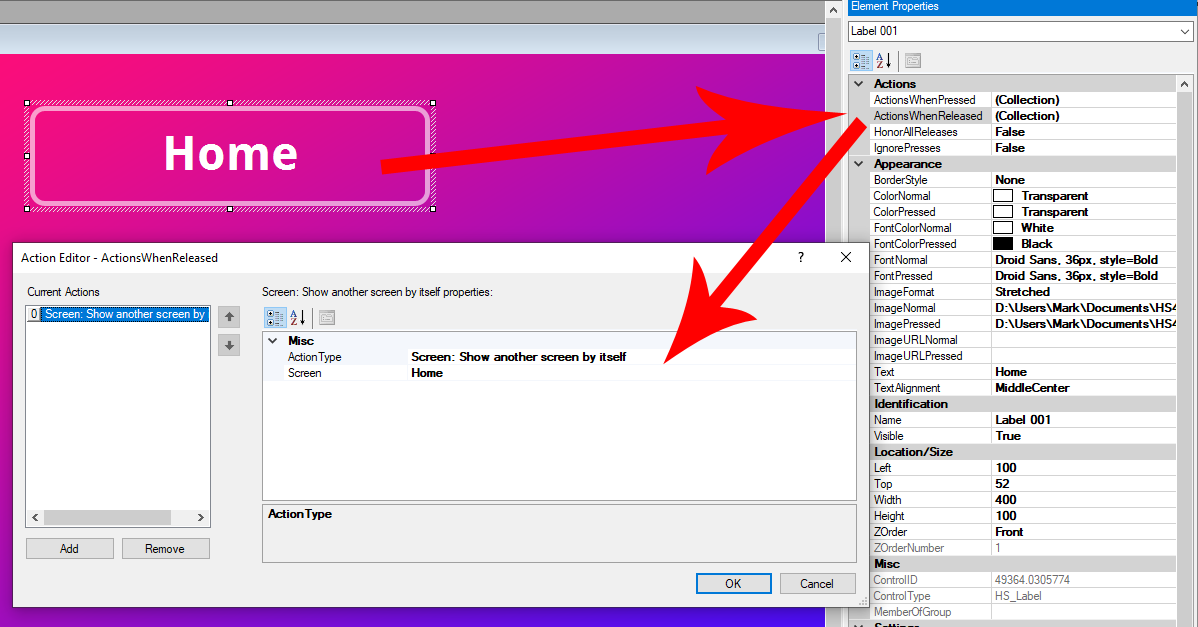
Actions are what happens when buttons, sliders or other element are clicked or touched. HS4Touch includes an Action Editor to define these actions. You can access the Action Editor for buttons by right-click the button and selecting Actions When Pressed or you can left-click any element and edit the Actions When Pressed and/or Actions When Released properties in the Actions section of the Properties Pane.
|
Right-click Buttons to Access Action Editor |
Select Elements and Edit Action Properties |
|---|---|
|
|
See HS4Touch Actions for a complete listing of all available properties.
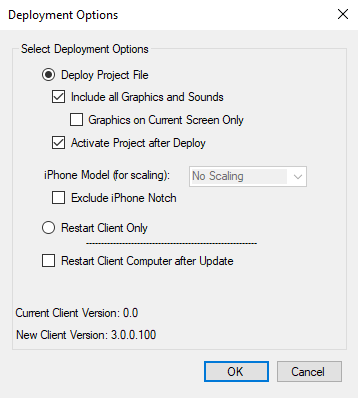
Deploying Projects
An HS4Touch project is comprised of the following:
-
XML file (includes all project specifications)
-
Image files (for backgrounds, button and graphics)
-
Sound files (mp3 or wav files)
These files must all be copied to your HS4Touch client for use on your phone, tablet or touchscreen. HS4Touch Designer includes a Deployment function to simplify the process of copying these files to your devices. To initiate deployment, navigate to Tools / Deploy and then select the client you wish to deploy to. The first time you deploy to a device, be sure to Include all Graphics and Sounds.