Updating Z-Wave Plugin
Information on updating or upgrading an existing Z-Wave plugin.
Overview
Upgrading from v3 to v4 is different than updating from 3.0.10.0 to 3.0.11.0 or 4.0 to 4.1. If you are going from a plugin version that starts with 3 to a plugin that starts with 4, using the Upgrading procedure. If you are going from v4.x to v4.x, use the updating procedure.
Upgrading
If you are upgrading to the new 4.0 version of the Z-Wave plugin. It is required that you disable and remove your current Z-Wave plugins (Z-Wave Core and/or Z-Wave UI). See the upgrading procedure below.
HT-PI
If you own a HomeTroller Pi G3 with Z-Wave plugin version 3.100.x.x or later, you can skip the Upgrade procedure and do the Updating procedure.
Upgrading Procedure
The format for event data has been changed. Because of this, once you have upgraded your system to v4.0 of the Z-Wave plugin, you cannot go back.
- Do a HomeSeer backup, see here for instructions.
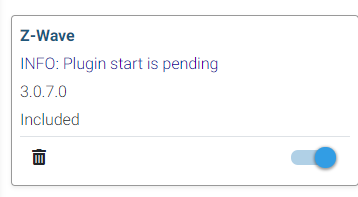
- Disable and uninstall your current Z-Wave plugins. Click the toggle on the bottom right to disable and then the trash can to uninstall.
Note: If you uninstall plugins after installing v4, you will remove critical files for v4 to work therefore breaking your upgrade.
- Once removed, navigate to Plugins→Add and locate the Z-Wave plugin in the Featured section or you can search for it using "z-wave" or you can find it in the alphabetical list and click on the card.
Note: If you are still not able to locate the plugin, make sure you have enabled Show Beta Plugins on the right hand side of the page.
- Within the popup card, click Install.
- Once complete, you will be brought to the Manage page where you can now enable the plugin.
- Once enabled, you are upgraded to version 4.0.
Updating Procedure
Updating
When updating your Z-Wave plugin, your existing plugin install will be overwritten but your Z-Wave DATA will not be affected. See the notes below for additional information.
Upgrading
This procedure does not apply when upgrading to version 4.0.0.0. See above on how to upgrade your plugin.
Primary Method
- Go to Plugins→Manage
- Locate the Z-Wave plugin and click the update icon next to the version number.

- You will get a pop-up window where you will click Update to proceed.
- Once finished, you will receive a confirmation.
- All set!
Secondary Method
- Go to Plugins→Add
- Click the Sync Packages icon in the top right
- Locate Z-Wave in the list. Alternatively, you can search for "z-wave" or find Z-Wave in the list.
- Click on the plugin card and select Install.
- Once the Install is finished you will get a confirmation and be brought to the Installed section of Plugins.
- You may need to restart the plugin by toggling it off and back on.
Notes
HomeSeer has released a new Z-Wave plugin that replaces the Z-Wave UI and and Z-Wave Core plugins. Z-Wave UI is no longer available for download. Z-Wave Core has been renamed to Z-Wave Legacy and will no longer be updated. Version 4.0 of the Z-Wave plugin replaces both the UI and Legacy plugins.
The format for event data has been changed. Because of this, once you have upgraded your system to v4.0 of the Z-Wave plugin, you cannot go back. Your events will not work. We recommend saving a backup of your entire HomeSeer system prior to upgrading to v4.0 of the Z-Wave plugin.
Version 4.0 of the Z-Wave plugin uses some of the same files as the Z-Wave Legacy plugin. For this reason, the Z-Wave Legacy plugin should be uninstalled prior to installed v4.0 of the Z-Wave plugin. If the Z-Wave legacy plugin is uninstalled after v4.0 of the Z-Wave plugin is installed, the v4.0 plugin may stop working. The plugin will need to be uninstalled and reinstalled to repair it.
If you are seeing INFO: Start Pending as your plugin status. You need to disable and reenable the plugin. If you are still seeing this error after a system restart, reinstall the plugin via the above instructions.

