Use this guide to configure your Home Assistant hub to work with the Z-NET PRO Z-Wave & Zigbee network interface using Z-Wave JS, Z-Wave JS UI and Zigbee Home Automation (ZHA) integrations.
Overview
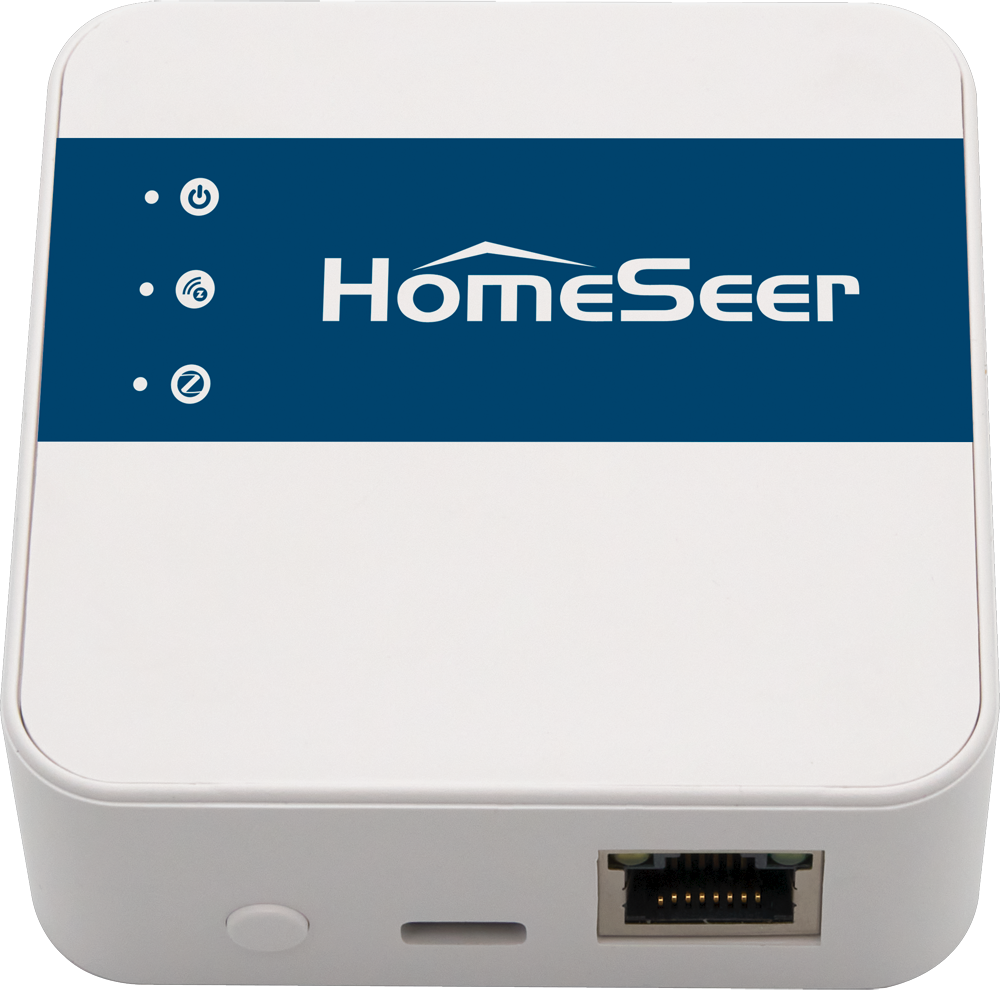
Z-NET PRO is a network-connected interface that’s designed to send and receive wireless commands to and from Z-Wave and Zigbee smart home devices. This guide will cover the steps required to use Z-NET PRO with Home Assistant’s Z-Wave JS, Z-Wave JS UI and ZHA integrations.
Initial Setup
This guide requires your Z-NET PRO to be initialized and connected to your home’s local area network (LAN). If you’ve not already done this, please refer to the Quick Start Guide for instructions.
Z-Wave Integration
Z-NET PRO works nicely with Home Assistant’s Z-Wave JS integration and the community supported Z-Wave JS UI add-on. Use the steps below to configure the settings for the integration you’re using.
Option 1: Integration with Z-Wave JS
Install Z-Wave JS
-
In Home Assistant, navigate to Settings > Devices & services.
-
Click the Add Integration button at the bottom of the screen.
-
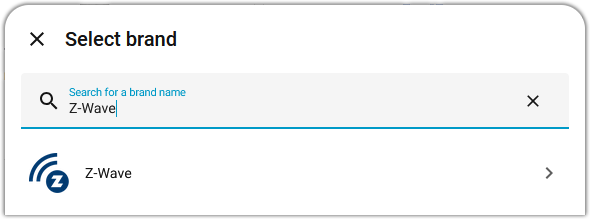
Search for and select Z-Wave. Then click Z-Wave again.
-
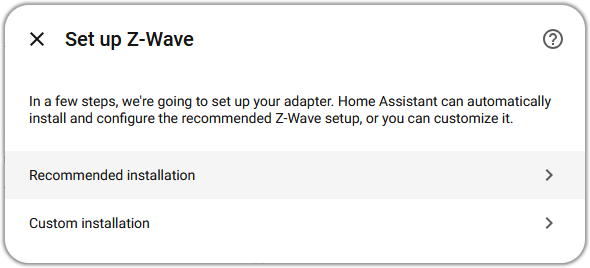
On the Set up Z-Wave pop-up, click Recommended Installation.
-
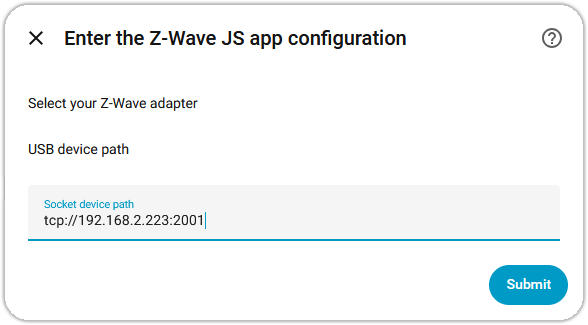
On the Enter the Z-Wave JS app configuration pop-up enter the Z-Wave URL as described in the Quick Start Guide into the Socket device path field. The format for this will be tcp://{IP Address}:2001 where the IP Address is that of your Z-NET PRO. In this example, the Z-NET PRO IP Address is 192.168.2.223. To find the IP Address of your Z-NET PRO, refer to the Quick Start Guide.
-
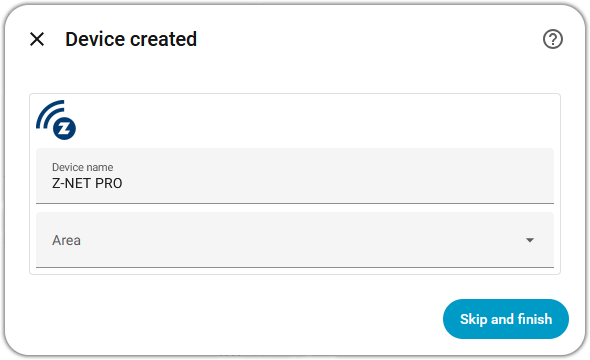
Click the Submit button and wait for your Z-NET PRO device to be created.
-
Enter the name as Z-NET PRO (or whatever you wish), choose the Area it’s to be positioned at and click Finish.
-
Refer to Home Assistant’s documentation on Z-Wave JS to finish setting up Z-Wave and to begin adding Z-Wave devices.
Option 2: Integration with Z-Wave JS UI
Install Z-Wave JS UI
-
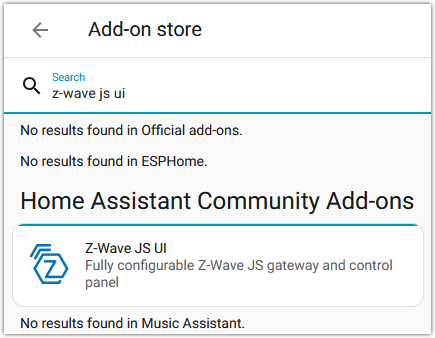
In Home Assistant, navigate to Settings > Add-ons and click the Add-on store button.
-
Search for Z-Wave JS UI and select that when it appears.
-
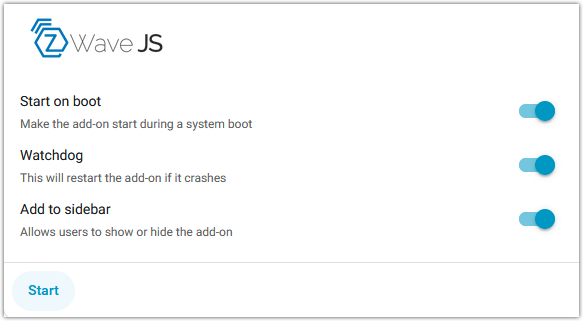
On the next screen, click the Install button and wait for the installation to complete. We recommend enabling the Watchdog and adding it to the sidebar but that’s up to you. Then click the Start button to start the add-on.
-
Once startup is complete, click the Open web UI button. The Z-Wave JS UI Control Panel will appear.
-
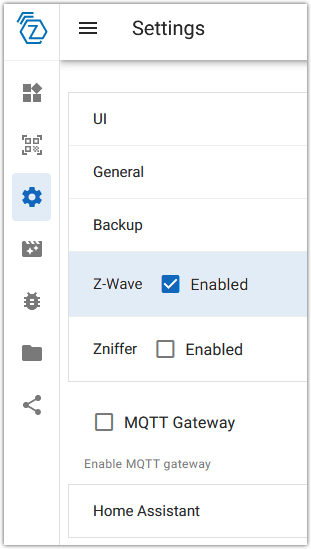
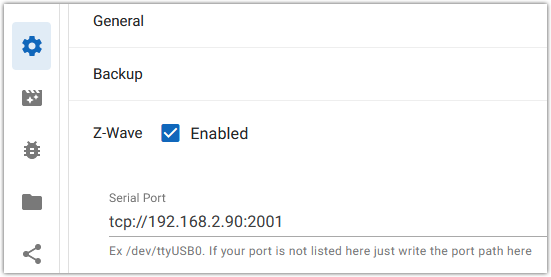
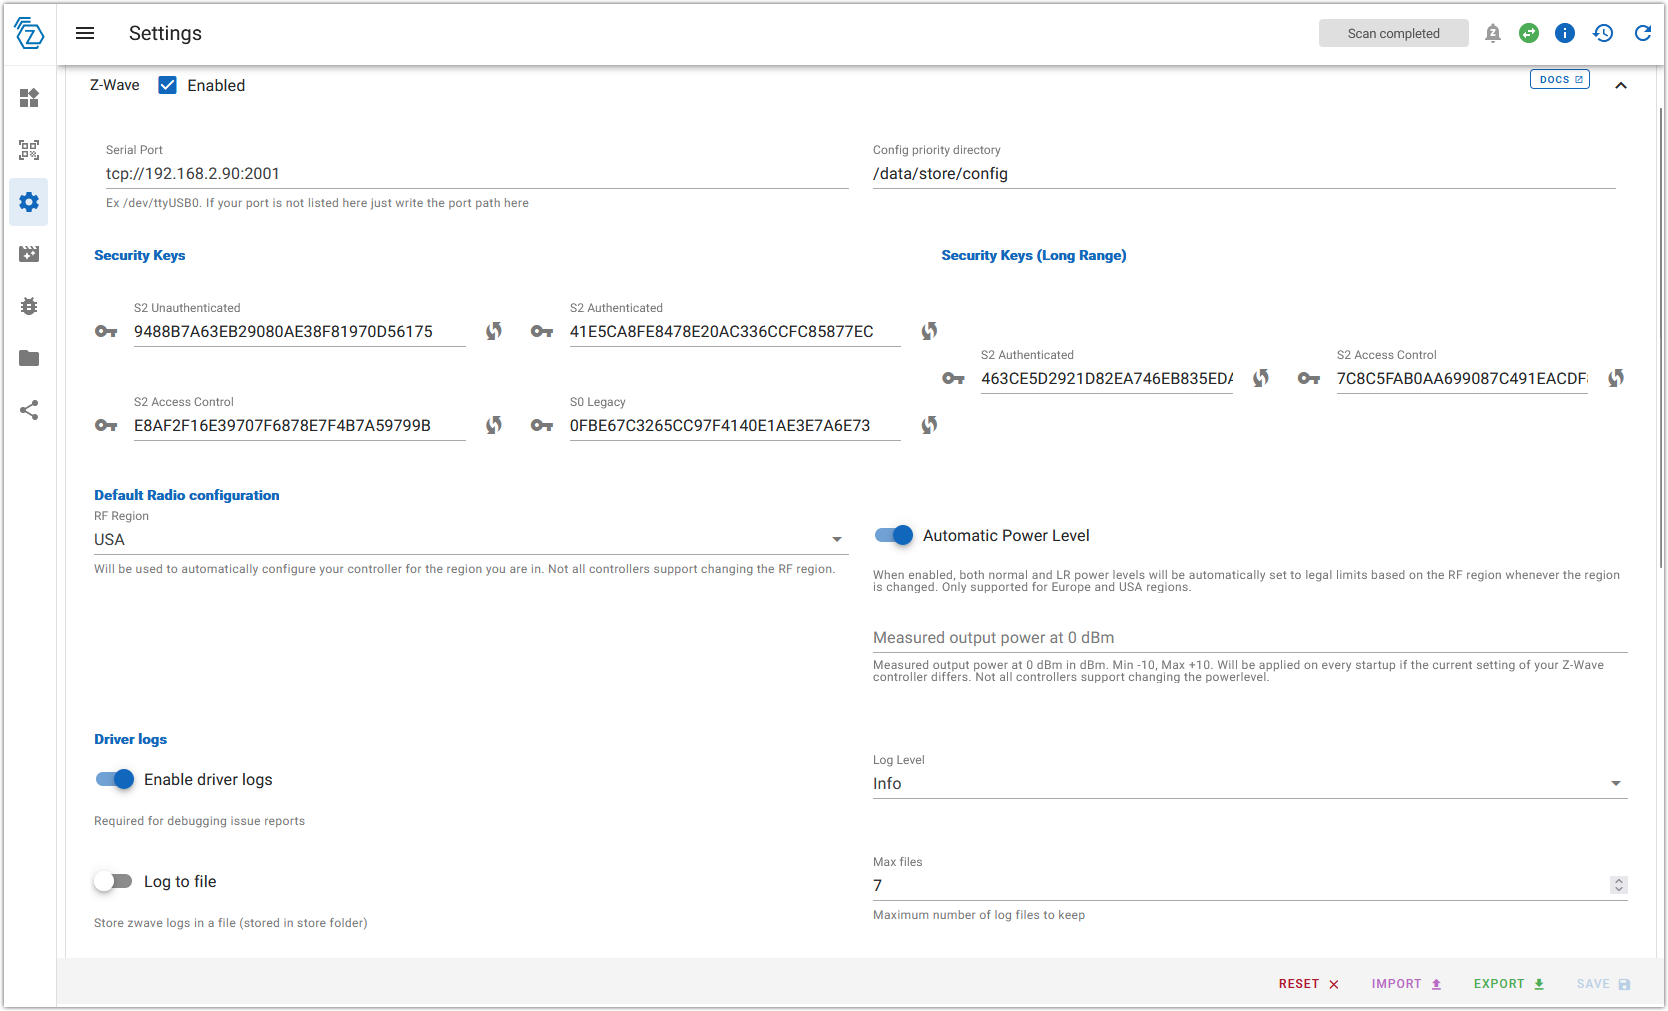
Click the Settings (gear) icon on the left and then click the Z-Wave row to access Z-Wave settings.
-
Enter the Z-Wave URL as described in the Quick Start Guide into the Serial Port field. The format for this will be tcp://{IP Address}:2001 where the IP Address is that of your Z-NET PRO. In this example, the Z-NET PRO IP Address is 192.168.2.90. To find the IP Address of your Z-NET PRO, refer to the Quick Start Guide.
-
If you are migrating from another Z-Wave interface (controller), copy and paste the security keys from that interface into the Security Keys fields below. If you are starting from scratch, click the icons next to each field to generate new security keys.

-
Select your RF Region.
-
Click SAVE in the lower right hand corner of the screen.
-
You should see Configuration updated successfully when finished.

-
Refer to Home Assistant’s documentation on Z-Wave JS to finish setting up Z-Wave and to begin adding Z-Wave devices.
Zigbee Integration
Follow these steps to set up the Z-NET PRO with Home Assistant’s Zigbee Home Automation (ZHA) integration.
-
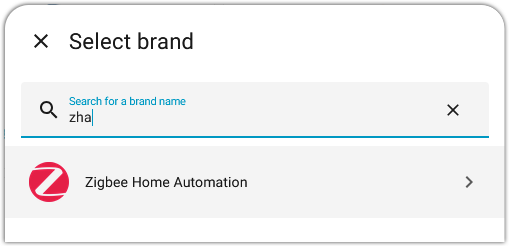
In Home Assistant, click Settings > Devices & services, then click the + Add integration button.
-
Enter zha and select Zigbee Home Automation
-
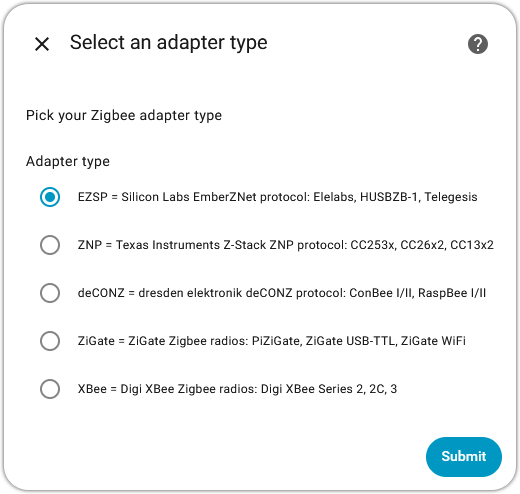
On the next screen, select EZSP = Silicon Labs… Adapter type
-
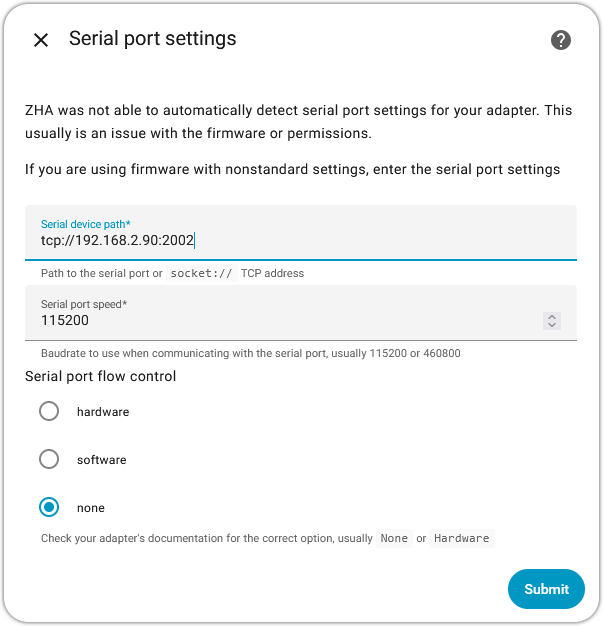
On the next screen, enter the (Zigbee) URL to connect to the Z-NET PRO. The format for this will be tcp://{IP Address}:2002 where the IP Address is that of your Z-NET PRO. In this example, the Z-NET PRO IP Address is 192.168.2.90. To find the IP Address of your Z-NET PRO, refer to the Quick Start Guide.
-
Once ZHA connects to the Z-NET PRO, you’ll be prompted to Set up Zigbee. At this point refer to the documentation for ZHA to finish setting up Zigbee and to migrate of add your Zigbee devices.