Z-NET PRO Quick Start Guide
Z-NET PRO is a network interface that’s designed to send and receive wireless Z-Wave & Zigbee commands to and from compatible smart home products in the home
Overview
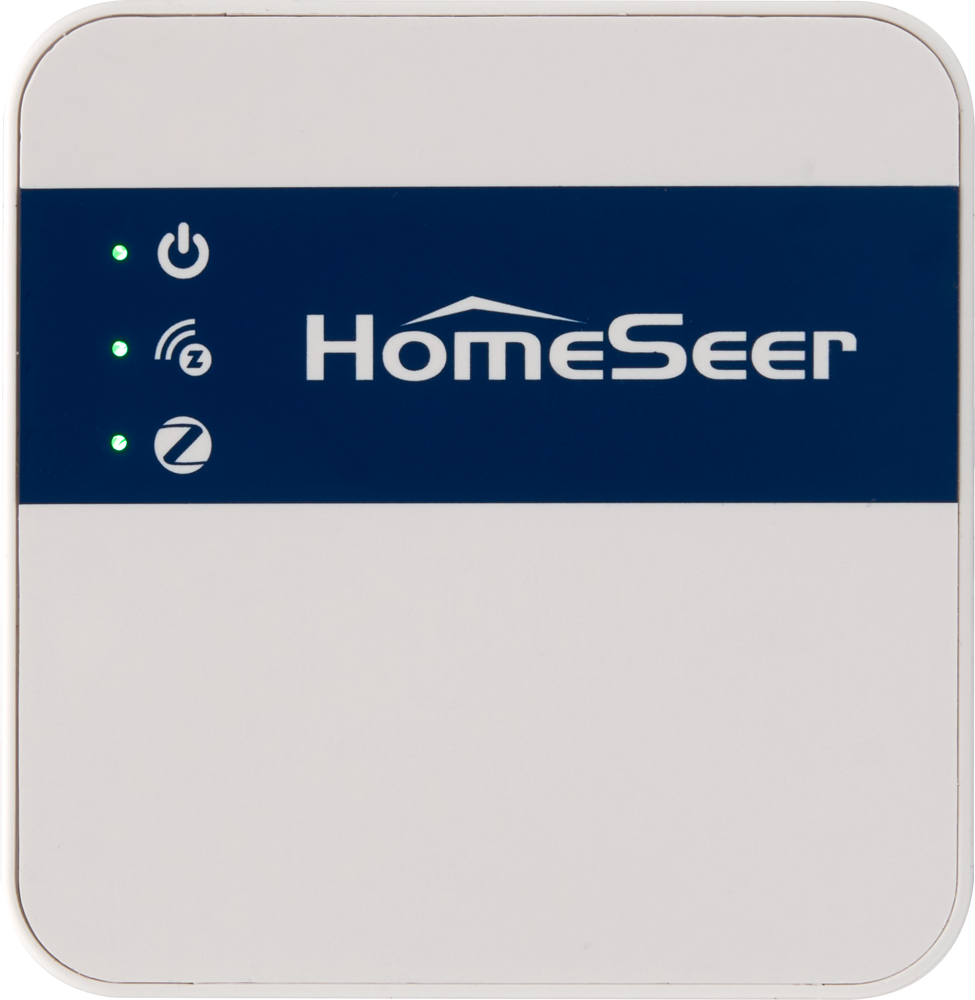
Z-NET PRO is a network-connected interface that’s designed to send and receive wireless commands to and from Z-Wave and Zigbee smart home devices. Unlike USB connected interfaces which must be directly connected to smart home hubs, Z-NET PRO may be positioned anywhere there’s a network connection (Ethernet or WiFi). This guide will go over the steps required for installation in HomeSeer and Home Assistant smart home platforms.
In The Box
Z-NET PRO interface
AC Power adapter and cable
Ethernet cable
Quick Start card
Hardware Features
Z-NET PRO is equipped with the following:
LED status indicators
Power: The top LED glows red for a few seconds when first plugged in, then changes to green to indicate the unit is operational. This LED will remain lit as long as the unit is operational.
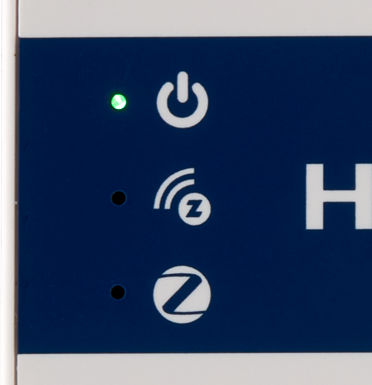
Z-Wave: The middle LED glows green when Z-Wave is correctly configured to work with your hub. Otherwise it is off.
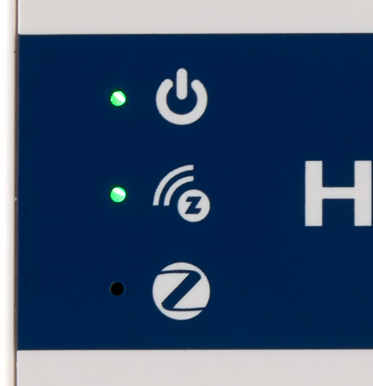
Zigbee: The bottom LED glows green when Zigbee is correctly configured to work with your hub. Otherwise it is off.
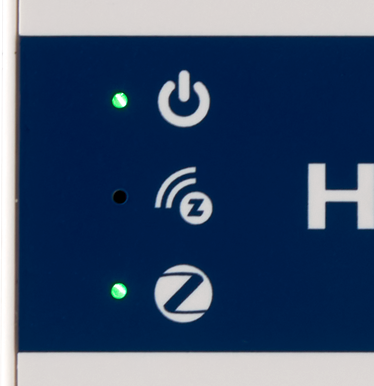
Ethernet port: Used to connect Z-NET PRO to your router or network switch.
USB-C port: Used to power the unit.
Push button: Use this to restart the unit or to perform a factory reset.
Press for 1-3 second to initiate a restart of the Z-NET PRO. The LEDs will turn off, then turn back on again starting with the power LED.
Press for 10 seconds to initiate a factory reset of the Z-NET PRO. The LEDS will blink rapidly. Release the button when the LEDs stop blinking.
This function resets the Z-NET PRO Name and WiFi settings. No other data is affected.
Initial Setup
Unpack the Z-NET PRO interface, Ethernet cable, AC power adapter and power cable.
Connect the supplied Ethernet cable from your router or network switch to the Ethernet port on the Z-NET PRO.
Connect one end of the supplied USB power cable to the Z-NET PRO and connect the other end to the AC power adapter.
Plug the AC power adapter into a 120v AC outlet. The top LED of the Z-NET PRO will glow red briefly and then glow green.
Open a web browser and navigate to find.homeseer.com to access the system finder. You should see Z-NET-PRO hyperlink displayed (as shown below). If you don’t see this, wait a minute and refresh your browser.
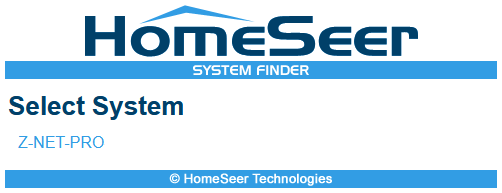
Click Z-NET PRO to access its settings page. Follow these steps to configure your unit:
System
This section includes a Name field, Z-Wave and Zigbee Port numbers, a link to all Z-NET PRO documentation and the version number of its firmware.
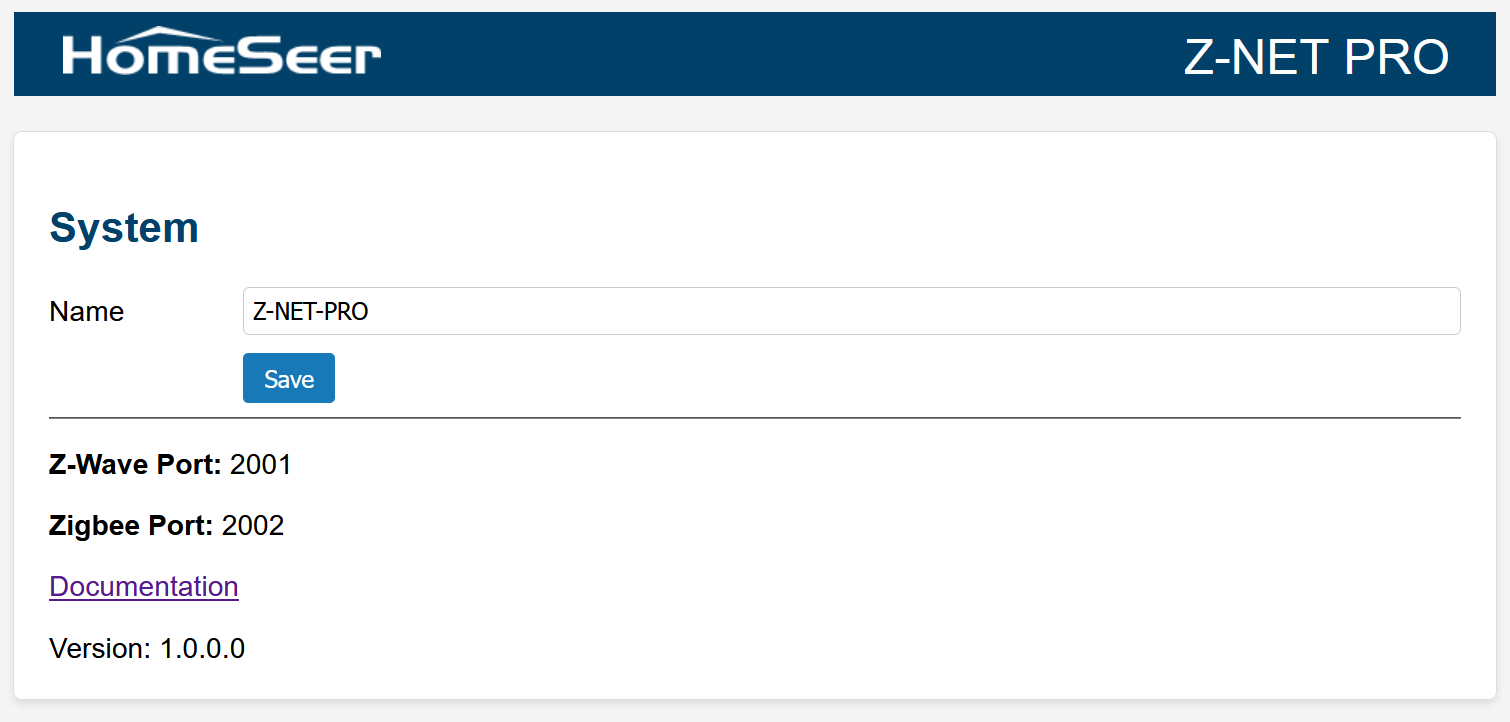
Name: The default name of the unit (Z-NET PRO) is displayed. This is the name that displays in the system finder. If you’re installing more than 1 unit, we recommend changing this name to avoid confusion. To do so, enter a new name and click the Save button. Your new name will display in the system finder in a few minutes.
Z-Wave Port: Use port 2001 when setting the network URL to connect to your smart home hub. Format: tcp://{IP Address}:{Port Number} | Example: tcp://192.168.1.25:2001
Zigbee Port: Use port 2002 when setting the network URL to connect to your smart home hub. Format: tcp://{IP Address}:{Port Number} | Example: tcp://192.168.1.25:2002
Ethernet or WiFi?
We recommend using a wired Ethernet connection for your Z-NET PRO for the most reliable operation. If you can do this, skip down to the Ethernet Status section to obtain IP address and MAC address required to connect to your unit and to create an address reservation in your router.
If it’s not possible to use Ethernet, you may connect to your Z-NET PRO using WiFi. Follow the next steps to set up your WiFi connection.
Select WIFI Network
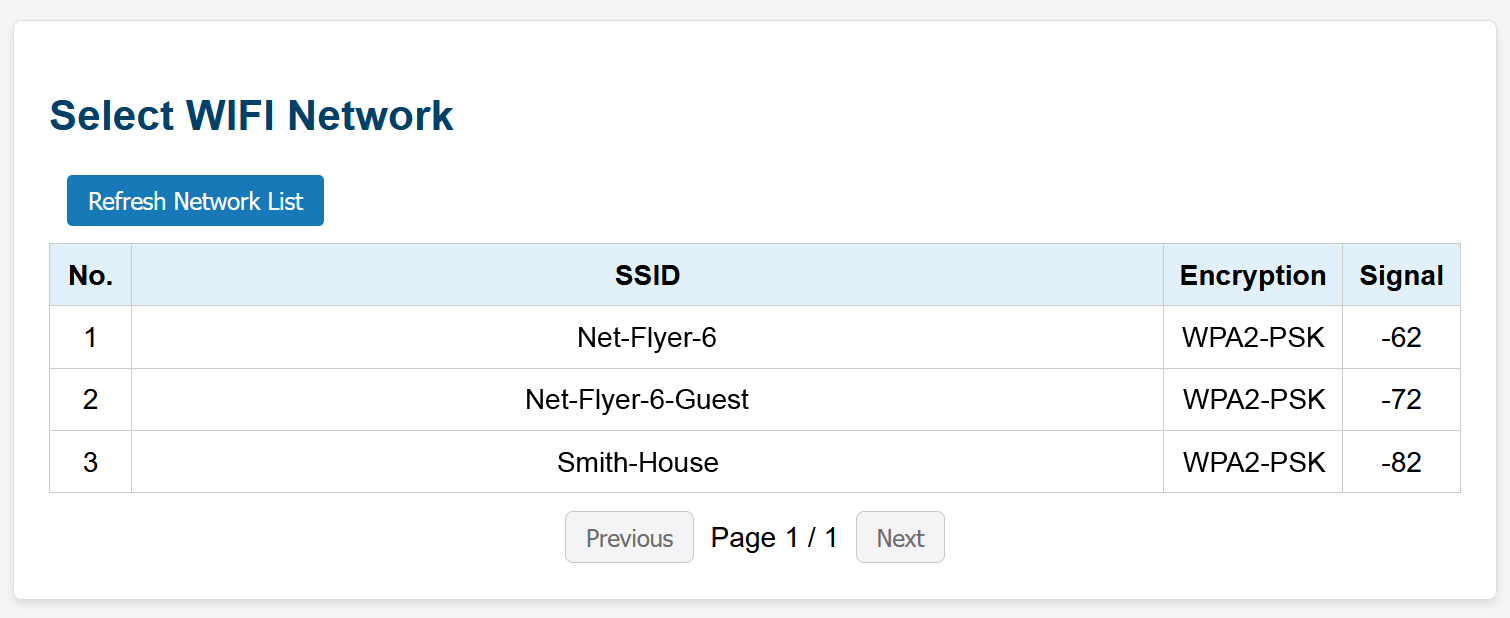
This section displays a list of available WiFi networks. If using WiFi, click the network you wish to use from this section and its attributes will be inserted in the Enter WIFI Configuration section below.
Enter WIFI Configuration
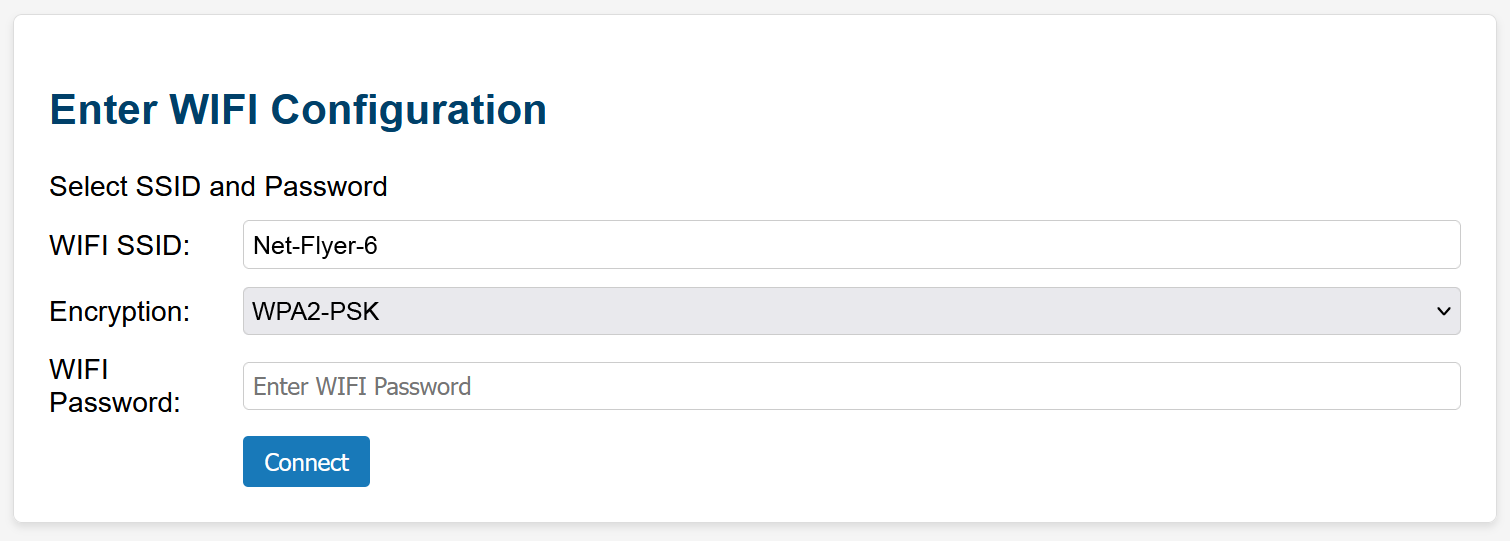
Enter the WIFI SSID, Encryption type and WIFI Password, then click the Connect button to connect the Z-NET PRO to your WiFi network.
WIFI Status
This section displays the connection status, IP Address and MAC Address for your WiFi connection. Use this information to connect to your Z-NET PRO and to create an address reservation in your router.
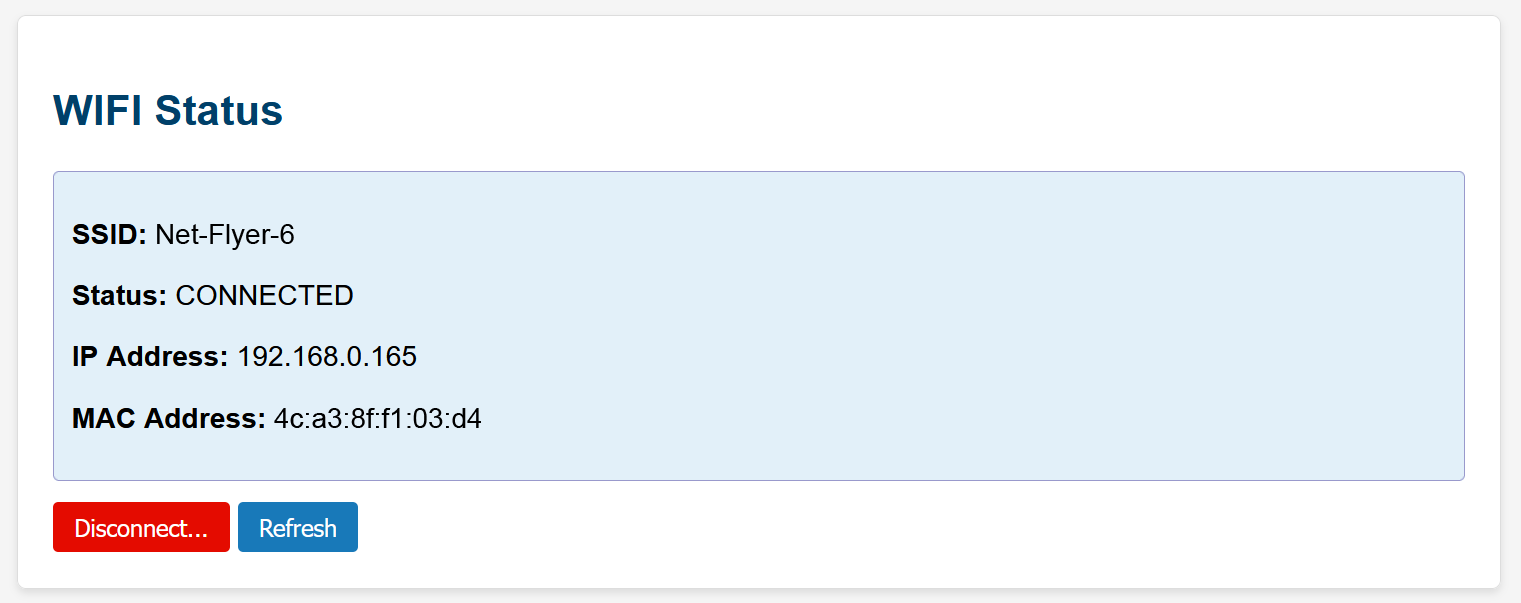
In the example above, you would use the following URLs to connect your hub to the Z-NET PRO
tcp://192.168.0.165:2001 (for Z-Wave)
tcp://192.168.0.165:2002 (for Zigbee)
Ethernet Status
This section displays the connection status, IP Address and MAC Address for your Ethernet connection. Use this information to connect to your Z-NET PRO and to create an address reservation in your router.

In the example above, you would use the following URLs to connect your hub to the Z-NET PRO
tcp://192.168.0.115:2001 (for Z-Wave)
tcp://192.168.0.115:2002 (for Zigbee)
Setting an Address Reservation
An address reservation is a router setting that ensures a specific device always gets the same IP address on your network. It's assigned based on the device's MAC address. Use the instructions in your router’s manual to set an address reservation for your Z-NET PRO. This will ensure the unit maintains a reliable connection with your hub.
Additional Features
The bottom of the settings page contains 2 buttons:

Reboot: Click this button to restart the Z-NET PRO.
Enable Zigbee Firmware Update: Click this button to initiate a firmware update of the built-in Zigbee interface. (instructions will be provided here when firmware updates become available)
Congratulations!
Now that your Z-NET PRO is connected to your local network, it’s time to integrate it with your hub. Refer to the docs linked below for specific instructions for HomeSeer and Home Assistant hubs.
HomeSeer
Z-Wave: Z-Wave Plus plugin setup
Zigbee: Zigbee Plus plugin setup
Home Assistant
Z-Wave & Zigbee: Z-NET PRO Integration with Home Assistant
