Use this guide to upgrade any HomeTroller Pi G3 to 800 series Z-Wave technology.
Overview
Users of previous model HomeTroller Pi G3 hubs now have two options to upgrade to the latest 800 series Z-Wave technology:
-
Option 1: Buy a new HomeTroller Pi G8 and then follow the HomeTroller Pi G8 Migration Guide. (the easy option)
-
Option 2: Upgrade your existing unit with the new 800 series kit and then follow the steps below (the less easy but more cost effective option)
In this guide, we’ll focus on option 2 with the steps required to upgrade your unit.
Note that “interface” and “controller” are interchangeable terms that refer to the Z-Wave module (“HAT”) that’s physically installed on the HomeTroller hub.
Preliminary Steps
Perform these steps first before proceeding with the migration. DO NOT SKIP THIS
-
Upgrade your HomeTroller Pi G3 to the latest Pi G8 image by following this guide: Upgrading HomeTroller Pi G3 Image
-
Update HS4 to v4.2.22.4 or later
-
Migrate from the legacy Z-Wave plugin to Z-Wave Plus using this guide: Migrating from Z-Wave to Z-Wave Plus
Steps
-
Back up your existing Z-Wave controller
-
Navigate to Plugins > Z-Wave Plus > Advanced Functions and select Backup Interface. Complete the steps and make a note of the backup file name.
-
-
Enable Z-Wave Plus to display the Z-Wave JS Front-End
-
If you don’t have access to the Z-Wave JS Front-End, navigate to Plugins > Z-Wave Plus > Manage Networks, scroll to the Z-Wave JS Network section and tick the box next to Show ZWave JS Front-End and click SAVE.
-
-
Determine the Z-Wave SDK of your existing Z-Wave controller
-
Navigate to Plugins > Z-Wave Plus > Z-Wave JS Front-End. The first device on the Control Panel page is your Z-Wave controller. This will be device ID 001 and the Z-Wave SDK will appear in the FW column. 👉 If the SDK version is lower than v6.61, follow the procedure in Converting Older Z-Wave Backups for Z-Wave Plus or Z-Wave JS Restore before advancing to the next step.
-
-
Install the new 800 series Z-Wave kit
-
Disconnect your HomeTroller from the power adapter and network cable (if using Ethernet)
-
Using a very small Phillips head screwdriver, remove the 4 bolts holding the enclosure together. One of these bolts is only threaded about 1/4” into the enclosure. This is normal.
-
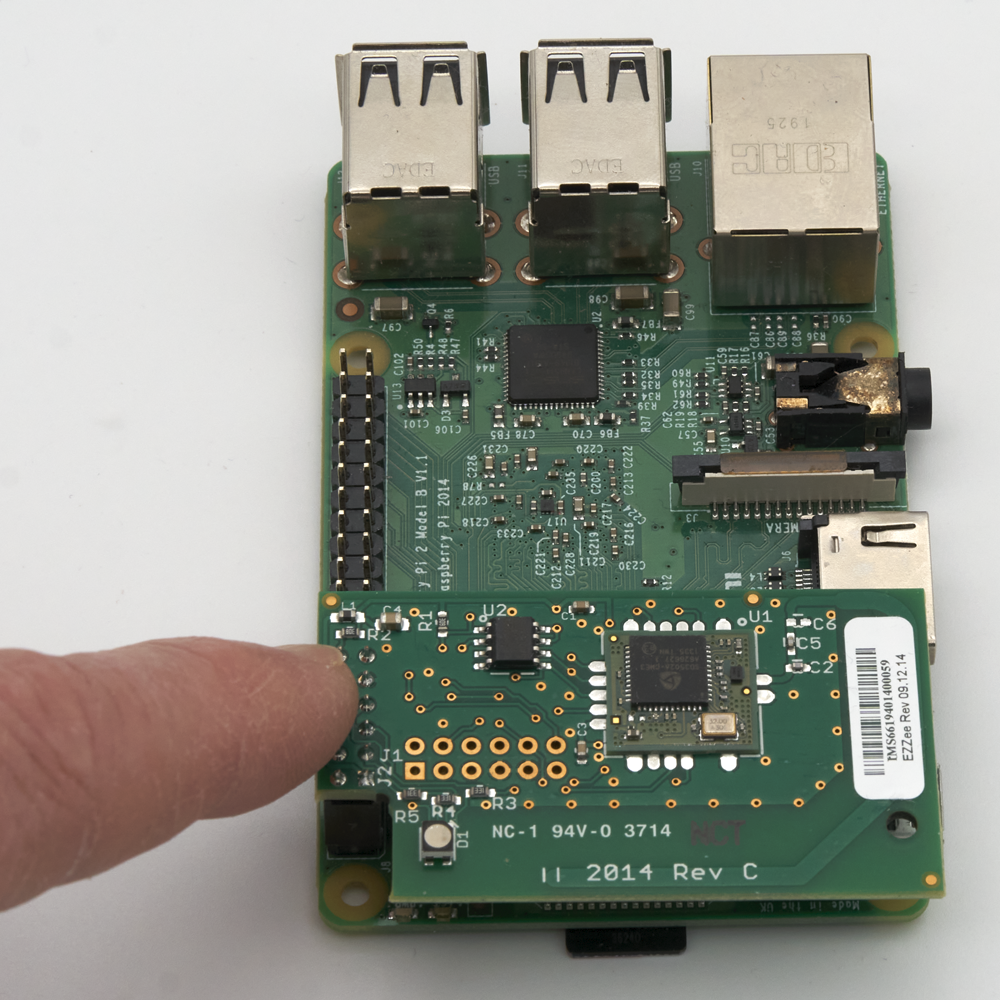
Open the enclosure and remove the main motherboard. Locate the existing Z-Wave module (aka “HAT”). It will be green colored with a press-fit connector attached to the GPIO pins on the left side of the mother board (as show below).
-
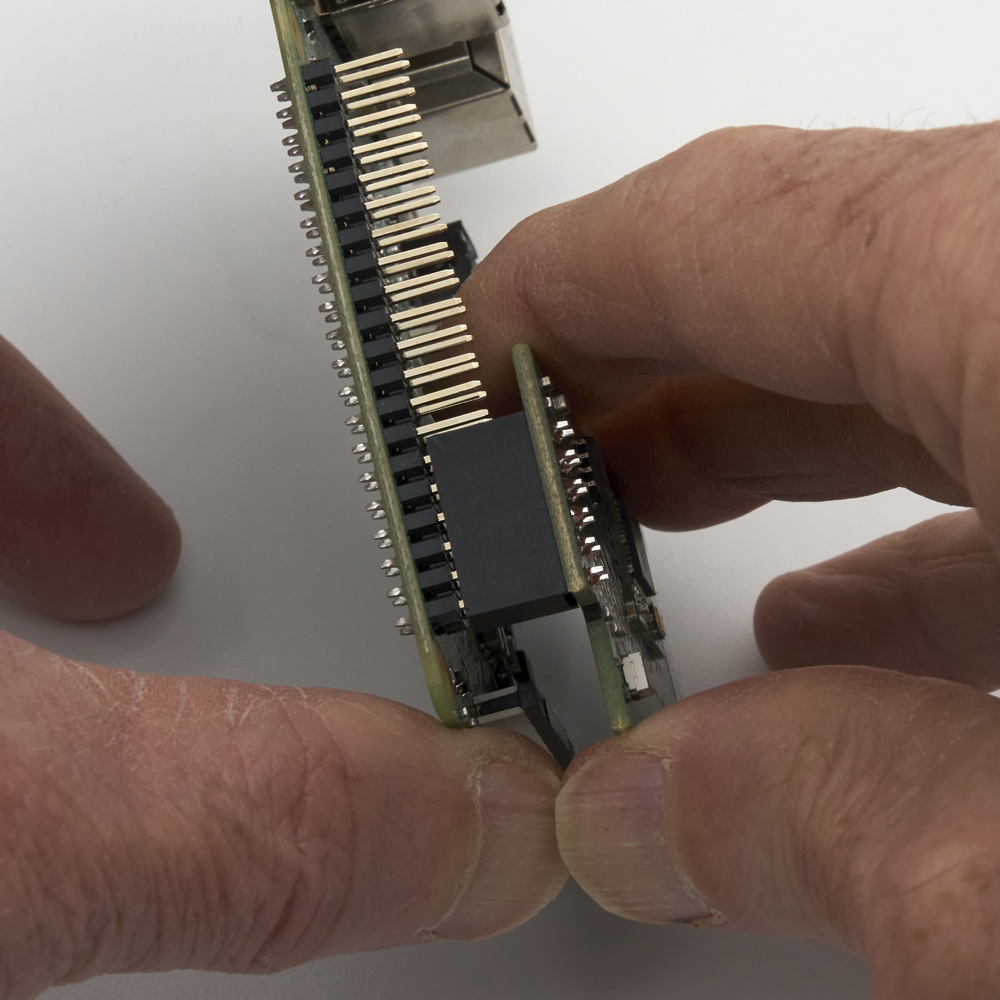
Grip the motherboard firmly and gently pull the HAT upward so that it comes off the pins. It may be necessary to rock it back and forth as you do this. Be careful not to bend the pins.

-
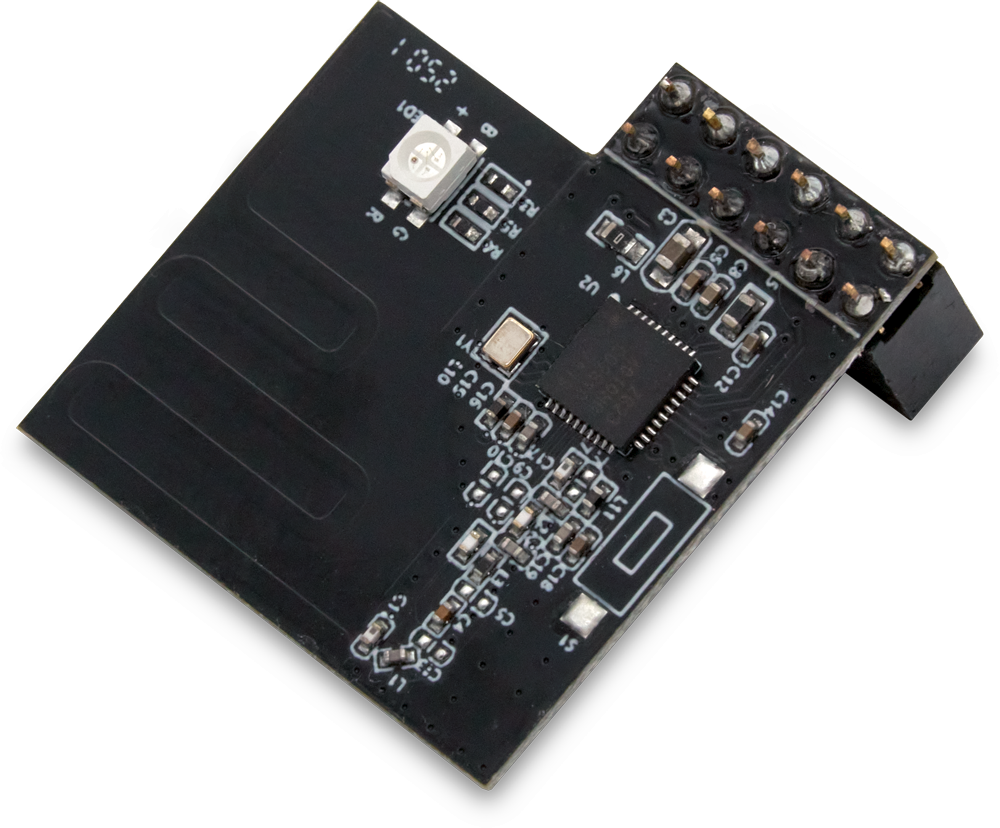
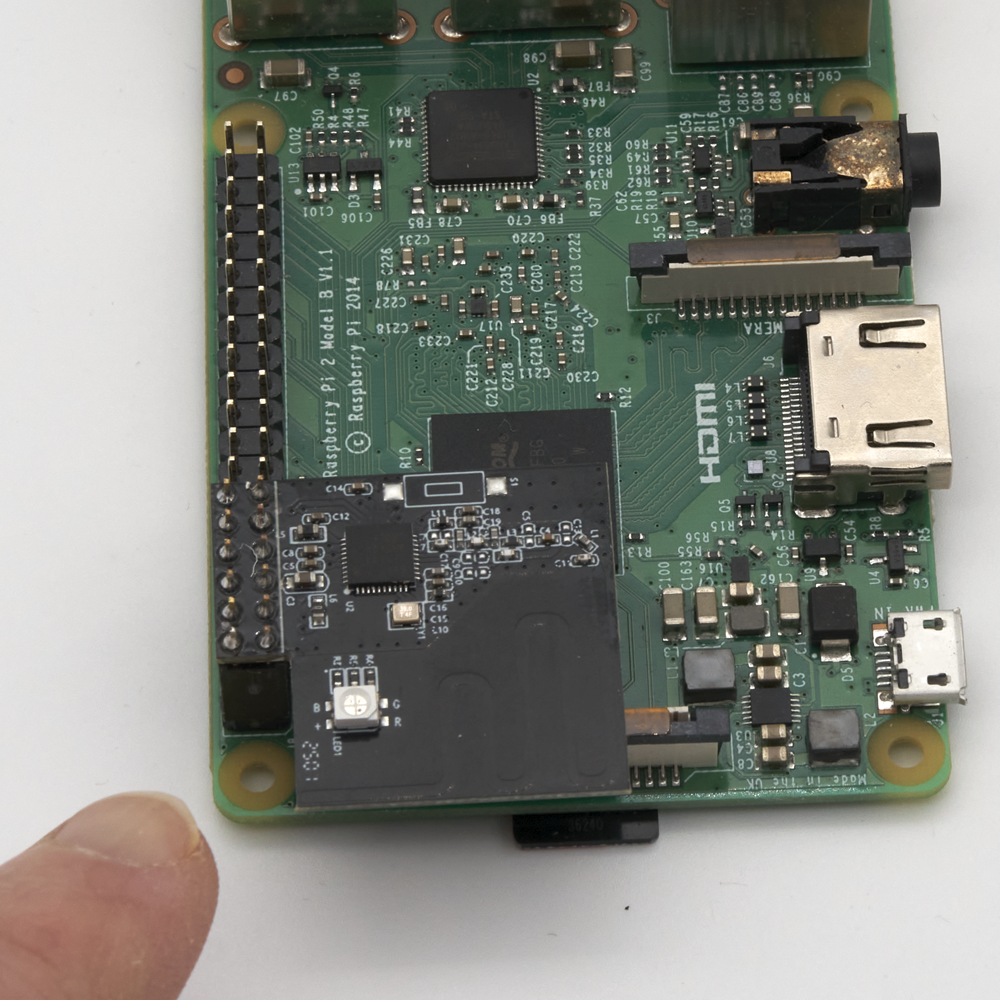
Now install the 800 series Z-Wave controller onto the same GPIO pins as the previous Z-Wave controller.
-
An optional spacer was added to the 800 upgrade kit in Nov 2025. If you have this spacer, refer to the 800 Upgrade Kit Spacer Installation guide for instructions.
-
-
Reassemble your HomeTroller
-
Install your upgraded hub back into the enclosure and gently screw it together.
-
-
Restore your Z-Wave network to the upgraded hub
-
Navigate to Plugins > Z-Wave Plus > Advanced Functions and select Restore Interface. Select the backup created in step 1 above or the converted backup file created in step 3 above and complete the steps.
-
Congratulations! Your new hub should be fully operational and your Z-Wave devices should now works as expected.