Z-NET G3 Quick Start Guide
Z-NET G3 is a network Z-Wave interface that’s designed to send and receive wireless Z-Wave commands to and from compatible smart home products in the home
Attention Home Assistant users: Check out Z-NET Integration with Home Assistant for instructions on using Z-NET with HA
HomeSeer Requirements
HS4 Version: 4.0.3.0 or later | Z-Wave version: 3.0.3.3 or later
Initial Setup
- Unpack the Z-NET, AC power supply and Ethernet cable. Connect the cable to the unit and attach the other end to your router or network switch.
- Connect the AC power supply to the unit and plug it in. The unit will power on by itself and the LED on the top of the unit will blink red for approximately 20 seconds and then glow red once the unit has finished booting.
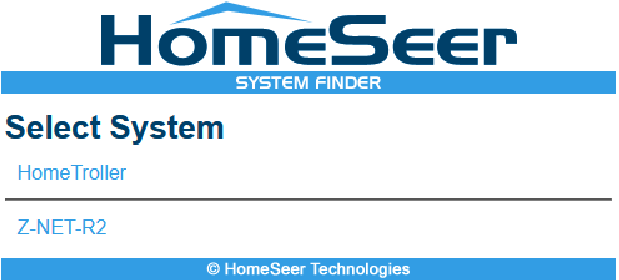
- Navigate to find.homeseer.com to access the system finder. You should see two links displayed, one for your HomeTroller hub (or HS4 system) and one for your Z-NET. If you don’t see the Z-NET link, wait for a few minutes and refresh your browser.
WiFi Setup (optional)
A wired Ethernet connection is recommended as wired connections tend to be more reliable. However, Z-NET may also be configured to work over WiFi if necessary. To enable WiFi, follow the steps below.
- With the Z-NET connected to your router (as described in the Initial Setup section above), navigate to find.homeseer.com to access the system finder. You should see two links displayed, one for your HomeTroller hub (or HS4 system) and one for your Z-NET. Click the link for your Z-NET (Z-NET-R2 in the example below).
- The Z-NET Configuration screen will now appear. Enter your WiFi SSID, Password, Security type and Encryption type into the Wireless section of the screen.
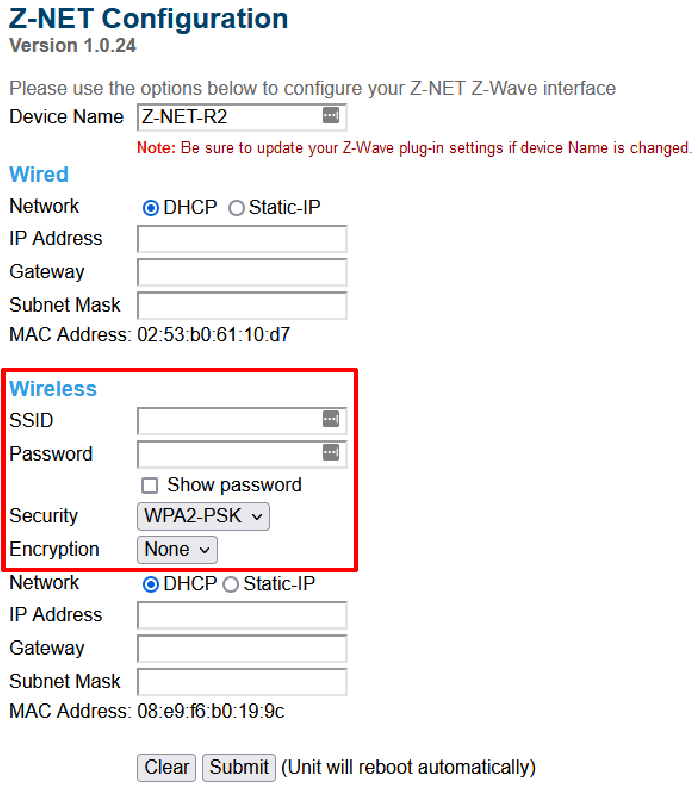
- Click the Submit button. The unit will reboot automatically and will then connect to your WiFi network.
Z-Wave Setup
HomeSeer's Z-Wave plugin is able to manage multiple Z-Wave networks using multiple Z-NETs.
- Using find.homeseer.com, click the HomeTroller (or HS4) link to access the web interface of your HomeSeer system.
- Navigate to Plugins > Z-Wave > Add Interface to access the stepper for adding the Z-Net to your system.
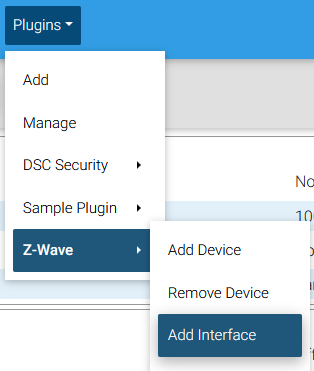
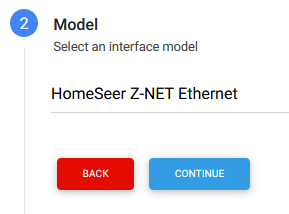
Create a Name for your Z-NET, Select HomeSeer Z-NET Ethernet as the Model, and configure the interface by selecting Auto*, then Add. The Z-NET will then be added to your system.
Name your Z-NET Select Model Configure 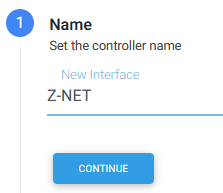
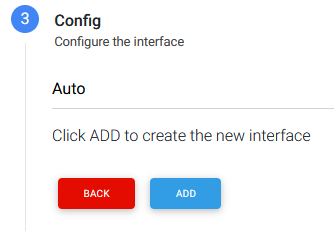
*Note: If multiple Z-NETs are to be installed, do not select Auto. Instead, choose the specific Z-NET from the dropdown list.
Upgrading From Another Z-Wave Interface
In some cases, HomeSeer system users may be able to upgrade from another interface to Z-NET G3 using the Z-Wave backup and restore processes.
Zigbee Setup
In 2023, Zigbee support was added to Z-NET using a Sonoff ZBDongle-E Zigbee adapter. Follow the steps below to add Zigbee capability to your Z-NET.
- Update your Z-NET to v1.0.25 (or later) using the procedure here: Updating the Z-NET
- Attach a Sonoff ZBDongle-E Zigbee adapter to a USB port on your Z-NET
- Using find.homeseer.com, click the HomeTroller (or HS4) link to access the web interface of your HomeSeer system.
- Navigate to Plugins > Add, search for Zigbee Plus and install that plugin
- Refer to Setting Up the Zigbee Plus Plugin to complete the Zigbee setup process
Limited Warranty
HomeSeer Technologies, LLC will repair or replace, at its option, any part of the device, which proves to be defective in workmanship or material under normal use, in the USA except in the states of Alaska or Hawaii, for a period of one year from the date the device is purchased. During the warranty period, HomeSeer Technologies, LLC will repair and provide all parts necessary to correct such defects, free of charge, provided the device has been operated in accordance with the manufacturer's guidelines. The Customer will return the device to HomeSeer Technologies, LLC for testing and repair or replacement. Should you need service, during warranty period or beyond, contact HomeSeer to obtain return authorization before shipping your device to HomeSeer Technologies, LLC.
FCC Statement
THE MANUFACTURER IS NOT RESPONSIBLE FOR ANY RADIO OR TV INTERFERENCE CAUSED BY UNAUTHORIZED MODIFICATIONS TO THIS EQUIPMENT. SUCH MODIFICATIONS COULD VOID THE USER’S AUTHORITY TO OPERATE THE EQUIPMENT. STORE INDOORS WHEN NOT IN USE. SUITABLE
FOR DRY LOCATIONS ONLY. DO NOT IMMERSE IN WATER. NOT FOR USE WHERE DIRECTLY EXPOSED TO WATER.
This device complies with Part 15 of the FCC Rules. Operation is subject to the following conditions:
- This device may not cause harmful interference,
- This device must accept any interference received, including interference that may cause undesired operation.
This equipment has been tested and found to comply with the limits for a Class B digital device, pursuant to part 15 of the FCC Rules. These limits are designed to provide reasonable protection against harmful interference in a residential installation. This equipment generates, uses and can radiate radio frequency energy and, if not installed and used according to instructions, may cause harmful interference to radio communications. However, there is no guarantee that interference will not occur in any given installation.