This doc outlines the procedure required to install a SmartStick wall mount bracket.
Overview
These wall mount brackets address a common challenge: achieving optimal wireless performance from USB-based radio sticks when connected directly to hubs or placed at desk level. By enabling elevated, vertical placement away from hub electronics, these wall mount brackets improve signal propagation, reduce interference, and deliver a cleaner, more professional installation.
Tool required
-
Philips screwdriver
-
Drill w/3/16” bit
-
Hammer
Also Required (not included)
-
HomeSeer SmartStick G3, G8 or ZB from HomeSeer store
-
USB-A extension cable from Amazon
Steps
As you’ll be drilling into the wall, be sure to avoid areas where electrical wiring or plumbing/water pipes are likely to be.
-
Choose a wall location that’s near (preferably above) your smart home hub and drill a hole using a 3/16” bit.
-
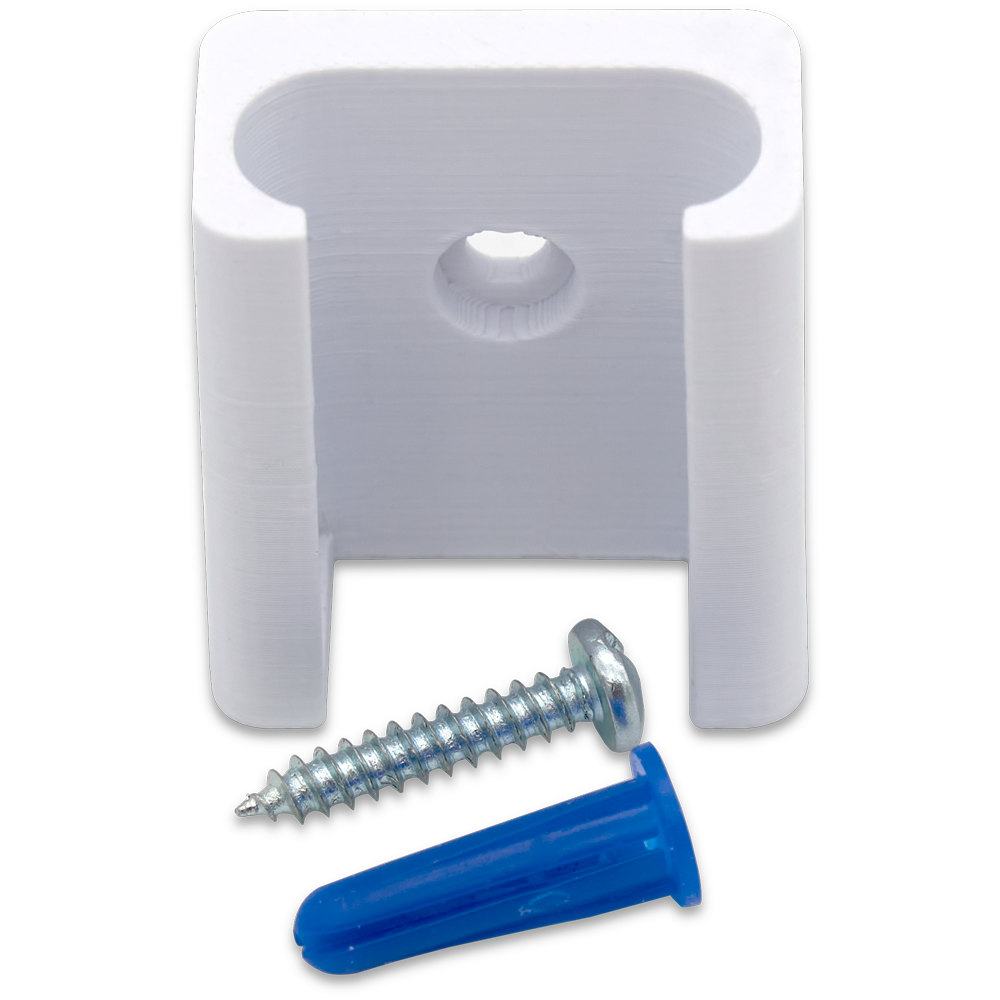
Insert the provided drywall anchor into the hole and gently tap it flush with the wall.
-
Use the provided screw to secure the wall mount bracket to the wall.
-
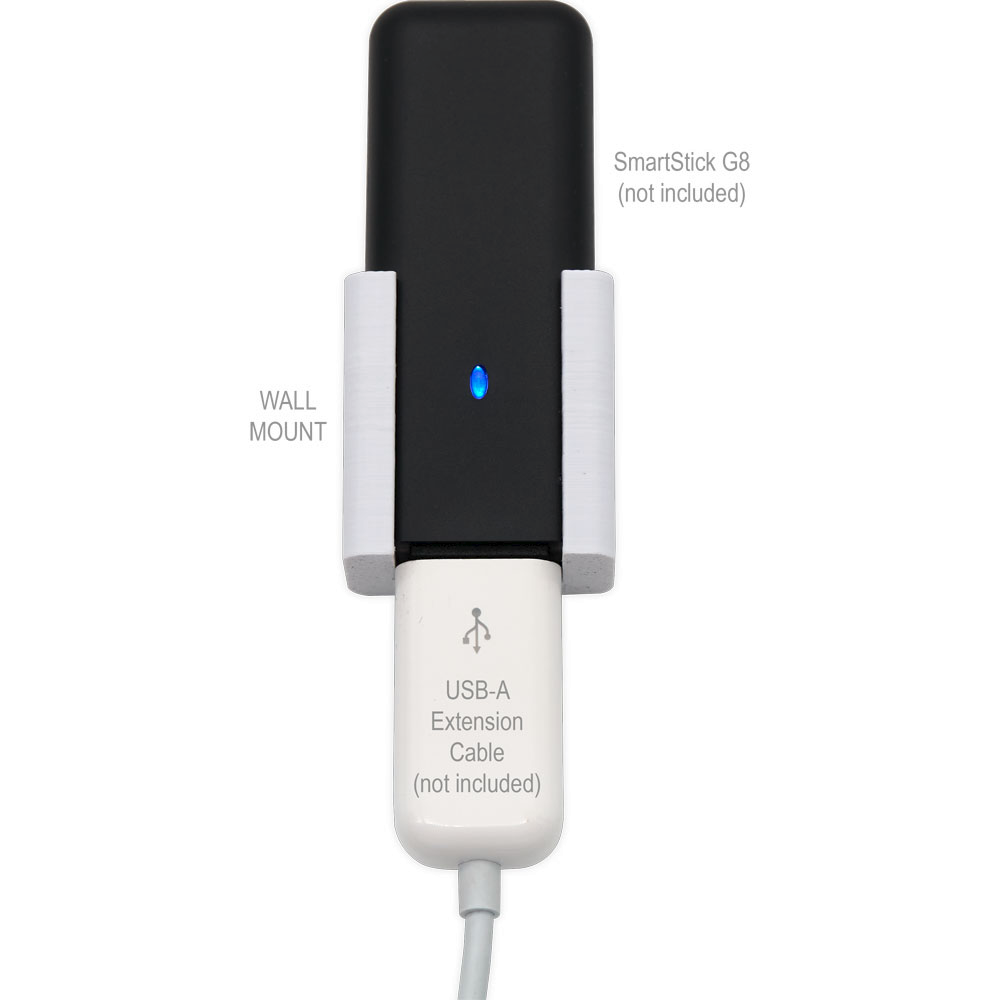
Attach the USB-A extension cable to the SmartStick and connect the other end to your smart home hub.