This doc outlines the procedure required to install a Z-NET PRO wall mount bracket.
Overview
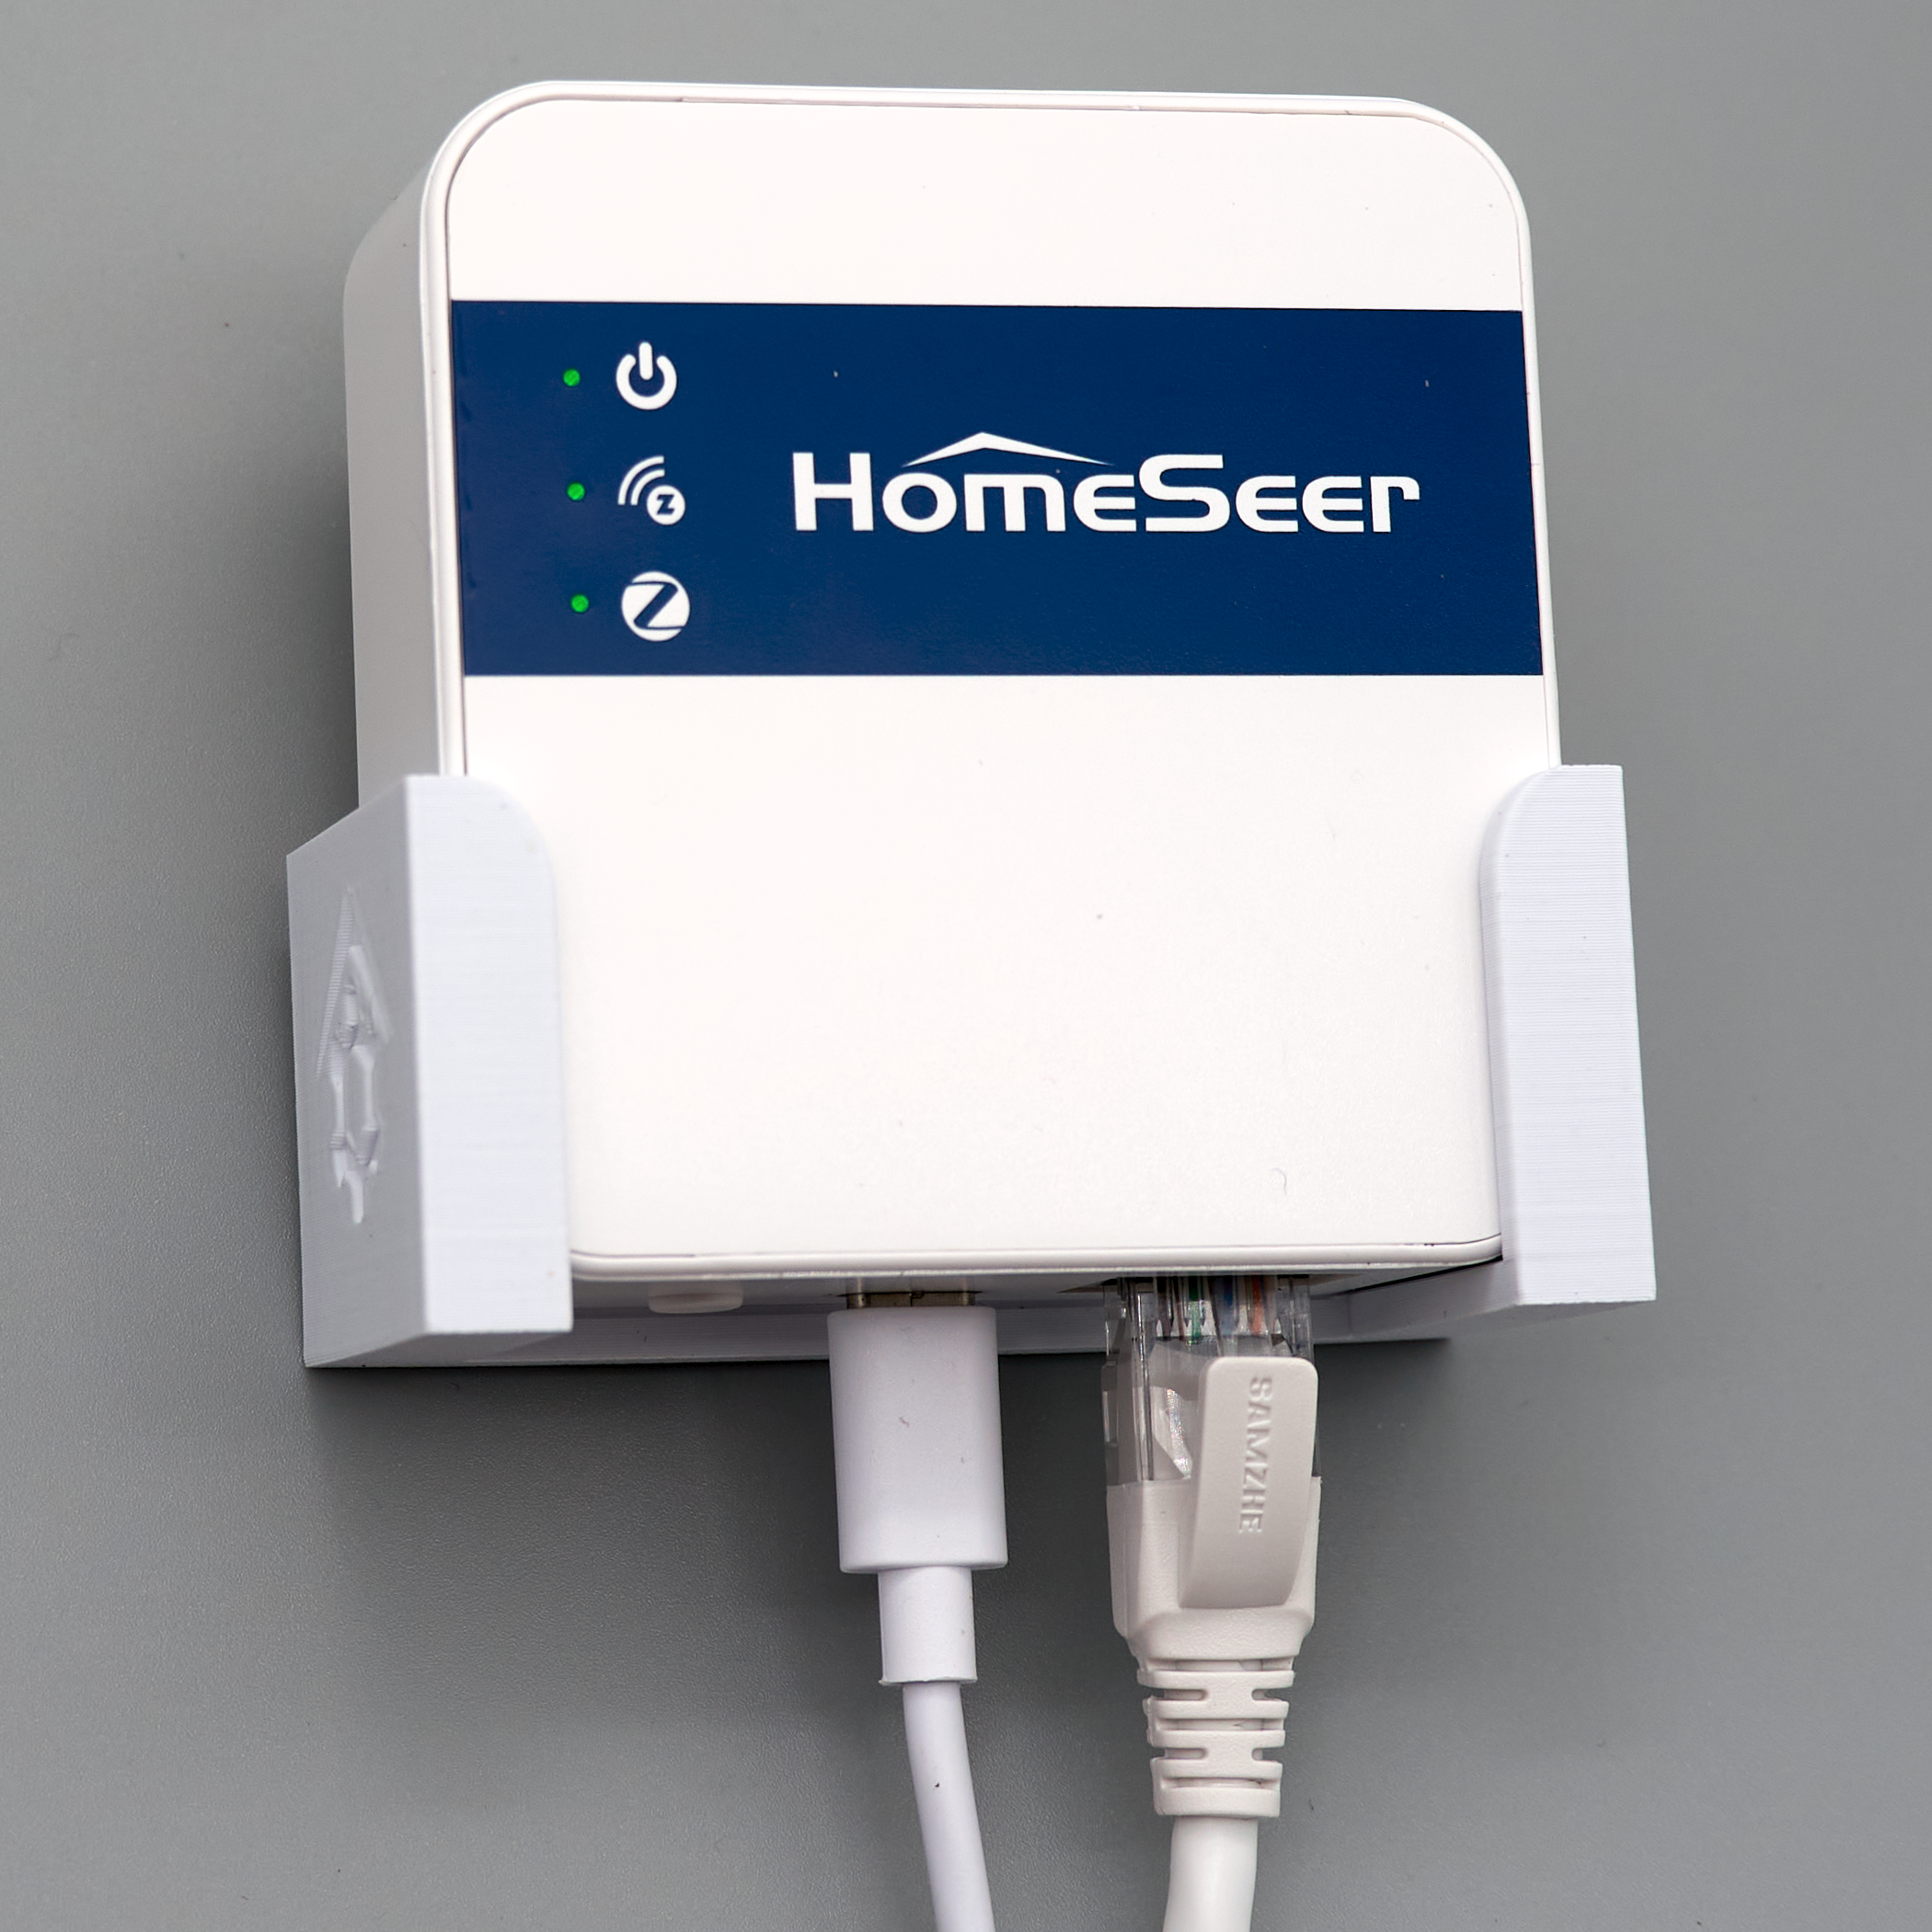
These wall mount brackets address a common challenge: achieving optimal wireless performance from interfaces placed near hubs or at desk level. By elevating placement away from hub electronics, these wall mount brackets improve signal propagation, reduce interference, and deliver a cleaner, more professional installation.
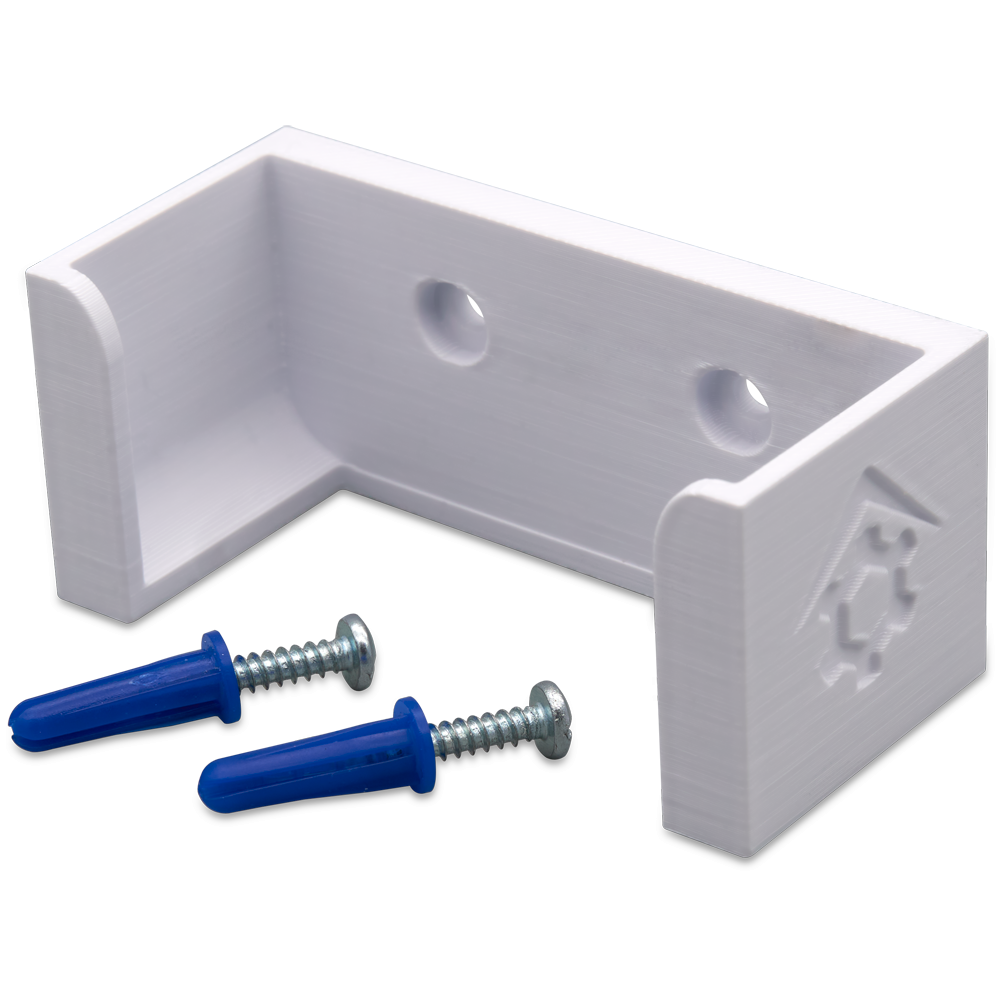
Tool required
-
Philips screwdriver
-
Drill w/3/16” bit
-
Hammer
Also Required (not included)
-
HomeSeer Z-NET PRO from HomeSeer store
Steps
As you’ll be drilling into the wall, be sure to avoid areas where electrical wiring or plumbing/water pipes are likely to be.
-
Choose a wall location near a wall outlet that’s centrally located (relative to your Z-Wave and Zigbee devices) and reachable by your home network (Ethernet or WiFi).
-
Position the bracket on the wall and use a pencil to mark the screw holes on the wall.
-
Drill two 3/16” holes in the wall where the marks are.
-
Insert the provided drywall anchors into the holes and gently tap them flush with the wall.
-
Use the provided screws to secure the wall mount bracket to the wall.
-
Slide your Z-NET PRO into the bracket and connect power and Ethernet cables to it.