Use this guide to access and edit Z-NET PRO settings
Accessing Z-NET PRO Settings
-
On any computer/phone on the same network, open a browser and go to:
http://find.homeseer.com -
You should see a link for the Z-NET PRO. Click it to open the settings page. The page will include the following sections:
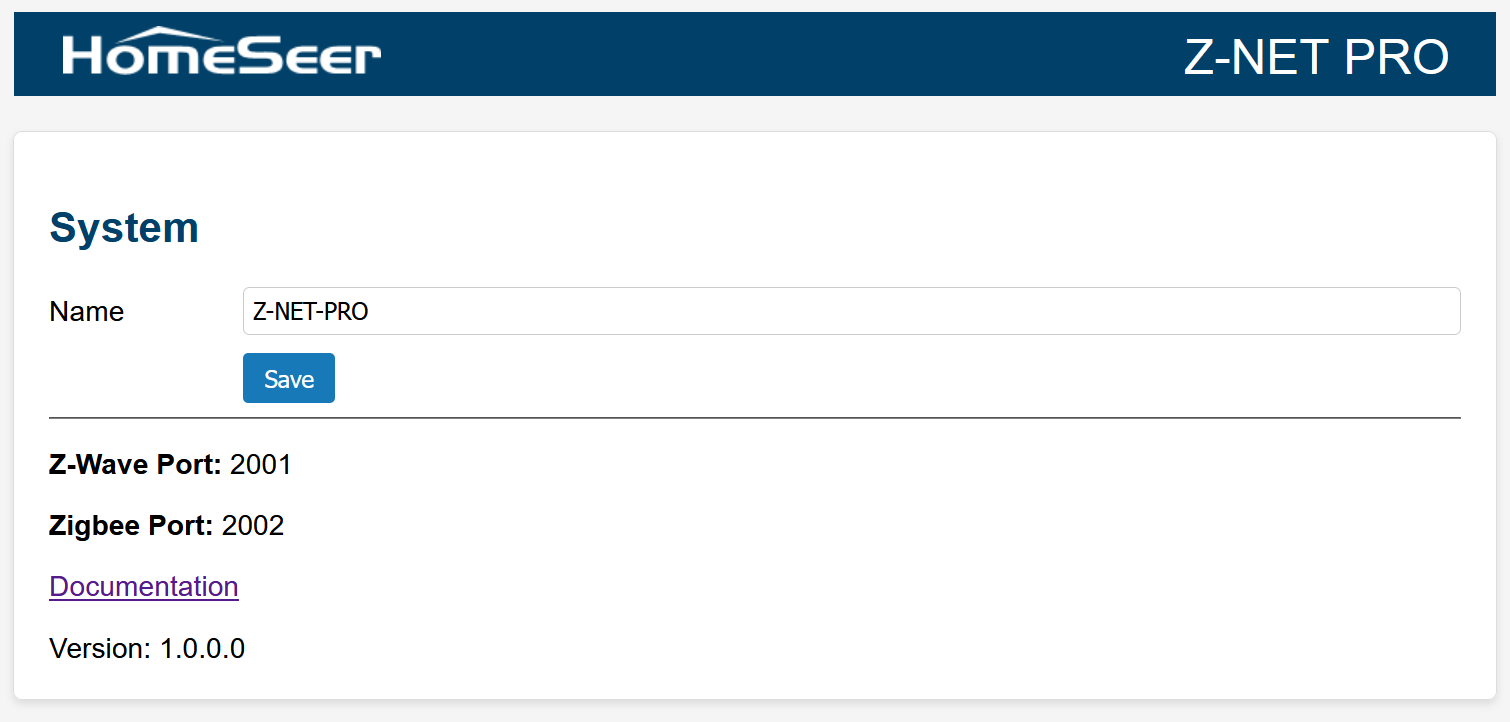
System
This section includes a Name field, Z-Wave and Zigbee Port numbers, a link to all Z-NET PRO documentation and the version number of its firmware.
-
Name: The default name of the unit (Z-NET PRO) is displayed. This is the name that displays in the system finder. If you’re installing more than 1 unit, we recommend changing this name to avoid confusion. To do so, enter a new name and click the Save button. Your new name will display in the system finder in a few minutes.
-
Z-Wave Port: Use port 2001 when setting the network URL to connect to your smart home hub. Format: tcp://{IP Address}:{Port Number} | Example: tcp://192.168.1.25:2001
-
Zigbee Port: Use port 2002 when setting the network URL to connect to your smart home hub. Format: tcp://{IP Address}:{Port Number} | Example: tcp://192.168.1.25:2002
Ethernet or WiFi?
We recommend using a wired Ethernet connection for your Z-NET PRO for the most reliable operation. If you can do this, skip down to the Ethernet Status section to obtain IP address and MAC address required to connect to your unit and to create an address reservation in your router.
If it’s not possible to use Ethernet, you may connect to your Z-NET PRO using WiFi. Follow the next steps to set up your WiFi connection.
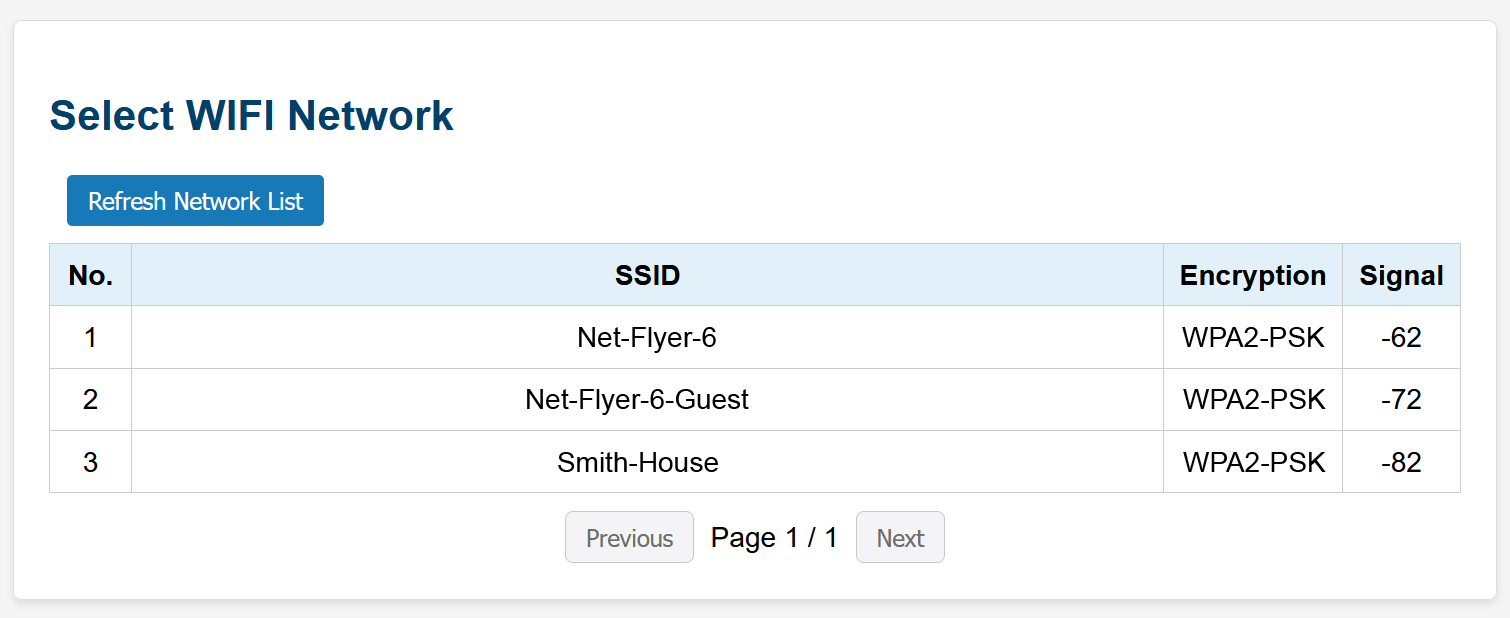
Select WIFI Network
This section displays a list of available WiFi networks. If using WiFi, click the network you wish to use from this section and its attributes will be inserted in the Enter WIFI Configuration section below.
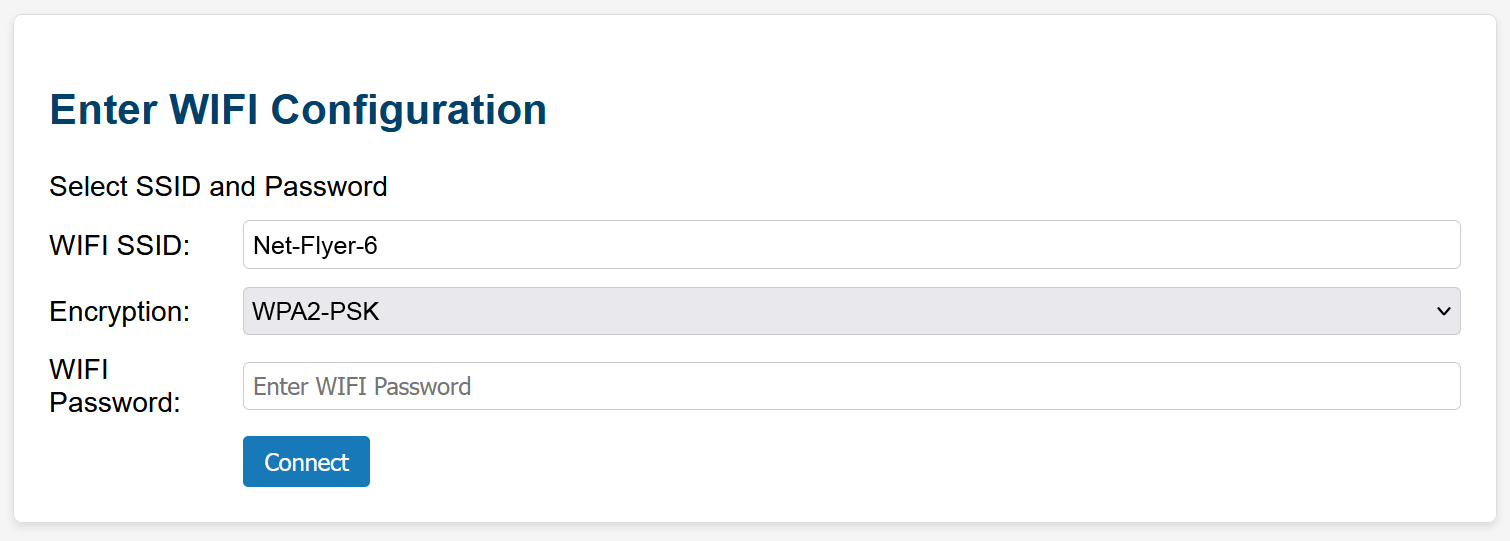
Enter WIFI Configuration
Enter the WIFI SSID, Encryption type and WIFI Password, then click the Connect button to connect the Z-NET PRO to your WiFi network.
WIFI Status
This section displays the connection status, IP Address and MAC Address for your WiFi connection. Use this information to connect to your Z-NET PRO and to create an address reservation in your router.
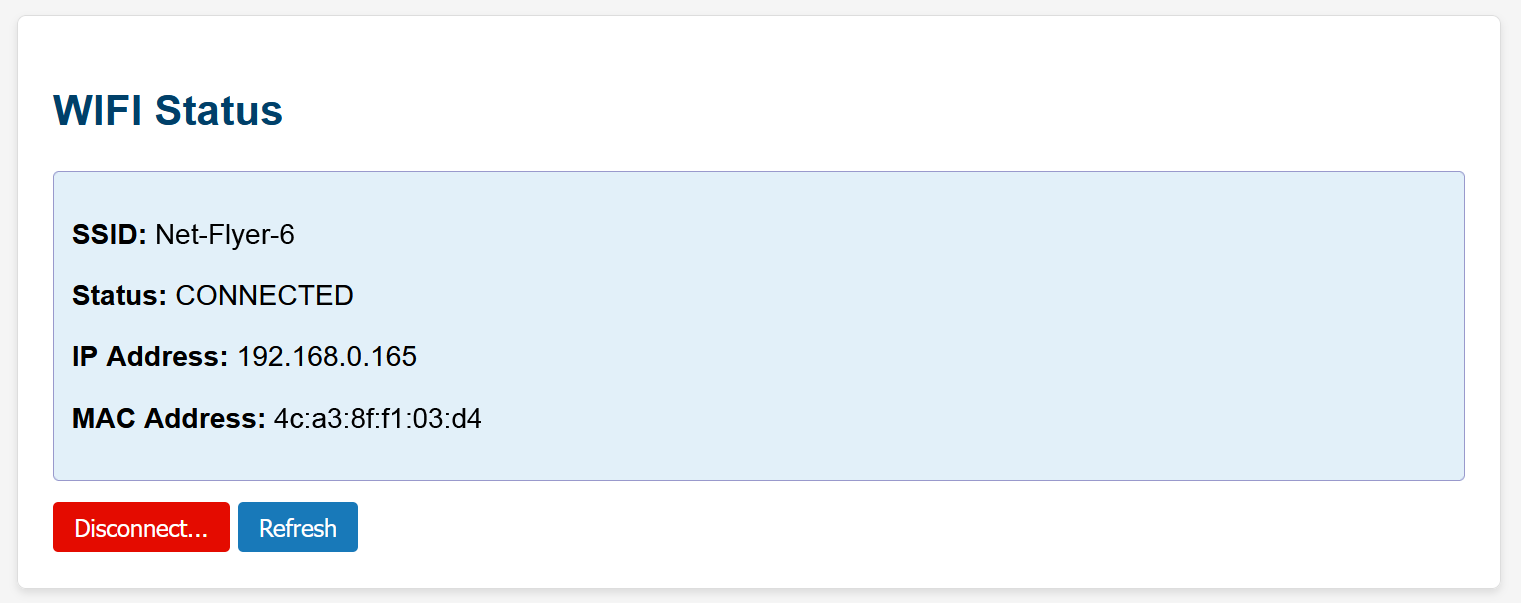
In the example above, you would use the following URLs to connect your hub to the Z-NET PRO
-
tcp://192.168.0.165:2001 (for Z-Wave)
-
tcp://192.168.0.165:2002 (for Zigbee)
Ethernet Status
This section displays the connection status, IP Address and MAC Address for your Ethernet connection. Use this information to connect to your Z-NET PRO and to create an address reservation in your router.
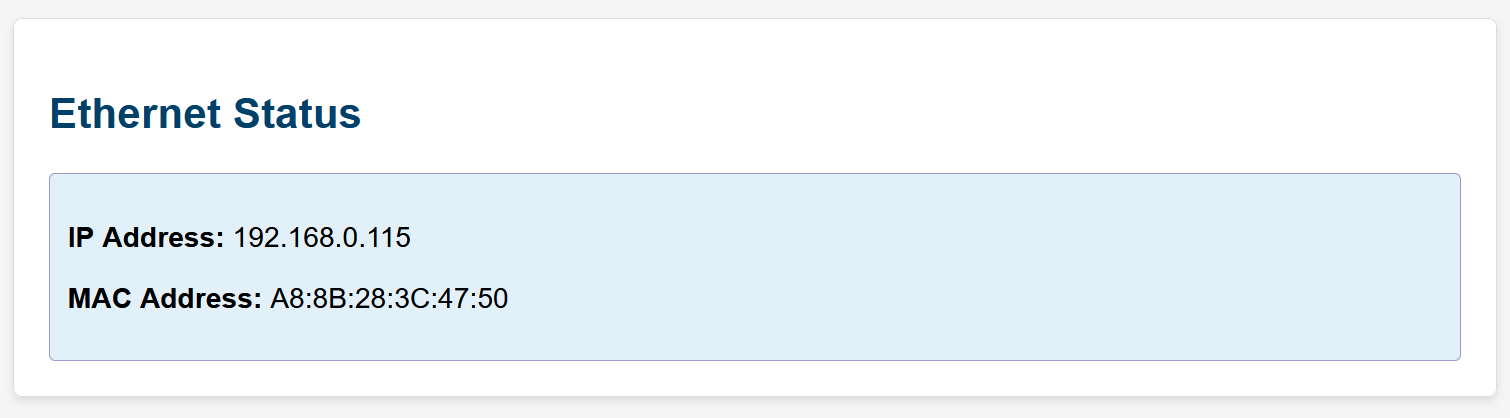
In the example above, you would use the following URLs to connect your hub to the Z-NET PRO
-
tcp://192.168.0.115:2001 (for Z-Wave)
-
tcp://192.168.0.115:2002 (for Zigbee)
Setting an Address Reservation
An address reservation is a router setting that ensures a specific device always gets the same IP address on your network. It's assigned based on the device's MAC address. Use the instructions in your router’s manual to set an address reservation for your Z-NET PRO. This will ensure the unit maintains a reliable connection with your hub.
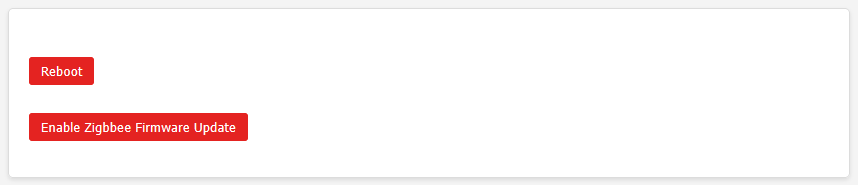
Additional Features
The bottom of the settings page contains 2 buttons:
-
Reboot: Click this button to restart the Z-NET PRO.
-
Enable Zigbee Firmware Update: Click this button to initiate a firmware update of the built-in Zigbee interface. (instructions will be provided here when firmware updates become available)